This project (blind and valance) is so simple and inexpensive. It probably took a total of 3 hours and approximately $55 total.
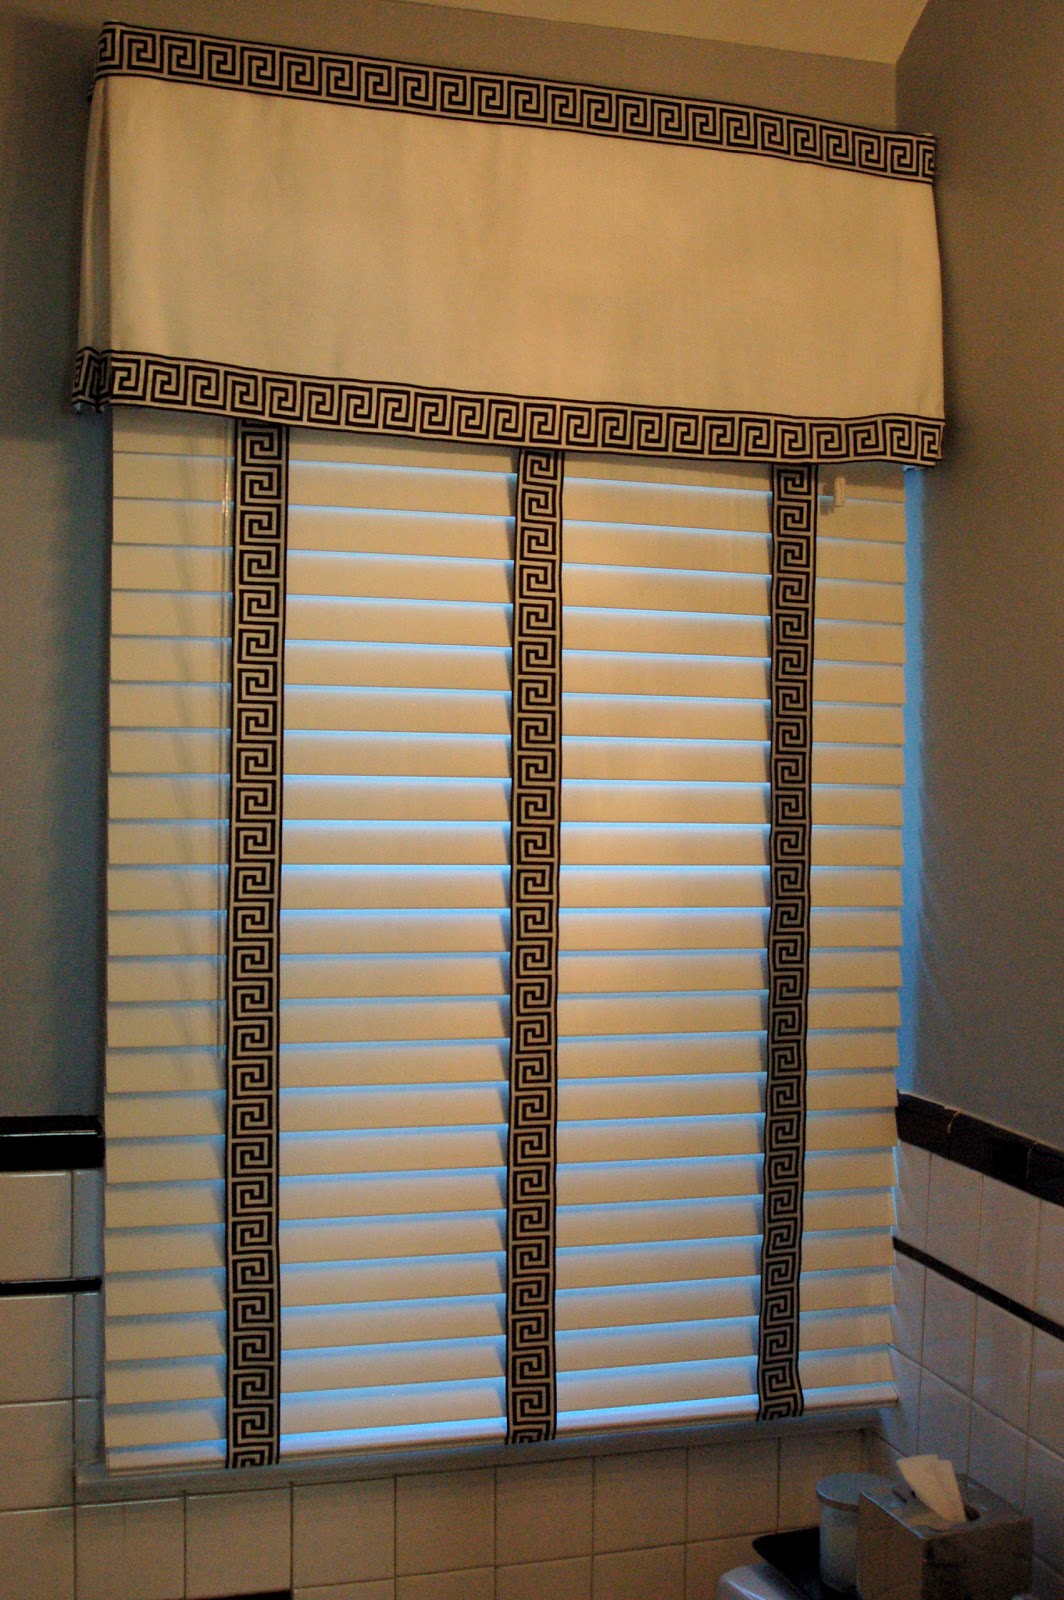
Today, I'll explain how to add ladder trim detail to basic blinds.
Materials:
- Wood or faux wood blinds (I use 2" faux wood blinds from JC Penney) and tools needed for installation (drill/screwdriver/pencil/level).
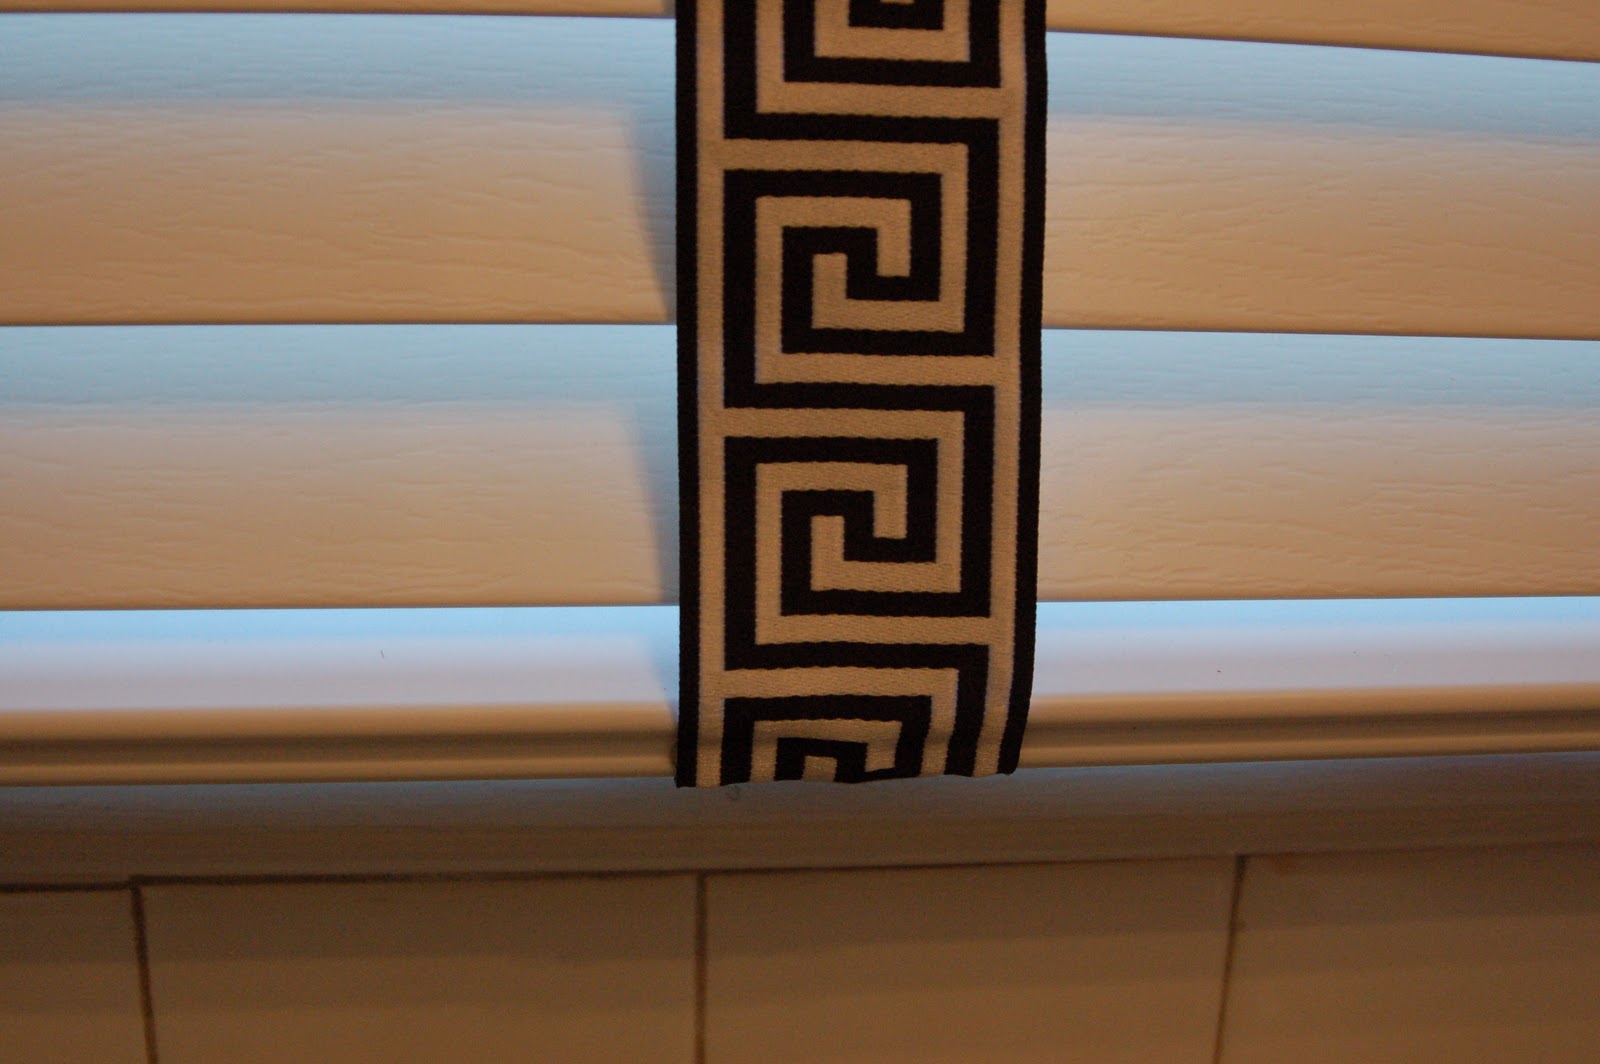
- Ribbon or jacquard trim (I found this greek key trim on ebay - I think it was about $20 for 10 yards).
- Hot glue gun and glue sticks.
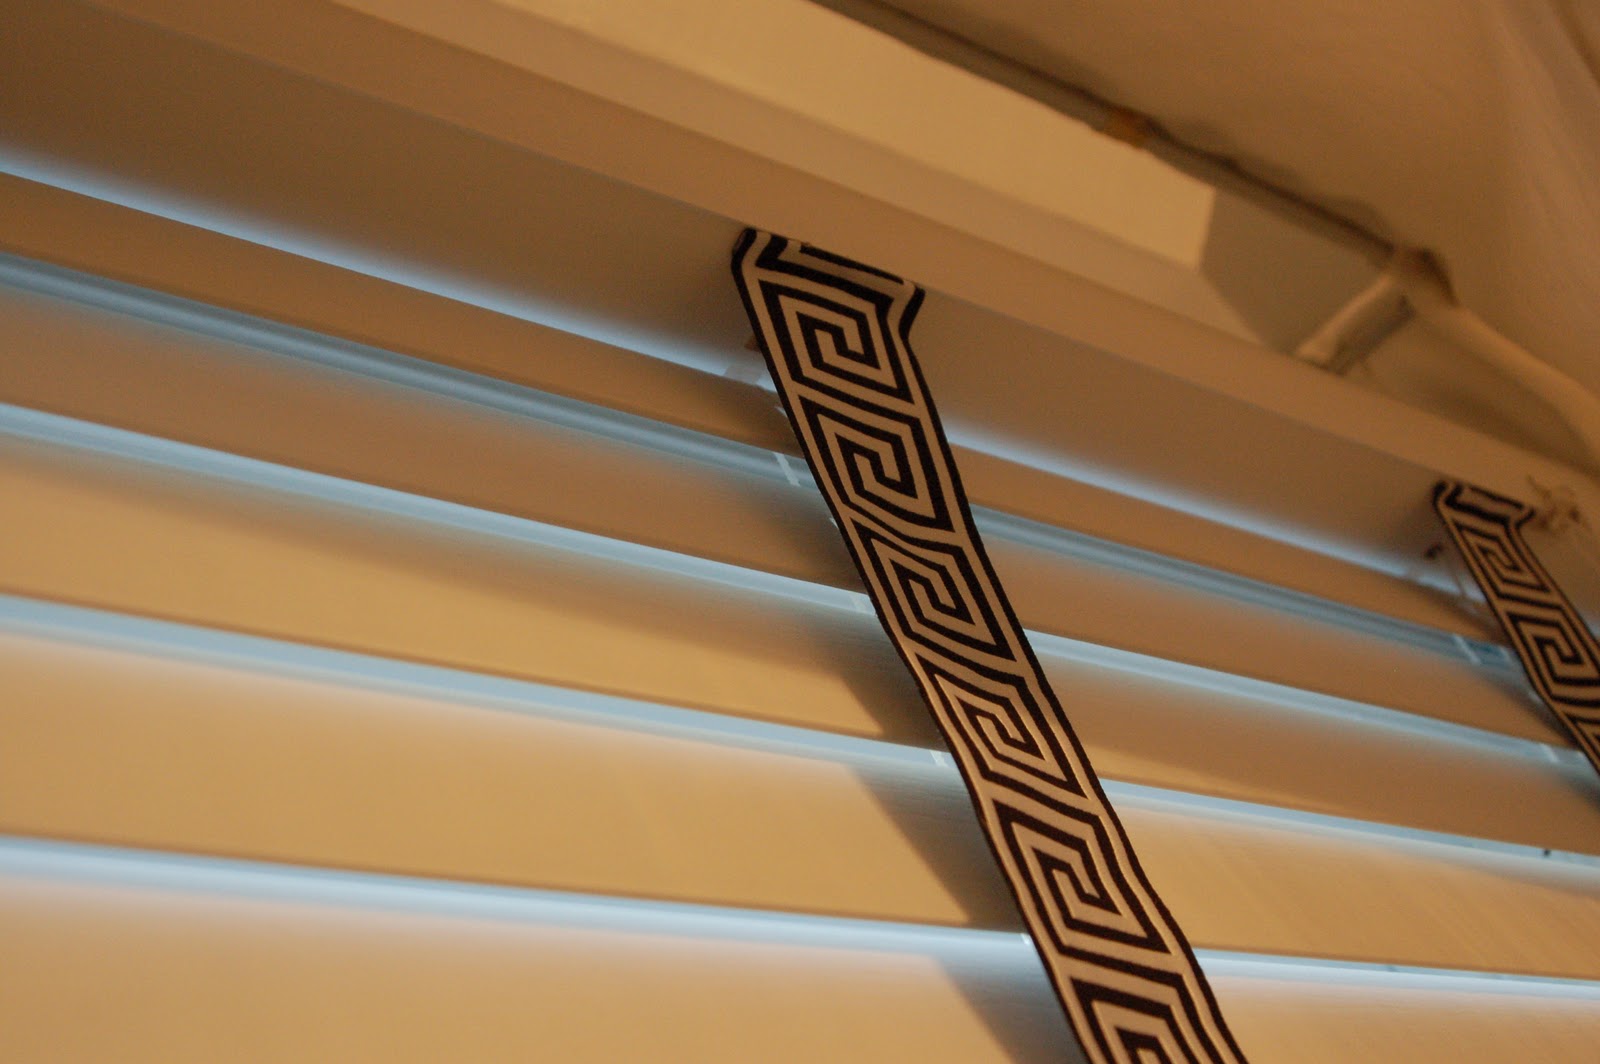
Step #1: Measure your trim by adding about 3 inches to the length of the blind.
Step #2: Cut as many lengths of trim as needed to cover the lift cords (I chose to cover all 3, but you could also leave the middle lift cord un-covered)
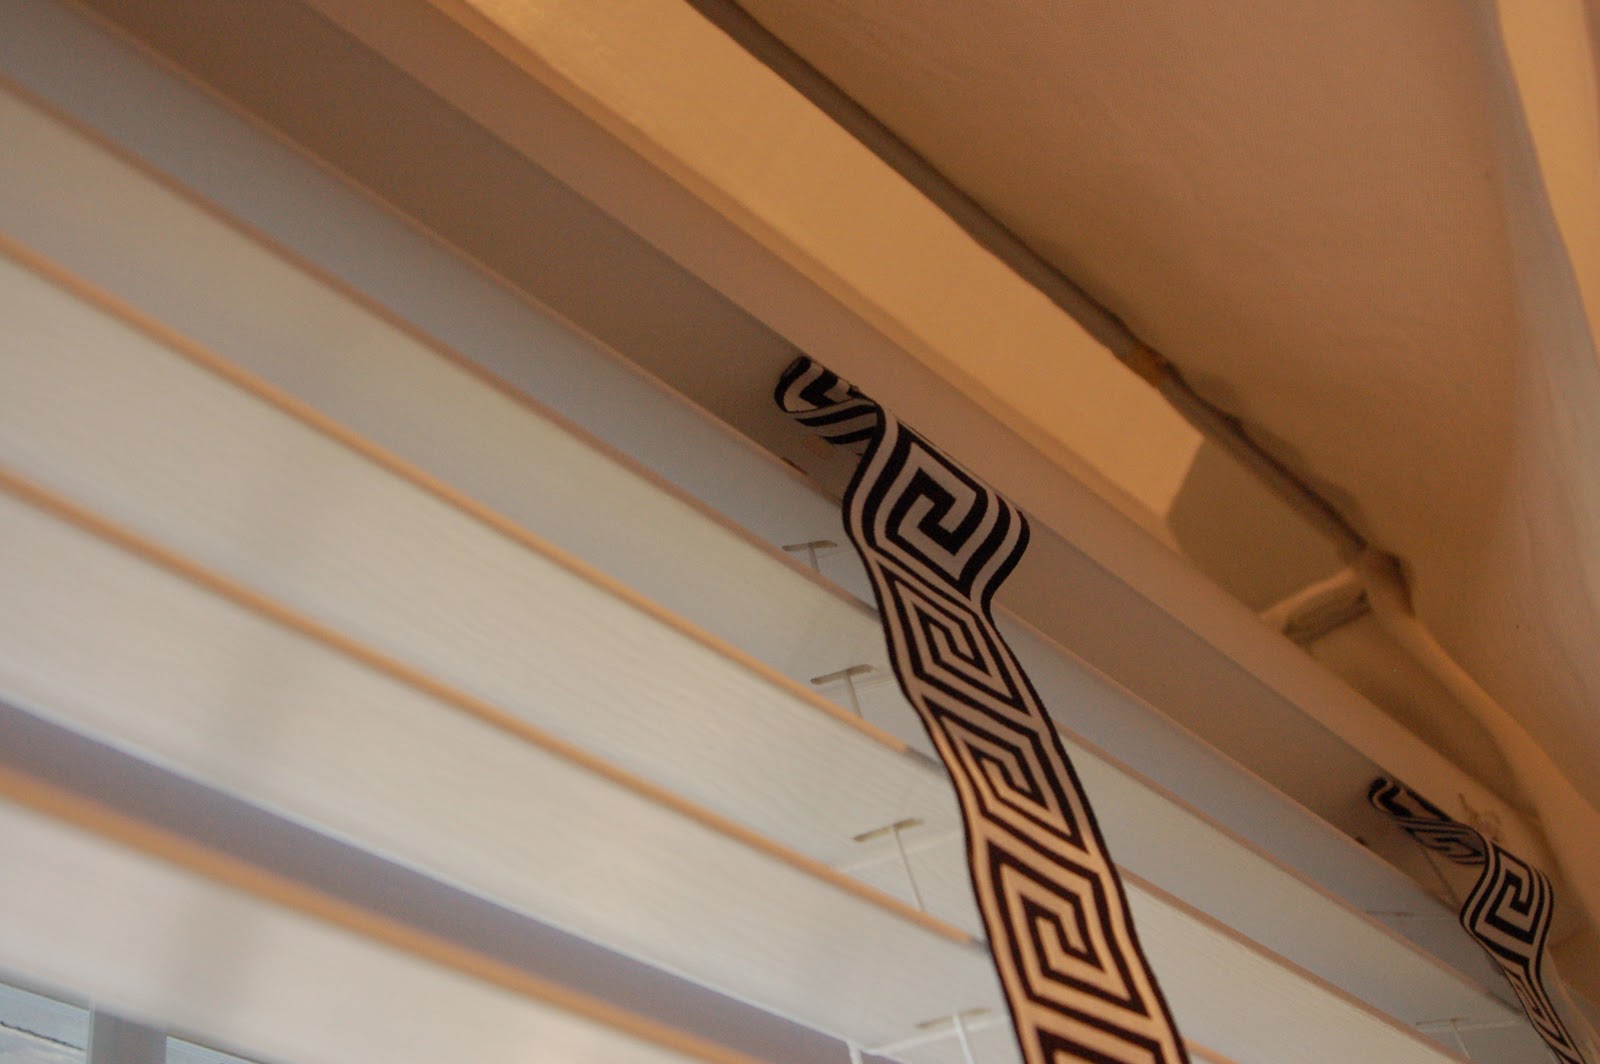
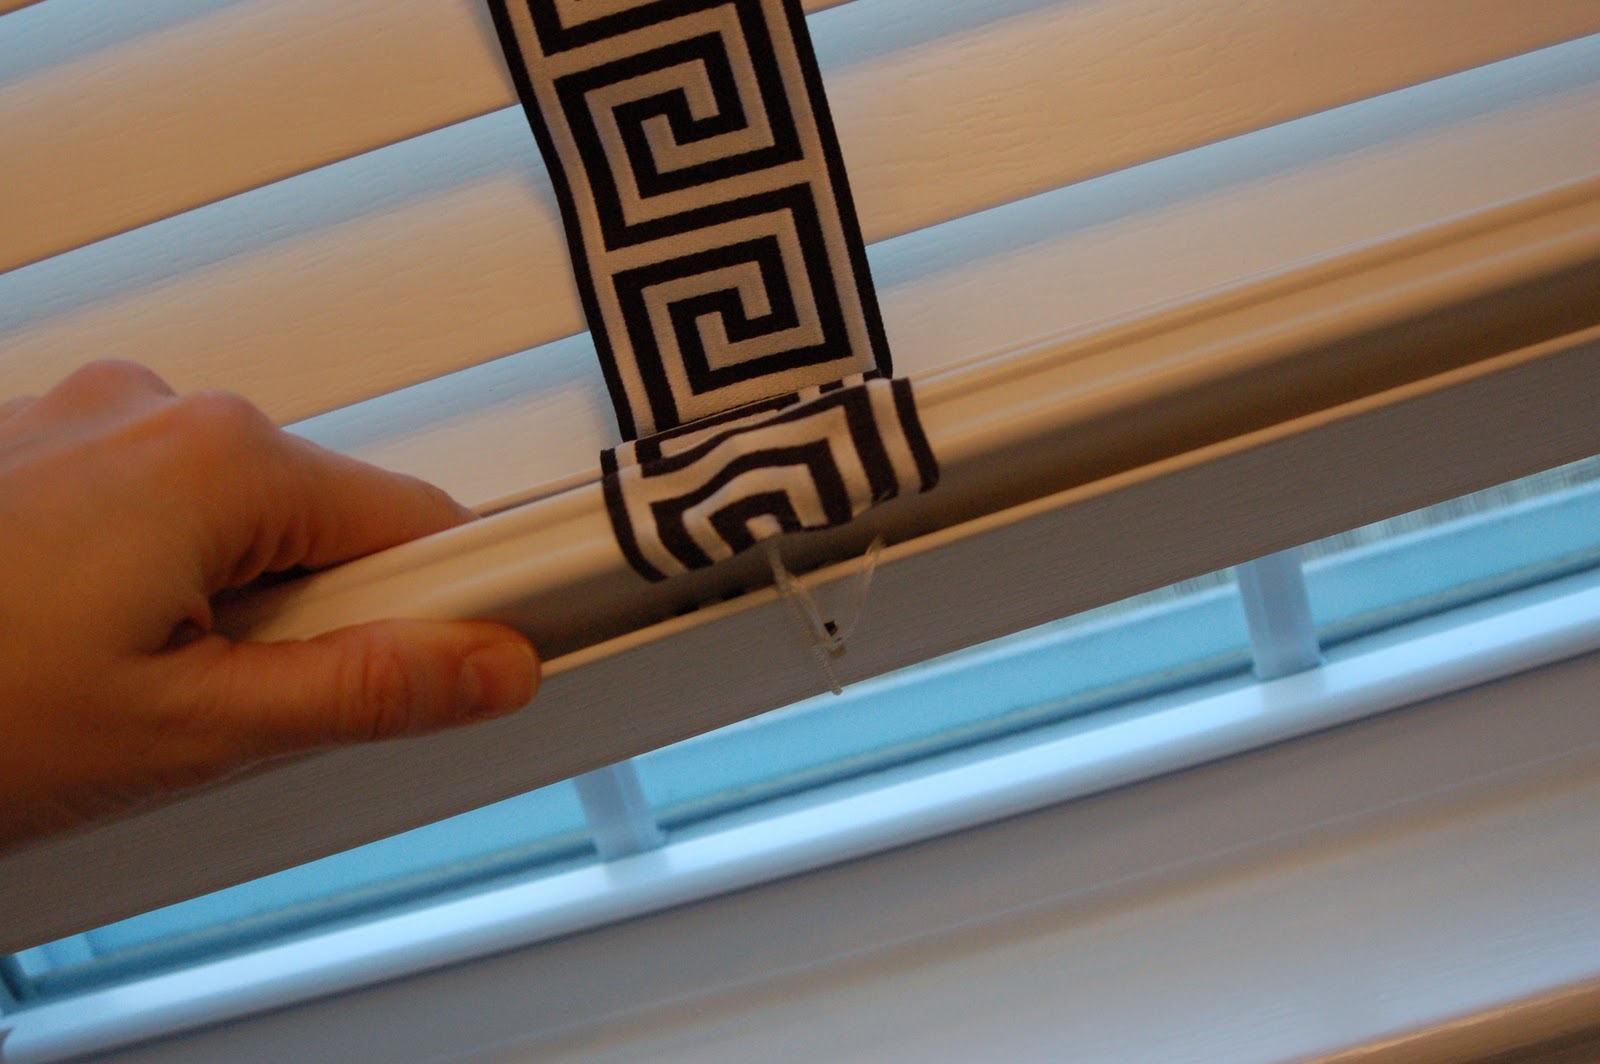
Step #3: Glue the top end of one of your cut trim pieces to the underside of the top of the shade (centered above one of the lift cords) with your hot glue gun (I created a little clean "hem" first by folding over the end of the trim and gluing it down).
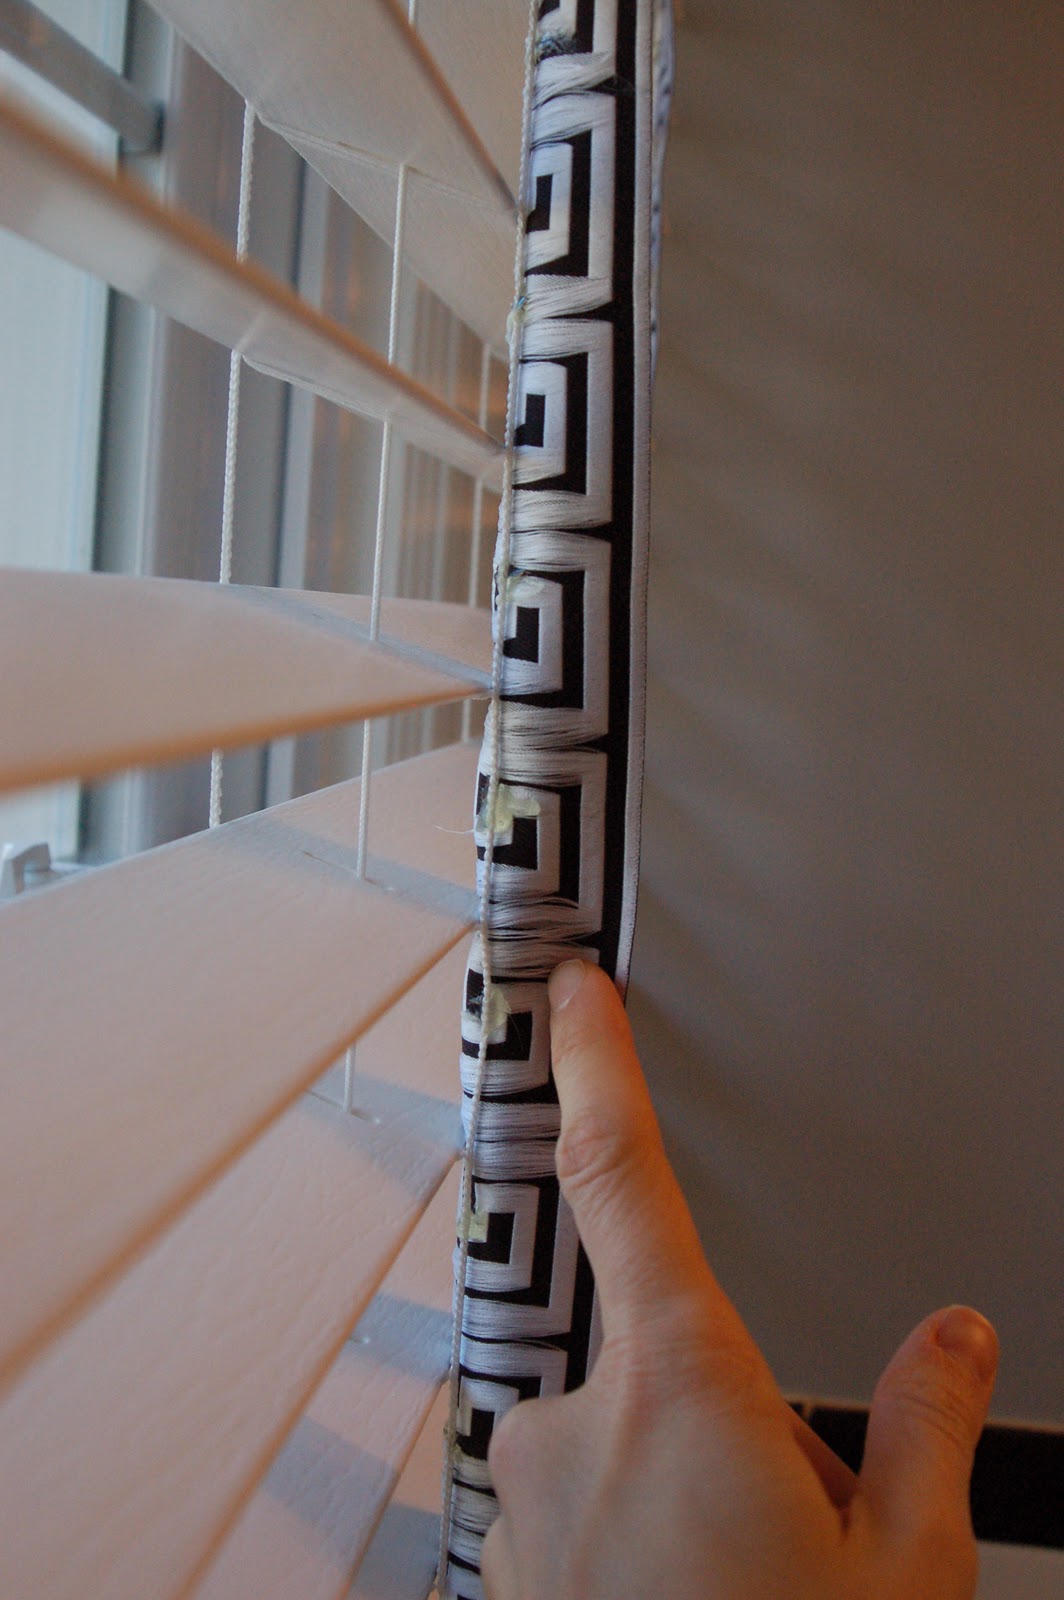
Step #6: The tedious part will be holding your arms up high, because you'll need to keep the trim/cord steady while the glue dries. Once the first glued spot is dry, test the shade by opening and closing. If it's able to close fully, open the shade again and work your way down the shade adding a dab of glue to connect the trim to the cord between each slat.

Step #8: Repeat for as many lift cords as you intend to cover.
That's it! Here's how it looks open:

And, here it is open and lifted:

Tune back in tomorrow for a tutorial on the box-pleat valance!
If you try this - I'd love to see photos!
This is fantastic. I was planning to replace the wood blinds in our guest bath, but now I'm convinced that this could give me a low-cost alternative.
ReplyDeletewow, I love this!!! Just found you from another blog (oops, can't remember which one), and I'm loving your projects, can't wait to check out more! :)
ReplyDeleteThanks for the kind comments!
ReplyDeleteWhat a stunning transformation! I don't need to think about Smith + Noble anymore ;-)...
ReplyDeleteHi, I would love to cover my blinds like this, do I glue the fabric to the middle cord?
ReplyDeleteThanks,
Regina
Hi Regina - you would only glue to the front cord. The middle cord (front to back) is the lift cord, and needs to remain unobstructed. If you're thinking of covering the whole blind with fabric to make a roman shade (I wasn't sure if that's what you meant by "cover" your blinds), I'm not sure this method would work - but let me know if it does. Thanks for reading! I'd love to see your finished project!
ReplyDeleteI am beyond impressed. They look fabulous and stunning!
ReplyDeleteThis is definately my next project! Thx for the tutorial.
ReplyDeleteThis is definately my next project! Thx for the tutorial.
ReplyDeleteThis is definately my next project! Thx for the tutorial.
ReplyDeleteThis is definately my next project! Thx for the tutorial.
ReplyDeleteI like this. :} Blinds are a great window cover for keeping the light out and protecting our privacy. Very useful, indeed. But sometimes they do come in designs which are not so flattering to a room. Thanks for giving me an idea: Putting a little twist to blinds without interfering with its purpose. Thanks! :D
ReplyDeleteRoxie Tenner
It would take a lot longer, but I would use a needle and sturdy thread instead of glue, at least on the front cord. Attach it where the slat sits on the horizontal cord so the front cord moves independently from the ribbon and everything can stack neatly. I think it would look better when the blinds are lifted.
ReplyDeleteJust curious...how is the glue holding up in the bathroom with humidity and use of opening/raising/lowering? Do you find that you need to re-glue frequently?
ReplyDeleteThank you, thank you, thank you! I ordered all new blinds from Penney's the other day and the only thing that's been bothering me is the lack of a trim to conceal the cord holes. I just really didn't want to spend the extra money for customs. Your instructions will help to make my new blinds look custom for a fraction of the cost!
ReplyDelete