Strawberry Fraisier…
I dreamt of Summer and it arrived.
Well, not technically, but compared to the chill of a few weeks ago this is positively scorching. For those of you not living in Cape Town, South Africa, let me explain…
It’s the middle of Winter here. Up until about 2 weeks ago, we were having some of the worst storms I’ve seen. Torrential downpours, hail, gale force winds, the whole deal. Don’t get me wrong, I’m totally going steady with Winter. As I’ve mentioned on numerous occasions. (Yep we talk about the weather a lot here. Not that I’m shallow or anything. Just saying.) But, the Northern Hemisphere bloggers were killing me with what they’ve been throwing out. Ice Creams, Sorbets, Sodas, Cocktails. *sigh* Weirdly for the first time in my life I was willing Winter to end.
Now? It’s been clear skies for 2 weeks and not a drop of rain in sight.In Cape Town that is. The rest of South Africa? Not so sunny. Just a little up country they’re having snow storms where they’ve never had snow storms. It’s a little confusing.
Anyway… there is a reason for all this weather talk. The Daring Bakers challenge for this month was another thing that reminded me of summer.
Jana of Cherry Tea Cakes was our July Daring Bakers’ host and she challenges us to make Fresh Frasiers inspired by recipes written by Elisabeth M. Prueitt and Chad Robertson in the beautiful cookbook Tartine.
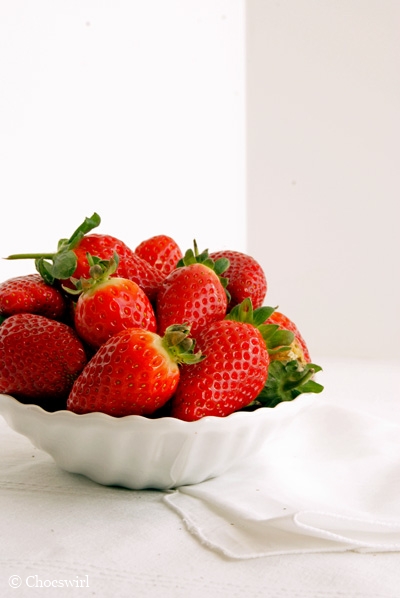
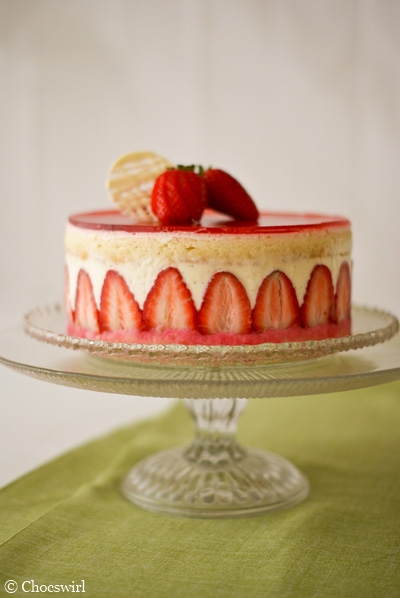
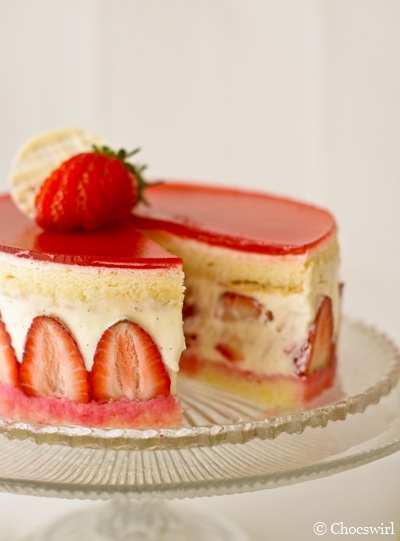
A Fraisier is a french cake with its name coming from the french word “fraise” which means “strawberry”. Now we didn’t have to make a strawberry one as there are daring bakers from all over the world and it’s not strawberry season in many countries. It’s certainly not strawberry season here. But I’m a little weird in that I like to make something the way it’s supposed to be the first time I make it, and I’ve been wanting to make Fraisiers for a while now. I’m also lucky to live near to a Woolies food store and they’ve had an abundance of strawberries lately, even if they are imported.
This is honestly one of the most yummy desserts I have tasted. Being around sweets and desserts all day everyday, they’ve become so normal to me that it’s so good to find a new favourite.
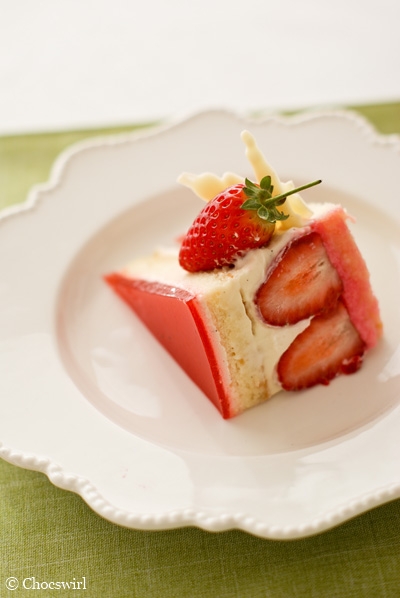
Tart but sweet strawberries with a light chiffon cake and a creamy custard cream filling. It’s Summer.
Strawberry Fraisier:
(Recipe from The Daring Kitchen)
Basic Chiffon Cake (for base):
1 cup + 2 tablespoons (270 ml) (5½ oz/155 gm) all-purpose flour (For Gluten Free – Use the same amount of gluten free flour mix (by weight) + 1/2 tsp. xanthan gum)
1 teaspoon (5 ml) (4 gm) baking powder
3/4 cups (180 ml) (6 oz /170 gm) sugar
1/2 teaspoon (2½ ml) (1½ gm) salt
1/4 cup (2 fl oz/60 ml) vegetable oil
3 large egg yolks
⅓ cup + 1 tablespoon (3.17 fl oz/95 ml) water
1 teaspoon (5 ml) pure vanilla extract
3/4 teaspoon (3¾ ml) (3 gm) lemon zest, grated
5 large egg whites
¼ teaspoon (1¼ ml) (1 gm) cream of tartar
Directions:
Preheat the oven to moderate 325°F (160°C/gas mark 3).
Line the bottom of an 8-inch (20 cm) spring form pan with parchment paper. Do not grease the sides of the pan.
In a large mixing bowl, stir together the flour and baking powder. Add in all but 3 tablespoons (45 ml.) of sugar, and all of the salt. Stir to combine.
In a small bowl combine the oil, egg yolks, water, vanilla and lemon zest. Whisk thoroughly.
Combine with the dry ingredients and mix thoroughly for about one minute, or until very smooth.
Put the egg whites into a stand mixer, and beat on medium speed using a whisk attachment on a medium speed, until frothy. Add cream of tartar and beat on a medium speed until the whites hold soft peaks. Slowly add the remaining sugar and beat on a medium-high speed until the whites hold firm and form shiny peaks.
Using a grease free rubber spatula, scoop about ⅓ of the whites into the yolk mixture and fold in gently. Gently fold in the remaining whites just until combined.
Pour the batter into the prepared pan. Bake for 45 to 55 minutes or until toothpick inserted into the center comes out clean.
Removed the cake from the oven and allow to cool in the pan on a wire rack.
To unmold, run a knife around the sides to loosen the cake from the pan and remove the spring form sides. Invert the cake and peel off the parchment paper. Refrigerate for up to four days.
Pastry Cream Filling
1 cup (8 fl oz/250 ml) whole milk
1/2 teaspoon (2½ ml) pure vanilla extract
1/8 teaspoon (1/2 ml) (¼ gm) salt
2 tablespoons (30 ml) (10 gm) cornstarch
1/4 cup (60 ml) (2 oz/55 gm) sugar
1 large egg
2 tablespoons (30 ml) (1 oz/30 gm) unsalted butter
3/4 teaspoon (3¾ ml) (4 gm) gelatin
1/2 tablespoon (7½ ml) water
1 cup (8 fl oz/250 ml) heavy cream
Directions:
Pour the milk, vanilla, and salt into a heavy sauce pan. Place over medium-high heat and scald, bringing it to a near boiling point. Stir occasionally.
Meanwhile, in a stand mixer add the cornstarch and sugar. Whisk to combine
Add the eggs to the sugar and cornstarch and whisk until smooth.
When the milk is ready, gently and slowly while the stand mixer is whisking, pour the heated milk down the side of the bowl into the egg mixture.
Pour the mixture back into the warm pot and continue to cook over a medium heat until the custard is thick, just about to boil and coats the back of a spoon.
Remove from heat and pass through a fine mesh sieve into a large mixing bowl. Allow to cool for ten minutes stirring occasionally.
Cut the butter into four pieces and whisk into the pastry cream a piece at a time until smooth.
Cover the cream with plastic wrap, pressing the plastic wrap onto the top of the cream to prevent a skin from forming. Chill in the refrigerator for up to five days.
In a small dish, sprinkle the gelatin over the water and let stand for a few minutes to soften.
Put two inches (55 mm) of water into a small sauce pan and bring to a simmer over a medium heat.
Measure 1/4 cup (2 oz/60 ml) of the chilled pastry cream into a small stainless steel bowl that will sit across the sauce pan with the simmering water, without touching the water.
Heat the cream until it is 120 F (48.8 C). Add the gelatin and whisk until smooth. Remove from the water bath, and whisk the remaining cold pastry cream in to incorporate in two batches.
In a stand mixer, fitted with the whisk attachment, whip the cream until it holds medium-stiff peaks. Immediately fold the whipped cream into the pastry cream with a rubber spatula.
Simple Syrup:
1/3 cup (2⅔ fl oz/80 ml) (2⅔ oz/75 gm) of sugar
1/3 cup (2⅔ fl oz/80 ml) of water
Directions:
Combine the water and sugar in a medium saucepan.
Bring the mixture to a boil and let the sugar dissolve. Stirring is not necessary, but will not harm the syrup.
Remove the syrup from the heat and cool slightly.
Transfer syrup to a lidded container or jar that can be stored in the refrigerator. Simple syrup can be stored for up to one month.
Strawberry Gelee: (Adapted from Cannelle et Vanille)
- 150 g strawberry puree, strained (I cooked up 300 g strawberries with 30 g sugar until soft, blended and strained the mixture and measured out 150 g)
- 10 g powdered gelatin
- 20 ml water
Sprinkle the gelatin over the water in a small ramekin and let stand to sponge.
Heat the puree.
Add the sponged gelatin to the hot puree and whisk until dissolved.
Assembly:
Components:
1 baked 8 inch (20 cm) chiffon cake
1 recipe pastry cream filling
⅓ cup (80 ml) simple syrup
2 lbs (900 g) strawberries
1 recipe strawberry gelee
Directions:
- Line the sides of a 8-inch (20 cm) spring form pan with plastic wrap. Do not line the bottom of the pan.
- Cut the cake in half horizontally to form two layers.
- Fit the bottom layer into the prepared spring form pan. Moisten the layer evenly with the simple syrup. When the cake has absorbed enough syrup to resemble a squishy sponge, you have enough.
- Hull and slice in half enough strawberries to arrange around the sides of the cake pan. Place the cut side of the strawberry against the sides of the pan, point side up forming a ring.
- Pipe cream in-between strawberries and a thin layer across the top of the cake.
- Hull and quarter your remaining strawberries and place them in the middle of the cake. Cover the strawberries and entirely with the all but 1 tbsp. (15 ml) of the pastry cream.
- Place the second cake layer on top and moisten with the simple syrup.
- Spread the remaining 1 tablespoon (15 ml) of pastry cream on the top of the cake.
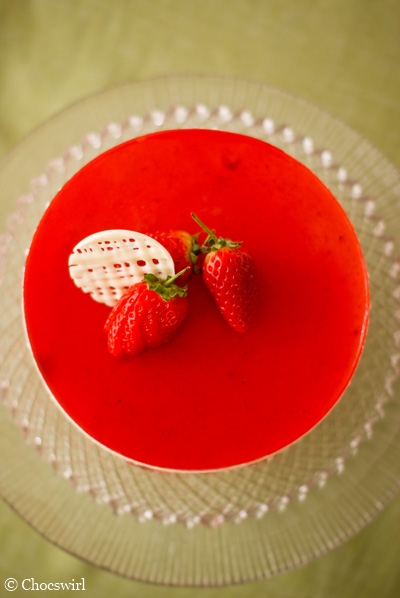
- Pour the just cooled gelee on top in an even layer and refrigerate for at least 4 hours.
- To serve release the sides of the spring form pan and peel away the plastic wrap.
- Serve immediately or store in the refrigerator for up to 3 days.


 The Daring Kitchen
Oh, what a fabulously summery recipe – I’ll bet there is going to be gnashing of teeth and howls of “how can you do this to us?” from your compatriots ;o) Here in London though, strawberry season is in full swing… not to make anybody jealous or anything!! Fab pics :)
Yep, the whole “seasonal fruit” thing. I’m usually the first to jump onto my soap box about that but this time I couldn’t resist! And yes… that does make me jealous :)
that looks absolutely wonderful! i don’t think i’ve ever seen a prettier cake! now i just need a bit of daring ambition to try this recipe out:)
Ahhh, thanks Kacey! :) You gotta try it! It’s so good!
those photographs are amazing, I could taste summer :)
Thanks Tandy! :)
Beautiful, beautiful, beautiful. Congratulations. Your blog just gets better and better (and it was excellent to start with!)
Thank you so much Jane-Anne! :) That really means a lot!
Gorgeous Robyn!! Absolutely stunning in every way
Thanks Jenn! :) I’ve been working on some of the things we’ve chatted about wrt the photography. It’s so much fun!
Wow, your fraisier is absolutely beautiful. Really amazing job.
Thanks Shelley!
It looks like so much work! How long did you take to do this? I’m thinking of whipping up a batch this weekend for a birthday party. I’m afraid of the failure rate! LOL.
Hey Jayne, it is quite a lengthy process but so worth it :) I made the sponge base and the pastry cream filling the day before coz they can keep in the fridge. Then on the day I just prepped the strawberries, made the strawberry glaze for the top and assembled the whole thing. Assembly took me about a half hour. Then at least 4 hours to chill. The filling is still quite soft when set so I used a blow torch to heat the sides of the mold before unmolding. Hope that helps! :)
O my goodness – this is absolutely beautiful and yummy!!
:) thanks!
Gorgeous! Your fraisier is the best I’ve seen today. Well done on the challenge. Love the mirror too. You inspire me!
Wow Deeba, thanks so much for the lovely compliment! You inspire me to that works :)
Stunning Robs! Won’t mention the non-seasonality issue….:) But looks super yum – I suggest a little tea party at work to test it out – in summer though…possibly with some champagne??
I’m totally for that! But we’d never drink at work! Would we? Of course not! :)
Sigh! Once again calories gone from plate to hips! Sooo yummy, Thanks Robs
Absolutely stunning Fraisier! WOW. Truth be told, I cannot wait for Fall and Winter – we just had a heatwave for almost 2 weeks straight..100 and up almost every day. Looking forward to seeing your summery treats when I’m basking in nice and cool weather again lol
He he… it’s always like that! And I’ll be longing for winter in the heat of summer when I look at all your winter treats. You just can’t win :)
Thanks chocswirl for this post. Just by looking to your beautiful photo, it make me go to the supermarket as soon there are open. It was so good, so fresh and an 8 inches it wasn’t enough for all of us to had a second piece of this cake. My little nephew told me don’t be so cheap, make a bigger one, next week lol! I wonder if you had any advice on how to converted this recipe to make a bigger one, of course nice as your, i.e for a 10 inches.
Thanks
Jamie
Hi Jamie, I’m so glad you were able to make your family happy with this cake! :) He he… boys are funny. All you need to do is multiply the recipe by 1 1/2, then that should be more than enough for a 9-inch! If you have left over filling you could always pop it into a pretty glass or ramekin with some sliced strawberries as a treat for the chef :)
Wow, you have shown here just how talented you are!! Incredible!
Beautiful!
What a beautiful dessert…and perfect for Valentine’s Day! You have a great blog. Patsy…from Texas
Thank you so much for this recipe! I can’t wait to make this-I hope mine looks as perfect as yours!!! :)
Gorgeous. I can only hope mine will turn out as beautiful and delicious looking as yours. :)