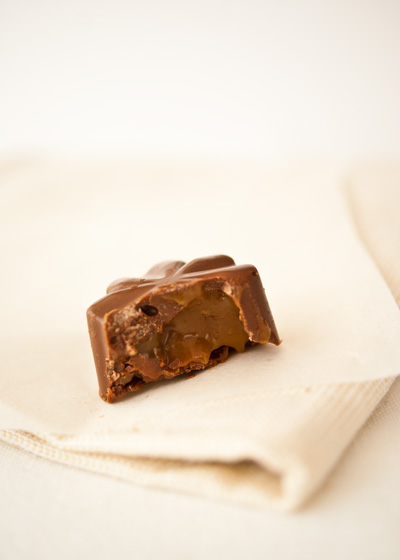
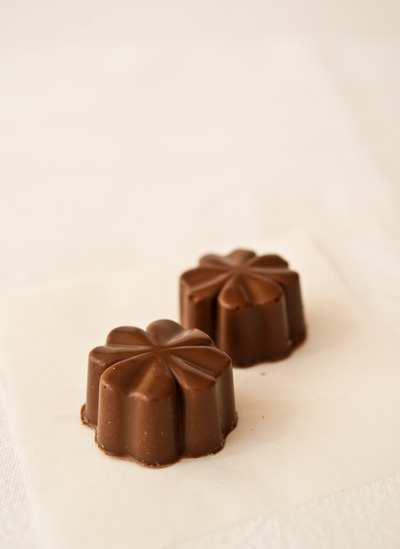
Milk Chocolates with Caramel Rum Filling…
As I said in my previous post, Daring Bakers snuck up on me last month and I didn’t have the time to post the recipes!
Many of you showed interest in the chocolates so I thought I’d start with these…

As you can see I need a little more practice when it comes to the thickness of the chocolate on the top (or is it bottom?) but I’m really excited by the result.
Making chocolates was not a challenge I took lightly. It wasn’t mandatory that we temper the chocolate but if you know me then you know I couldn’t pass up the opportunity. I like a challenge. And it definitely was one.
As far as most things go, I generally suffer from beginner’s luck *cough-macarons* (lets not talk about that). I know, suffer? But honestly, it’s deceiving! You get it right and it’s perfect and everybody oohs and ahhs over it and then you make it again.
This was the first time I’ve ever tempered chocolate. I rocked it.
Perfect colour, perfect shine, perfect snap. The first time. We won’t talk about the second time.
Despite the fact that they took a bit more effort than most things to make, I really enjoyed it and it was a big learning curve. Plus they’re impressive and people think you’re a pro. Even if it was beginner’s luck. *hoping that no one asks me to make them again anytime soon*
You don’t have to temper the chocolate but I’d recommend giving it a try. Tempering chocolate gives it that shiny, flawless appearance. It changes the crystalline structure of the cocoa butter in the chocolate to give it a firm texture which snaps when you break or bite into it. You know when chocolate has melted, you let it set again and it sets with those white streaks on the surface?
That’s the crystalline structure of the cocoa butter gone out of whack. That doesn’t always happen in untempered chocolate, but it will still have a dull look to it.
It’s your choice, but tempered or not, these taste delicious and the filling is the perfect gooey inside to this little chocolate.
Milk Chocolates with Caramel Rum Filling: (Adapted from “Field Guide to Candy” by Anita Chu)
(Makes about 35 small chocolates)
Necessary equipment:
- chocolate moulds
- cooking thermometer
- double boiler (not essential but helps quite a bit)
Ingredients:
- 450 g Belgian or Swiss milk chocolate (yes it can be expensive but couverture chocolate is a must!)
- 3/4 cup sugar
- 1/4 cup water
- 2/3 cup heavy cream
- 4 tbsp (about 60 g) butter
- 1 – 2 tbsp rum / few drops of rum essence (to taste)
Filling:
Place the sugar and water in a small saucepan and heat, stirring continuously while sugar dissolves. Once sugar has dissolved, stop stirring and allow to come to the boil. Boil until the syrup turns an amber colour (the darkness of the colour depends on your taste, the darker it is, the more bitter it is). Remove it from the heat and add the cream carefully, stirring to incorporate. (Be careful as it will bubble up and splutter) If hard bits of caramel form, reheat it over medium heat, stirring until smooth. Add the butter and rum/essence and stir until smooth. Set aside to cool.
Tempering the chocolate:
When the filling is cool and you’re ready to begin making your chocolates, place 2/3 of your chocolate into the top of a double boiler and melt, stirring frequently. The reason for the large amount of chocolate is that it is difficult to hold a small amount of chocolate at the right temperature. Do not let the temperature go above 40°C/105°F. When it has melted, remove from the heat. (Remember to wipe the bottom of the bowl to remove the condensation as you don’t want to get any water into your chocolate.)
Add the remaining chocolate, a bit at a time, stirring until completely melted.
Let the chocolate cool to about 27°C/82°F. You can do this by stirring it in the bowl or by tipping it out onto a marble slab and turning it over onto itself. (You know it’s at the right temperature when it starts to thicken slightly) Once its at the right temperature, put it back over the hot water. You may have to turn the heat back on but I found the water was still hot enough to heat the chocolate. Heat it back up to 29°C/85°F – 30°C/87°F, stirring constantly. Remove from the heat once you’ve reached the right temperature.
It is now in temper and you can use it. If the temperature drops but its still fairly liquid then you can just reheat it to the right temperature. If it starts to solidify then you’ll have to re-temper it.
Making the chocolates:
Make sure your mould is clean and dry.
Pour the tempered chocolate into the mould to fill the holes. Tap the mould on the work surface to get rid of any bubbles. Pour out the excess chocolate, leaving only a thin layer behind. Place into the refrigerator to set. (10 – 15 minutes)
Once the chocolate has set, fill the holes with filling to about 3/4 full. Refrigerate again to set the filling slightly.
In the meantime, make sure your chocolate is still in temper or re-temper it. Once the filling has chilled slightly, (10 – 15 minutes) remove from the fridge and pour a layer of tempered chocolate over the mould to seal the chocolates. Scrape off the excess chocolate with a bench scraper, palate knife or the back of a long knife. Place in the refrigerator for a further 15 – 20 minutes.
When the chocolates look set and are starting to come away from the sides of the mould a little, remove from the fridge and invert the mould to remove the chocolates.


 The Daring Kitchen
Well I don’t know – looks like you did an excellent job to me!! Wow – I could chomp a box of these babies!!! Yummmm xxxx jan
he he… Thanks Janice! :)
Hi Robyn, This recipe has been selected to be featured in our Recipe Guessing Game. Please share the following link with your friends and fans. To play, go here: http://knapkins.com/guess_games/223?source=facebook Congrats again!! :)