In this photoshop tutorial, you're going to learn how to create a scissors-cut type effect in photoshop. This tutorial is simple and easy to follow. We only use the layer style to create the effect. In addition, the simple technique to save the style to be applied to other layers is also quite important to know in order to save time and effort in doing a work. So, lets get started!
Step 1
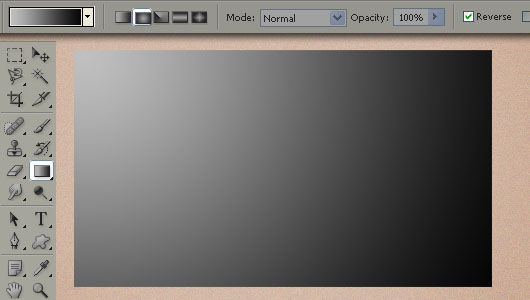
Start by preparing the background color. Give a radial gradient color from gray to black color like the picture below.
Step 2
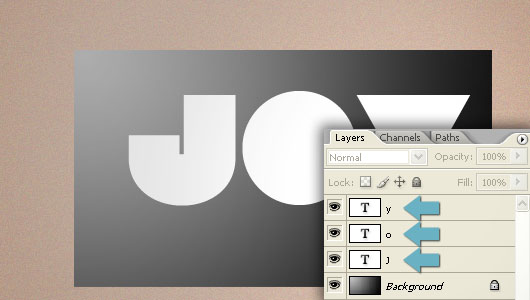
Prepare the text, in this example Im using Lot font that you can download it here. Make sure each letter in the text have their own layer
Step 3
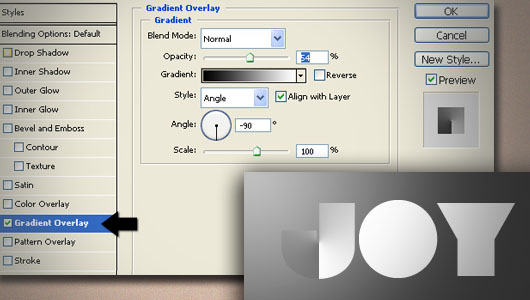
Let start from the layer 'j' to give a torn paper effect on the letter J. Double click on the layer 'j' it will open a window called layer styles. Then Select gradient overlay, and set the opacity setting, gradient, style, angle, and scale as in the picture below. tick on the preview to see changes directly.
Step 4
Still on the layer style on layer 'j', then click on the drop shadow to give a little shadow on the text. Set the values contained in the drop shadow as shown below.

Step 5
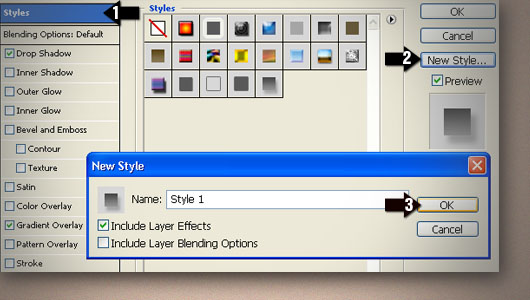
Next, select the style (located on the top row), then click on the new style. This move means we will save the settings in the layer style to later be applied to other layers.
this is the result of giving a gradient overlay layer style and drop shadow to the layer 'j'

Step 6
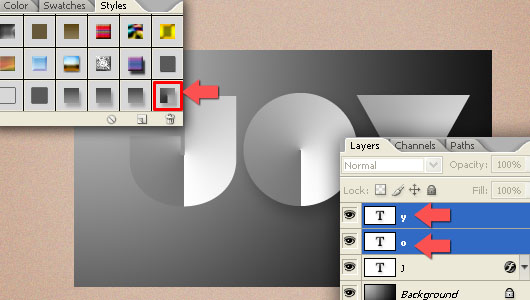
Now, go to Window -> Styles to open the Styles palette. Select the layer 'o' and the layer 'y' and then click on the icon style that you'd save. So automatically, the layer 'o' and the layer 'y' has the same style as the layer 'j'
Step 7
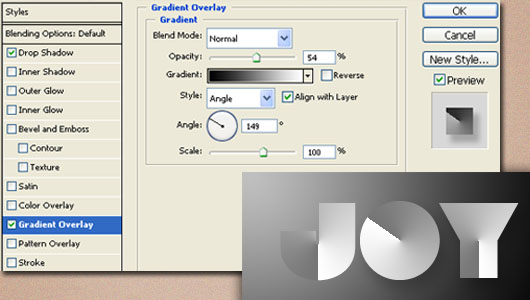
Double click on layer 'o' and click on Gradient Overlay to do a little editing. You will change the angle effect on the layer of paper cutouts 'o' to 149 ° (see picture below).
Step 8
After changing the angle, we also need to raise slightly upward effect on the letter 'o'. With the layer style window remains open, we only need to click and drag to adjust upwards the effect its position in the text.
Step 9
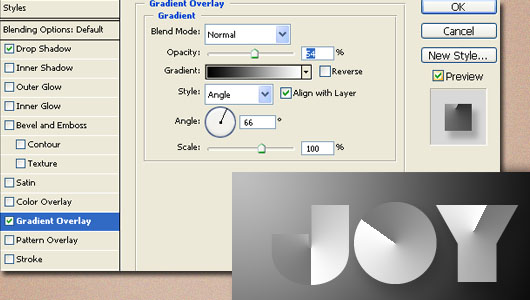
With the same way, also edit the angle of the gradient overlay layer effect 'y' to 66 °.
Ok now here's the layer palette condition after making the cut Scissors-style effect on the text is complete.
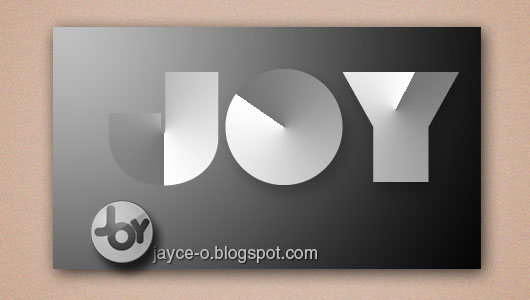
The final result
Thus the end result of giving some effect, and it's always good if you want to do more with it. This Photoshop tutorial is expected to be useful to be applied to creative projects that you do.

3 Comments
Yesta,
ReplyPlease check your email. Thanks
Blyke, I replyed to your email. so If you need more direct assistance I will be happy to help you, you can always find me on Skype, and MSN.
ReplyThis is stunning. Maybe I'm a newbie in PS but I never see this kind of effect. Looks awesome and not o hard to follow, for sure I'll try it.
Reply