The Facts
Fabric: Two standard-size pillowcases from The Warehouse, on sale for $7 the pair
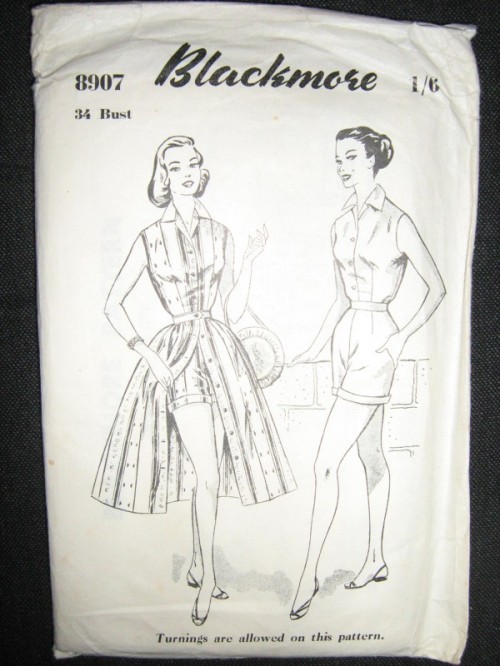
Pattern: Blackmore 8907
Year: 1950’s
Notions: 5 black buttons, rescued from a worn-out shirt
Time to complete: 4 hours
Will I wear it? Yes
Would I make this pattern again? Definitely!
Total cost: $7
Why is this the “Sleepy Secretary” blouse? Because it’s made out of pillow cases! Yep, that’s right – the Sew Weekly challenge this week was Pillow Talk – to make something out of one or two pillow cases.
My original plan was to go and get some thrifted ones from the op shop, but I was a bit too late getting there last Saturday and the only one still open didn’t sell bed linen. Oops! Since that was my one window of opportunity to get to the op shop, plan 2 happened instead – a mission to Farmers. Which didn’t have any. Hmmm. Luckily, I managed to convince the lovely Steve to drive me to The Warehouse, so I could get some from there. 🙂 I found this pair of aubergine coloured poly-cotton pillow cases, on sale for around $7 for the two of them. Yay! (Side note: this is the first Sew Weekly challenge where I’ve gone out and bought fabric – all the rest have been from my stash.)
My first thought when I saw this challenge was – I’m gonna make a shirt! It’s something that I’ve been meaning to do for a while, since I have no me-made shirts in my wardrobe. Yes, that’s right – I’ve got lots and lots of dresses, but no shirts. In fact, I’ve never even made a women’s shirt before. I’ve made a couple of jackets, and a couple of mens shirts, but no women’s ones. Clearly, it was high time I tried my hand at one!
I dug out this lovely Blackmore pattern from the 1950’s. (At least, I’m assuming it’s from the 1950’s – there’s no date on it anywhere.)
I’m planning on making the shorts from this at some stage, too. They look like they’d be cute to wear in summer. 🙂
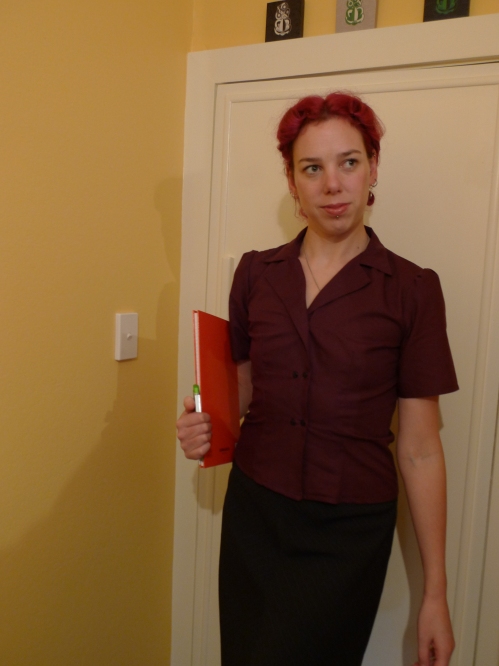
Since it’s winter over here at the moment, I altered the pattern a bit and added sleeves from another pattern. Coz really, I want to be able to wear this shirt and a sleeveless shirt isn’t going to get any wear in my wardrobe for the next 6 months or so!
I also altered the buttons on the front – the pattern calls for three buttons, but when I put them on I found they were placed quite far in and the overlap was larger than I would have liked. (Possibly because the buttons I used were quite small – I’ll use larger ones next time.) Steve suggested adding double buttons, so I did just that to the bottom two button holes. I think it adds a bit of interest to the shirt.
The pattern itself was nice and easy to make up. Admittedly, it took me quite a while, but part of that was due to the button holes – I’m a little bit scared of them, and now I remember why – my machine just doesn’t seem to do them the way it should. I’ve got an Elna 2004 SP and in theory it does one-step button holes – you just put the button on the little button foot thing to size it, put your foot down, and away it goes. I don’t know why, but this just doesn’t work on my machine. At all. Not the sizing, nor the one-step process. Hmmm. Anyone else got one of these machines? Any tips/tricks I should know about to get this working?? Next time I need to do buttonholes, I think I’m going to have to be brave and do them by hand, as they just didn’t work out as neatly as they should have, sadly. Luckily, they’re covered by the buttons. 🙂
I’ve got some scraps left from the pillowcases, which I’m going to use – I’m determined to use every last usable bit of these cases! I’m currently considering what to do with them – possibly a fabric wallet. Or maybe a fabric flower or necklace to wear with this shirt. Or maybe even a fabric headband, just for that matchy-matchy look. Only time will tell…..
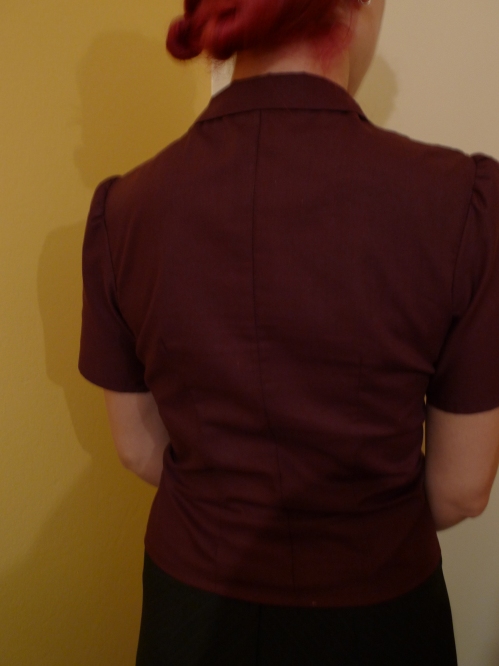
Both of the pillowcases were sewn around all the edges, as a result of which the back of the blouse now has a seam down the middle. I just used the seam that was already there, and treated it like the fold of the fabric, so the blouse has part of the pillowcase’s original stitching in it, which I quite like.
I can see myself wearing this quite a bit – I love the colour. I think I need to make a black pencil skirt that sits at waist height to tuck it into, and then I’ll have the perfect work outfit, yes indeed!
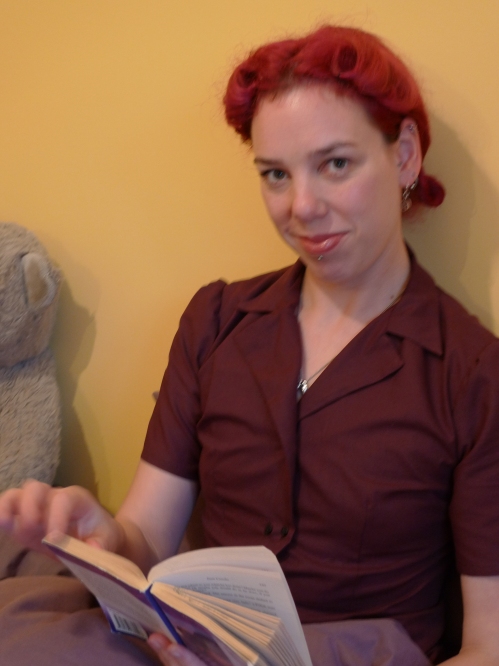
And it wouldn’t be a pillowcase blouse if it wasn’t worn in bed for a spell, now would it?
I’ve started trying to play around with vintage styles in my hair as well. This is my first attempt. (We just won’t mention how long I spent mucking around with my hair before this photo shoot, now will we?!) Could use some improvement (after all, it’s just my first attempt) but I figure if I practice a fair bit it’ll get a lot easier. Thank you, YouTube, for your helpful vintage hair tutorial videos!





I LOVE the hair!!!!! It looks so natural on you. It reallly suits you!
Thanks lady! I think I’ll be practicing this style lots, so I can wear it lots, so much fun!
You look incredible – LOVE the hair! The shirt is just gorgeous – I’m currently on a wardrobe refashion mission that involves sewing a lot more tops/shirts for work. The sleeves and double buttons look great – you’ve got a clever Steve!
I have an Elna 3210 and could never, ever get the automatic button hole thing to work (my machine has the same “put the button in the back” button hole foot thing you were describing). In my absolute despair, I went and looked in the manual (I’m Australian. This was difficult). I found out that there’s an automatic button hole “lever” right at the very back left, behind the pull down needle threader. It has a little button hole picture on it. You have to pull this down before you start the button hole as it is this lever that stops the button hole foot, finishing one edge of the button hole and sending it back towards the front. I always forget to pull the damn thing down and make a mess. Just in case our machines have the same thing, I can scan my manual pages and send them to you if it would help?
Oh my gosh! I think you’ve just solved the problem I’ve had for years! Wow!!!! I just had a look around my machine and found one of those wee leavers you spoke of, complete with tiny wee picture of a button hole. I’m so going to give that a try today and see if it fixes the problem! You’ve totally made my day – thank you so much. 🙂 🙂
Yay! That’s so exciting! Before finding the mystery lever there was much creative cursing and yelling whenever I attempted a button hole. On the flip side, there was much joy and dancing (or rather in my case, dance-like movements) when I found out how the damn thing worked! I’ve scanned my sewing machine manual pages on working the automatic button hole using magic button hole lever – let me know if you’d like me to email it to you 🙂 Here’s to a future of pretty, frustration-free button hole adventures!
Really cute – and I love the hair too!
Thanks Donna! 🙂
This is so perfect. And I love that it has been painstakingly crafted from 2 pillowcases. A lot of time and thought to create a really lovely blouse. A quick browse through your blog has reminded me that I’ve been here before to see your lovely dresses but wonder why on earth I didn’t subscribe. Am about to do that right now! See you soon! 🙂
Thanks! 🙂 I was having a look around your blog yesterday, actually, after you put up the photo of your Pillow Talk top – so cute!
I’m really impressed with this challenge your shirt looks great and the button placement just gives it that original “i made it’ look. Shame about the button holes but as you say they’re hidden so phew!! nice work indeed.
Thanks Kazz! 🙂
Pingback: “Bows” wardrobe challenge and Me Made June days 16-22 | Modern Vintage Cupcakes
Pingback: The ‘Betsey Johnson’ shirt | Modern Vintage Cupcakes
Pingback: Self-Stitched September 2011 – days 1-5 | Modern Vintage Cupcakes
Pingback: Self Stitched September – days 6-10 | Modern Vintage Cupcakes
Pingback: Scrap Bustin’ Tuesday – Blossom Bunny | Modern Vintage Cupcakes
Pingback: Blackmore 8907 « Patterns patterns patterns
Pingback: The “Zoo Team” Shirt | Modern Vintage Cupcakes