I will provide some basic instructions on how to:
Click on the pictures for a larger view.
I had been tweaking a few things in Firefox and I captured my screen to post the screen shots in my blog. But all the images, that were as large as my screen, were saved in .png format and each file was several MB large. So, I decided to re-size the images to reduce image size and converted the image to .jpg to reduce file size. Given that GIMP was conveniently included in Gutsy, I was happy to learn how to use it for such simple task. After one Google search I found the tutorial website for GIMP, which happened to be very helpful. Remember, my way might not be the quickest way because I pretty much figured this out myself.
Capturing Images
Just a little update. You can also capture image in ubuntu by selecting Applications-> Accessories -> Capture screen. The new window will provide you some options such as delay time, screen capture or window capture, with or without border… Or if you just want to take a snapshot of the entire screen, use your Print Screen button.
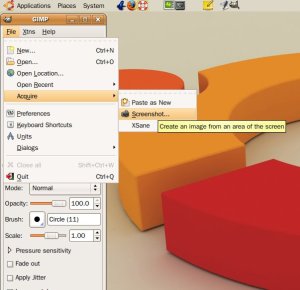
- Select File -> Acquire -> Screenshot…
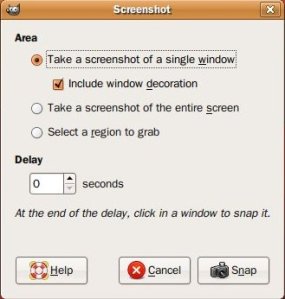
- Select options and delaying time.
- Select Snap to start capturing.
- You have captured an image.
Note:
- This is not the fastest way to capture image. Your Print Screen button will do a better job unless you want to edit the image in GIMP right after it’s taken.
- The third option of taking a snapshot of a selected region did not work for me even after I chose the region. Try it and let me know if it works for you.
Resizing Images
- Have your image ready.
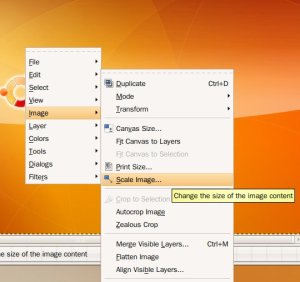
- On the Menu bar, select Image -> Scale Image. Alternatively, you can right click on the image and the Menu options will appear as well.
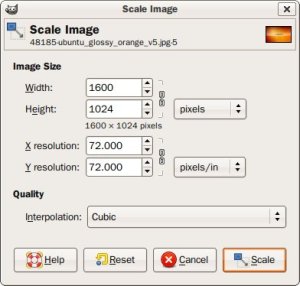
- Select your options.
- Click Scale.
- You have resized the image.
Note:
- Notice the Chain in the dialog box. If the chain is connected, that means the picture will be resize proportionally – when you change either the width or height, the other changes accordingly to maintain the proportion of the image.
- Choose Percent for unit if you just want to shrink the image, by half (50%) for instance, or do not know your desire image size in pixel.
Cropping Image
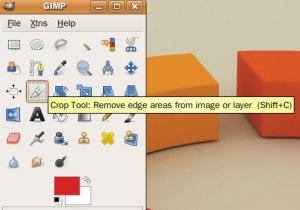
- Choose the Crop tool
- Choose the region that you want to crop. I chose the Ubuntu Logo in this image.
- Double click or hit Enter to execute. Below is the result.
- You have cropped the image.
Converting Image
- Have your file ready.
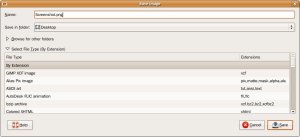
- Choose File -> Save as
- Expand Select File Type (by Extension) and choose your desire file type.
- Select Save.
- Your new file is the converted file.
Note:
- In fact, you will be requested to export your file when the file type is change. Exporting image will not change the original image but only create a new image with a different file type.
- I like this a lot because I can convert to many different types but I can only convert one file at a time. However, I also needed to edit the image, which resulted in loading GIMP – might as well use it for conversion.
Conclusion
I just discovered that WordPress.com provides a 3GB online storage and allows me to upload .png images. So…no comment.
Anyway, how is this tutorial? Please let me know in the comment sections. Thank you.
Filed under: Ubuntu | Tagged: capture, convert, crop, Editing Images, GIMP, Howto, Images, resize |




Thank you for sharing this informative
information…. 🙂 Great website keep
up the great work… 😉
Here is a couple of custom image
headers I did with Gimp…
Link»Custom Header Theme Voting Is Now Open
P.s. I discovered your blog through my stats
someone click on my link in the “Possibly related posts:”
Titled “Gimp Photo Editor”
Really impressed with your suggestion about cropping image in ubuntu.
[…] Capturing, Resizing, Cropping and Converting Images with GIMP … May 16, 2008 … Capturing, Resizing, Cropping and Converting Images with GIMP Image Editor. Posted on May 16, … […]