MC/Serviceguard Cluster on HP-UX 11.31
HP Serviceguard is specialized software for protecting mission-critical applications from a wide variety of hardware and software failures. With Serviceguard, multiple servers (nodes) and/or server partitions are organized into an enterprise cluster that delivers highly available application services to LAN-attached clients. HP Serviceguard monitors the health of each node and rapidly responds to failures in a way that minimizes or eliminates application downtime.
This article describes the installation steps for a MC/Serviceguard Cluster Installation on two HP-UX Servers.
Environment:
Server 1:
Hardware: HP Integrity rx4640
OS: HP-UX B.11.31
Servername: boston.vogtnet.com
Stationary IP: 172.16.18.30 (lan0)
Heartbeat IP: 10.10.1.30 (lan1)
Standby: (lan2)
Lock Disk: VG: /dev/vglock
PV: /dev/disk/disk12
Server 2:
Hardware: HP Integrity rx4640
OS: HP-UX B.11.31
Servername: denver.vogtnet.com
Stationary IP: 172.16.18.31 (lan0)
Heartbeat IP: 10.10.1.31 (lan1)
Standby: (lan2)
Lock Disk: VG: /dev/vglock
PV: /dev/disk/disk12
Storage:
HP Enterprise Virtual Array EVA8000 SAN
Cluster Installation Steps
1. Configure /etc/hosts
-> on boston.vogtnet.com:
# vi /etc/hosts
—————————————-
# boston
172.16.18.30 boston.vogtnet.com boston
10.10.1.30 boston.vogtnet.com boston
127.0.0.1 localhost loopback
# denver
172.16.18.31 denver.vogtnet.com denver
10.10.1.31 denver.vogtnet.com denver
—————————————-
-> on denver.vogtnet.com
# vi /etc/hosts
—————————————-
# denver
172.16.18.31 denver.vogtnet.com denver
10.10.1.31 denver.vogtnet.com denver
127.0.0.1 localhost loopback
# boston
172.16.18.30 boston.vogtnet.com boston
10.10.1.30 boston.vogtnet.com boston
—————————————-
2. Set $SGCONF (on both nodes)
# vi ~/.profile
—————————————-
SGCONF=/etc/cmcluster
export SGCONF
—————————————-
# echo $SGCONF
/etc/cmcluster
3. Configure ~/.rhosts (for rcp, don’t use in secure envs)
-> on boston.vogtnet.com
# cat ~/.rhosts
denver root
-> on denver.vogtnet.com
# cat ~/.rhosts
boston root
4. Create the $SGCONF/cmclnodelist
(every node in the cluster must be listed in this file)
# vi $SGCONF/cmclnodelist
—————————————-
boston root
denver root
—————————————-
#rcp cmclnodelist denver:/etc/cmcluster/
5. Configure Heartbeat IP (lan1)
-> on boston.vogtnet.com
# vi /etc/rc.config.d/netconf
—————————————-
INTERFACE_NAME[1]=”lan1″
IP_ADDRESS[1]=”10.10.1.30″
SUBNET_MASK[1]=”255.255.255.0″
BROADCAST_ADDRESS[1]=””
INTERFACE_STATE[1]=””
DHCP_ENABLE[1]=0
INTERFACE_MODULES[1]=””
—————————————-
-> on denver.vogtnet.com
# vi /etc/rc.config.d/netconf
—————————————-
INTERFACE_NAME[1]=”lan1″
IP_ADDRESS[1]=”10.10.1.31″
SUBNET_MASK[1]=”255.255.255.0″
BROADCAST_ADDRESS[1]=””
INTERFACE_STATE[1]=””
DHCP_ENABLE[1]=0
INTERFACE_MODULES[1]=””
—————————————-
Restart Network:
# /sbin/init.d/net stop
# /sbin/init.d/net stop
# ifconfig lan1
lan1: flags=1843<UP,BROADCAST,RUNNING,MULTICAST,CKO>
inet 10.10.1.30 netmask ffffff00 broadcast 10.10.1.255
6. Disable the Auto Activation of LVM Volume Groups (on bot nodes)
# vi /etc/lvmrc
—————————————-
AUTO_VG_ACTIVATE=0
—————————————-
7. Lock Disk
( The lock disk is not dedicated for use as the cluster lock; the disk can be
employed as part of a normal volume group with user data on it. The
cluster lock volume group and physical volume names are identified in
the cluster configuration file. )
However, in this cluster we use a dedicated Lock Volume Group so we are sure this VG will never be deleted.
As soon as this VG is registered as lock disk in the cluster configuration, it will be automatically marked as cluster aware.
Create a LUN on the EVA and present it to boston and denver.
boston.vogtnet.com:
# ioscan -N -fnC disk
disk 12 64000/0xfa00/0x7 esdisk CLAIMED DEVICE HP HSV210
/dev/disk/disk12 /dev/rdisk/disk12
# mkdir /dev/vglock
# mknod /dev/vglock/group c 64 0x010000
# ll /dev/vglock
crw-r–r– 1 root sys 64 0x010000 Jul 31 14:42 group
# pvcreate -f /dev/rdisk/disk12
Physical volume “/dev/rdisk/disk12” has been successfully created.
// Create the VG with the HP-UX 11.31 agile Multipathing instead of LVM Alternate Paths.
# vgcreate /dev/vglock /dev/disk/disk12
Volume group “/dev/vglock” has been successfully created.
Volume Group configuration for /dev/vglock has been saved in /etc/lvmconf/vglock.conf
# strings /etc/lvmtab
/dev/vglock
/dev/disk/disk12
# vgexport -v -p -s -m vglock.map /dev/vglock
# rcp vglock.map denver:/
denver.vogtnet.com:
# mkdir /dev/vglock
# mknod /dev/vglock/group c 64 0x010000
# vgimport -v -s -m vglock.map vglock
–> Agile Multipathing of HP-UX 11.31 is not used by default after import (HP-UX 11.31 Bug ?!). The volume group uses alternate LVM Paths.
Solution:
# vgchange -a y vglock
// Remove Alternate Paths
# vgreduce vglock /dev/dsk/c16t0d1 /dev/dsk/c14t0d1 /dev/dsk/c18t0d1 /dev/dsk/c12t0d1 /dev/dsk/c8t0d1 /dev/dsk/c10t0d1 /dev/dsk/c6t0d1
// Add agile Path
# vgextend /dev/vglock /dev/disk/disk12
// Remove Primary Path
# vgreduce vglock /dev/dsk/c4t0d1
Device file path “/dev/dsk/c4t0d1” is an primary link.
Removing primary link and switching to an alternate link.
Volume group “vglock” has been successfully reduced.
Volume Group configuration for /dev/vglock has been saved in /etc/lvmconf/vglock.conf
# strings /etc/lvmtab
/dev/vglock
/dev/disk/disk12
# vgchange -a n vglock
// Backup VG
# vgchange -a r vglock
# vgcfgbackup /dev/vglock
Volume Group configuration for /dev/vglock has been saved in /etc/lvmconf/vglock.conf
# vgchange -a n vglock
8. Create Cluster Config (on boston.vogtnet.com)
# cmquerycl -v -C /etc/cmcluster/cmclconfig.ascii -n boston -n denver
# cd $SGCONF
# cat cmclconfig.ascii | grep -v "^#"
——————————————————————-
CLUSTER_NAME cluster1
FIRST_CLUSTER_LOCK_VG /dev/vglock
NODE_NAME denver
NETWORK_INTERFACE lan0
HEARTBEAT_IP 172.16.18.31
NETWORK_INTERFACE lan2
NETWORK_INTERFACE lan1
STATIONARY_IP 10.10.1.31
FIRST_CLUSTER_LOCK_PV /dev/dsk/c16t0d1
NODE_NAME boston
NETWORK_INTERFACE lan0
HEARTBEAT_IP 172.16.18.30
NETWORK_INTERFACE lan2
NETWORK_INTERFACE lan1
STATIONARY_IP 10.10.1.30
FIRST_CLUSTER_LOCK_PV /dev/disk/disk12
HEARTBEAT_INTERVAL 1000000
NODE_TIMEOUT 2000000
AUTO_START_TIMEOUT 600000000
NETWORK_POLLING_INTERVAL 2000000
NETWORK_FAILURE_DETECTION INOUT
MAX_CONFIGURED_PACKAGES 150
VOLUME_GROUP /dev/vglock
———————————————————————————–
-> Change this file to:
———————————————————————————–
CLUSTER_NAME MCSG_SAP_Cluster
FIRST_CLUSTER_LOCK_VG /dev/vglock
NODE_NAME denver
NETWORK_INTERFACE lan0
STATIONARY_IP 172.16.18.31
NETWORK_INTERFACE lan2
NETWORK_INTERFACE lan1
HEARTBEAT_IP 10.10.1.31
FIRST_CLUSTER_LOCK_PV /dev/disk/disk12
NODE_NAME boston
NETWORK_INTERFACE lan0
STATIONARY_IP 172.16.18.30
NETWORK_INTERFACE lan2
NETWORK_INTERFACE lan1
HEARTBEAT_IP 10.10.1.30
FIRST_CLUSTER_LOCK_PV /dev/disk/disk12
HEARTBEAT_INTERVAL 1000000
NODE_TIMEOUT 5000000
AUTO_START_TIMEOUT 600000000
NETWORK_POLLING_INTERVAL 2000000
NETWORK_FAILURE_DETECTION INOUT
MAX_CONFIGURED_PACKAGES 15
VOLUME_GROUP /dev/vglock
———————————————————————————–
# cmcheckconf -v -C cmclconfig.ascii
Checking cluster file: cmclconfig.ascii
Checking nodes … Done
Checking existing configuration … Done
Gathering storage information
Found 2 devices on node denver
Found 2 devices on node boston
Analysis of 4 devices should take approximately 1 seconds
0%—-10%—-20%—-30%—-40%—-50%—-60%—-70%—-80%—-90%—-100%
Found 2 volume groups on node denver
Found 2 volume groups on node boston
Analysis of 4 volume groups should take approximately 1 seconds
0%—-10%—-20%—-30%—-40%—-50%—-60%—-70%—-80%—-90%—-100%
Gathering network information
Beginning network probing (this may take a while)
Completed network probing
Checking for inconsistencies
Adding node denver to cluster MCSG_SAP_Cluster
Adding node boston to cluster MCSG_SAP_Cluster
cmcheckconf: Verification completed with no errors found.
Use the cmapplyconf command to apply the configuration.
# cmapplyconf -v -C cmclconfig.ascii
Checking cluster file: cmclconfig.ascii
Checking nodes … Done
Checking existing configuration … Done
Gathering storage information
Found 2 devices on node denver
Found 2 devices on node boston
Analysis of 4 devices should take approximately 1 seconds
0%—-10%—-20%—-30%—-40%—-50%—-60%—-70%—-80%—-90%—-100%
Found 2 volume groups on node denver
Found 2 volume groups on node boston
Analysis of 4 volume groups should take approximately 1 seconds
0%—-10%—-20%—-30%—-40%—-50%—-60%—-70%—-80%—-90%—-100%
Gathering network information
Beginning network probing (this may take a while)
Completed network probing
Checking for inconsistencies
Adding node denver to cluster MCSG_SAP_Cluster
Adding node boston to cluster MCSG_SAP_Cluster
Marking/unmarking volume groups for use in the cluster
Completed the cluster creation
// Deactivate the VG (vglock will be activated from cluster daemon)
# vgchange -a n /dev/vglock
9. Start the Cluster (on boston.vogtnet.com)
# cmruncl -v
cmruncl: Validating network configuration…
cmruncl: Network validation complete
Waiting for cluster to form ….. done
Cluster successfully formed.
Check the syslog files on all nodes in the cluster to verify that no warnings occurred during startup.
# cmviecl -v
MCSG_SAP_Cluster up
NODE STATUS STATE
denver up running
Cluster_Lock_LVM:
VOLUME_GROUP PHYSICAL_VOLUME STATUS
/dev/vglock /dev/disk/disk12 up
Network_Parameters:
INTERFACE STATUS PATH NAME
PRIMARY up 0/2/1/0 lan0
PRIMARY up 0/2/1/1 lan1
STANDBY up 0/3/2/0 lan2
NODE STATUS STATE
boston up running
Cluster_Lock_LVM:
VOLUME_GROUP PHYSICAL_VOLUME STATUS
/dev/vglock /dev/disk/disk12 up
Network_Parameters:
INTERFACE STATUS PATH NAME
PRIMARY up 0/2/1/0 lan0
PRIMARY up 0/2/1/1 lan1
STANDBY up 0/3/2/0 lan2
10. Cluster Startup Shutdown
// Automatic Startup:
/etc/rc.config.d/cmcluster
AUTOSTART_CMCLD=1
// Manuel Startup
# cmruncl -v
// Overview
# cmviewcl -v
// Stop Cluster
# cmhaltcl -v
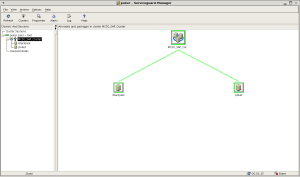
Serviceguard Manager (sgmgr)
Serviceguard Manager is a graphical user interface that provides configuration, monitoring, and administration of Serviceguard. Serviceguard Manager can be installed on HP‑UX, Red Hat Linux, Novell SUSE Linux, Novell Linux Desktop or Microsoft Windows.
More Information:
http://h71028.www7.hp.com/enterprise/cache/4174-0-0-0-121.html?jumpid=reg_R1002_USEN
22 Comments »
Leave a comment
-
Recent
- Linux – Repair Bootloader / Change Boot device path
- Join RedHat Linux to Microsoft Active Directory
- HP-UX Increase Veritas cluster filesystem (CFS) online
- MC/Serviceguard Cluster – Replace Quorum Server
- HP-UX Integrity Virtual Machines (Integrity VM)
- MC/Serviceguard Cluster on HP-UX 11.31
- HP-UX 11i comfortable shell environment
- Xen Guest (DomU) Installation
- Linux SAN Multipathing (HP Storage)
- Linux Network Bonding
- Linux SAN Multipathing
- ASM Disk not shown in Oracle Universal Installer (OUI) or DBCA
-
Links
-
Archives
- December 2011 (1)
- July 2010 (1)
- April 2010 (1)
- August 2009 (1)
- October 2008 (1)
- August 2008 (1)
- May 2008 (1)
- March 2008 (1)
- February 2008 (1)
- December 2007 (1)
- November 2007 (5)
-
Categories
-
RSS
Entries RSS
Comments RSS

Hello Thomas,
Very impressive resume around HP cluster conf.
Thanks a lot.
Regards
Comment by JLB | October 1, 2008 |
Thanks A lot for sharing.Keep continuous
Regards
khalid
Comment by khalid | November 10, 2008 |
Hi
this is nice to see this kind of good document
But i need to add one more thing here
# vgimport -v -s -m vglock.map vglock
This is not correct here
you need to use one “N” option to vgimport to get agile view of disk in 11.31
like vgimport -v -s -N -m mapfile vgname
No need to vgchange and vgreduce and ll
Regards
praveen muttikkal
Comment by Muttikkal | November 16, 2008 |
Hello Thomas,
Awesome work keep it up nice doc.
package creation is missing is it possible to add those steps too in this doc looks incomplete but not necessary.
Thanks
Sam
Comment by Sam | February 17, 2009 |
Great Document!!.
I have been looking for something like this for a looooong time.
Comment by Juan | April 21, 2009 |
Where is your Virtual IP defined
Comment by tim carroll | May 20, 2009 |
Hi,
Great document… thanks a lot
Comment by SUDHAKAR | June 24, 2009 |
Hi Thomas
Very well documented procedures. I tested pkg failover on both nodes as well. But when I shutdown the primary node and restart the cluster, the cluster is not coming up its giving error as follows
cmruncl: Validating network configuration…
cmruncl: Network validation complete
cmruncl: Validating cluster lock disk …. Done
Cannot reach node “node1”.
cmruncl failed: No such file or directory
Comment by Arun | October 25, 2009 |
HI ,
This is really very good document keep going Thams,
Reagrd’s
Ashok.k
Comment by ashok | February 2, 2011 |
Hi,
We need to create cluster for two independent application on same Itanium box. Since these two applications will not be deployed at same time,one application will create cluster.And at later point of time second application will recreate the cluster by append the cluster configuration details to existing (first application) cluster. Is there a way to avoid recreating the cluster again.I mean is there way just to create the second application cluster when the first one is still up and running?Please let me know.
Regards
Shaan
Comment by Shan | March 8, 2011 |
Hi Shan,
Buliding a Serviceguard cluster basically takes two steps, the cluster configuration itself and the clustered applications (called packages) configuration.
In your case you first build up the cluster with a first package (application) and later you can add a second clustered package without changing the MC/Servicegaurd configuration itself.
More information:
http://docs.hp.com/en/ha.html
Hope it helps.
Regards
– Thomas
Comment by thomasvogt | March 9, 2011 |
hi,
this is great steps, i have 2 server RX 7640 i need to make SG-NMAPI Serviceguard Extension for RAC SD Product tow nodes , So Please if you have steps like this .
Regards,
Fawzi
Comment by Fawzi | June 26, 2011 |
good document
Comment by ratnasagargar | August 1, 2011 |
These steps are very useful and i need the configuration setup for creating/moving Packages between the nodes.Thanks in advance.
Comment by Sankar | November 7, 2011 |
Excellant document….Thank you Thomas
Comment by Ninoy | November 8, 2011 |
Very Good Document..Thanks .. Mastan
Comment by Mastan | May 11, 2012 |
Hallo everyone,
I have a service running on HPUX11i in a 2 box HP9000 rp3440 server cluster connected to 2 HP StorageWorks 2405 disk system. The storage disks in the disks system failed and we managed to replace the disks. We need someone who can give us freelance support in restoring the cluster and the storage system. We dont have someone with good enough knowledge in HPUX. We have the archives of the service aaplications that were running in the system. It was operating in a node redundancy configuration.
If Thomas or some else is able to give us support to restore the system, We will appreciate. My contact is msdaudi_at_sahantelecoms.com phone +254722389826 I will be greatful to all and anyone that gives us the support we nee. Also if there is someone who can point me in the right direction for a paid freelance support, I will also deeply appreciate.
Sincerely, Daud Suleiman
Comment by Daud Suleiman | July 5, 2012 |
can you please tel me what is the need of second step…..
Comment by ashish prakash | November 27, 2012 |
hi,
Very useful document….
keep posting this type of document….
Appreciated!!!!!!
Thanks,
Parag Nikam
Comment by Parag Nikam | September 5, 2013 |
Think about what characteristics your current customers have,
and neurosis segun dsm 4 order your mailing lists, homeowners mailing lists and target addresses directly along mailing routes in your area.
Comment by Buzznet.Com | May 28, 2014 |
how do you run IO using the cluster IP address in service guard? what needs to added to the package. It would be great if you add that part on how run a sample dd command to the volumes through the cluster
Comment by Komateswar | October 10, 2014 |
I truly love the information you include on your webpage it truly has helped me out a great deal thanks
Comment by to create high traffic website | March 2, 2016 |