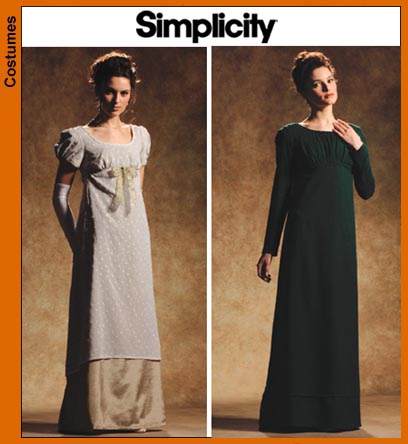
Simplicity Costumes 4055 – Sense and Sensibility Regency Period Gown
This pattern, Simplicity Costumes 4055, although produced by Simplicity, was created by Jennie Chancey of http://sensibility.com/ – a woman after my own heart who in the early days of her business used her children’s nap times to sew! I only left myself a week to make two gowns – one for myself and the other for my friend Mrs R, but luckily I had Julia’s help for a day, for which I was very grateful!
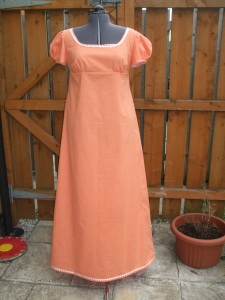
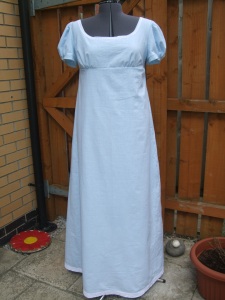
Having studied closely the gowns in some of the television and film interpretations of Austen’s novels, I decided I’d make us both a plain day dress as a starting point. We managed to find some good quality cotton for £1 per metre in Abakhan. The choice of colours was limited, however, so I ended up with pale blue and Mrs R chose orange. These colours were not quite what I had in mind, as I imagined my gown to be ivory or white, but who can refuse 100% cotton at £1 per metre when you need to buy 9 metres?! I chose cotton voile for the lining, so that it would be natural, light and comfortable.
The main issue with making the dresses was that both Mrs R and I wanted the bodice shown for View A (on the left), but the skirt shown for View B. I felt that the skirt shown for view A would be better suited to an evening gown with more luxurious fabrics. I therefore had to adapt the cutting and layout instructions, so here’s what I did in case anyone else was thinking of doing the same:
To make a gown with the bodice shown in View A and the skirt shown in View B (with no overlay), cut the following pattern pieces:
1 – Bodice Front A – Cut 1 on the fold of main fabric and 1 on the fold of lining fabric
2 – Bodice Back A – Cut 2 of main fabric and 2 of lining fabric
3 – Bodice Side Back A – Cut 2 of main fabric and 2 of lining fabric
4 – Sleeve A – Cut 2 of main fabric and 2 of lining fabric*
5 – Sleeve Binding A – Cut 2 of main fabric
6 – Skirt Front – Cut 1 on the fold of main fabric and 1 on the fold of lining fabric
7 – Skirt Back B – Cut 1 on the fold of main fabric
8 – Skirt Back Lining B – Cut 1 on the fold of lining fabric
16 – Skirt Placket B – Cut 1 of main fabric
[17 & 18 – Optional Sash – Cut as instructed on pattern piece]
*For the sleeves, you may want to omit the lining if the opacity of your main fabric is not an issue.
The main difference with the above method is that for the bodice pieces, you will not be cutting contrast fabric as instructed – you will only be cutting main fabric and lining. The instructions for sewing bodice A can be easily adapted for a main fabric and lining: where instructed to sew overlay pieces to main pieces, sew the lining pieces instead. Sew them right sides together so that you can turn your lining to the inside of the garment.
The gowns came together fairly easily and I finished them with a few days to spare. I can’t pretend there were no mistakes at all – but I’m pretty sure most people who sew find themselves unpicking and cursing themselves every once in a while!
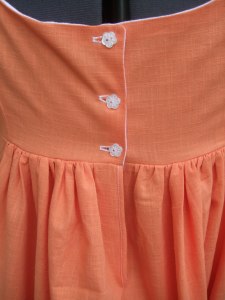
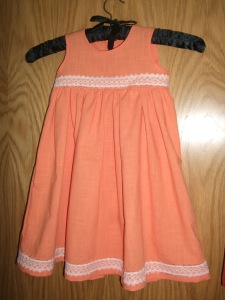
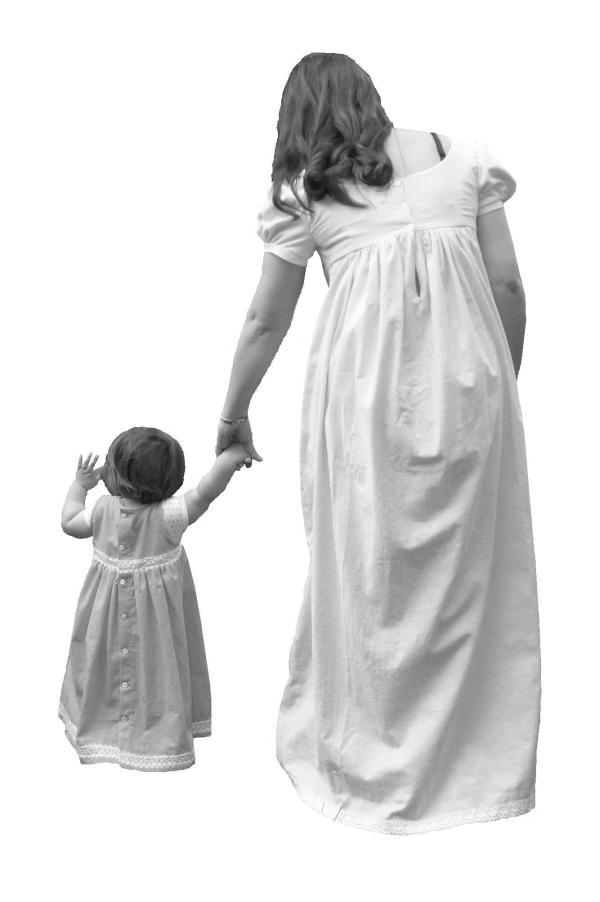
I used the leftover fabric from Mrs R’s dress to make a dress for Little Tweedie to wear. I didn’t use a specific pattern to make her dress, as it was just a simple bodice attached to a gathered skirt. I cut the bodice front on the fold, and cut two back bodices with the intention of having a button fastening at the centre back. I didn’t make facings for the bodices – instead I made bias binding and sewed it around the raw edges of the neck and arm holes. For the skirt front I cut a large rectangle on the fold measuring 45cm wide by 50cm long. For the two skirt backs I cut two rectangles the same size as the front skirt (but not on the fold). I then gathered the skirt front and backs to fit the bodice. I wanted to add puffed sleeves but wasn’t quite sure how to go about it from scratch, and given the time constraints in the end I decided not to bother! The dress was floor length on Little Tweedie and looked very pretty although it was not at all practical for crawling!
On the whole I’m very pleased with how our outfits turned out, but there are a few changes I would like to make for next time:
- I’d like the bodice/skirt seam to sit at least an inch lower, actually under the bust rather than on it
- I’d like more gathering on the bodice front – all across the front and not just a little on each side
- I’d like to have long undersleeves as well as puffed sleeves
- I’d prefer my next version to be in ivory or white fabric, perhaps with a sheer overlay
- I’d like to have piping around the neckline
- I’d like to try attaching braiding to the under-bust seam
- I’d like some white, long gloves to accessorize my dress


Nine yards? Ouch. The dresses do look really good, I bet you’ll wear yours a lot.
LOVE your regency gowns!!!! so beautiful!
They look so gorgeous finished. I still an’t believe just how much fabric was involved in making those. It’s just crazy!
Oh my, that photo of you and Little Tweedie is just precious. Little Tweedie’s dress might be useless for crawling, but it’s perfect for a gorgeous little girl’s dress.
Thank you all for your comments! 🙂
hoping to make a simular thing but with a few more trimmings. you have any advice. also what else did you need to create this i’ve been told iron on things for the hems and collar.. did you need them?
Hi Amy. I used cotton lace ribbon trim for both dresses which I sewed in place. You can use any kind of trim you like: lace, ribbon, broderie anglaise, braiding… You could have multiple rows of it if you wanted. I just kept mine simple to begin with. Let me know how they turn out!