How to make your own pattern for an A-line skirt
In week eight of my City and Guilds Fashion course, our tutor Debbie showed us how to make our own patterns for straight skirts, and for A-Line skirts. As I am making an A-Line skirt for my exam piece, I tested that style of skirt first, and thought I’d show you how to do it yourself.
I had to tweak the instructions and I ended up making two toiles to get it right, so I think that this would be best suited to people who already know how to use commercial patterns. I will explain as best I can how I solved the problems I came across, and I hope the instructions might be of use.
You will need pattern paper, a long ruler, a tape measure, a pencil, some sellotape and some scissors. The pattern paper I have used is dots and crosses paper.
Use the tape measure to get your waist measurement and your hips measurement. Be honest, and if in doubt go bigger rather than smaller!
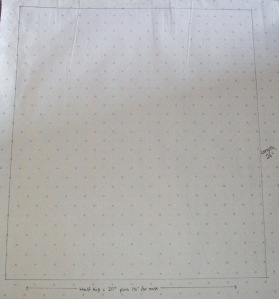
On your pattern paper, draw a rectangle. The width of the rectangle should equal half the width of your hips, plus an extra 1 and a half inches. My hips measure 40”, so the width of my rectangle is 21.5”. The length is the length you would like your finished skirt to be. I went for 24”.
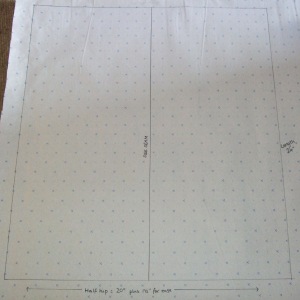
Divide your rectangle in half by drawing a line down the middle. This will be your side seam.
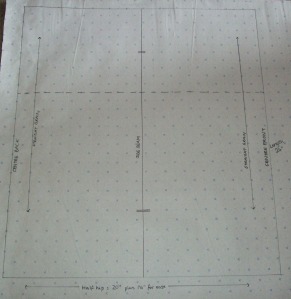
Mark the hipline 22cm from the top. Label the centre back, centre front and grainline. Add markings across the side seam to help you match it back up later.
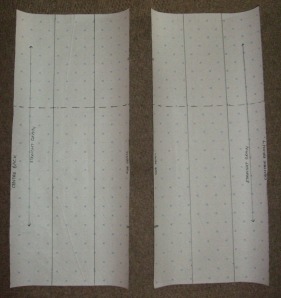
Cut out your pattern piece, and cut into two along the side seam line. Divide each piece into three sections by drawing lines.
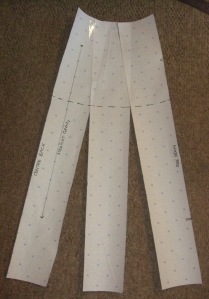
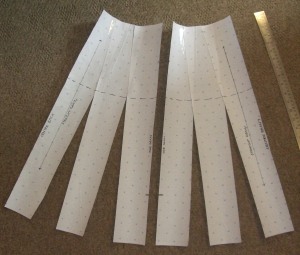
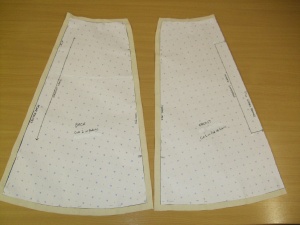
Cut along each dividing line, so that you have three strips each side of the side seam. Overlap the strips at the top and splay them out at the bottom to get the A-line shape. The top edge should measure one quarter of your waist measurement, plus an extra 5/8” for ease. My waist is 31”, so this piece at the top is just under 8”. Sellotape the pieces in place, ensuring the hipline matches up.
Repeat for the other half:
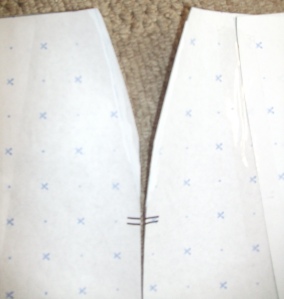
Draw, and then cut out a slight curve at the top of the side seam for your hips (sorry about the blurry photo).
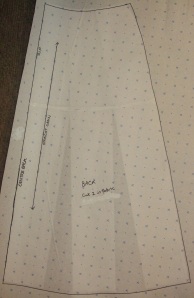
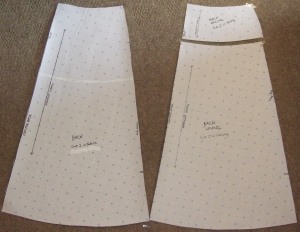
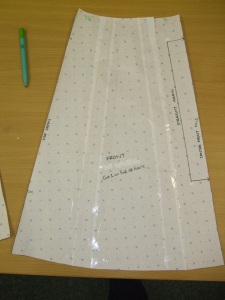
Lay your strips underneath a new piece of pattern paper, and trace over it. Here’s my back pattern piece. I’ve marked the side where the zip will go (an 8” zipper is best for a skirt), added the grainline, and written on the cutting instructions.
Repeat the process for the lining pattern piece. Inserting a yoke into the lining will help to make the skirt more sturdy, so cut the lining pattern piece in two as shown below:
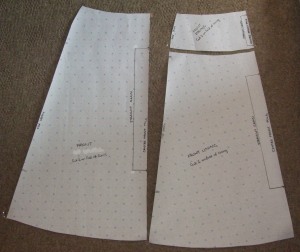
Trace the strips for the front through, remembering that your front pieces will be cut on the fold.
Now you have your pattern pieces, but the seam allowance is not yet included. I would advise making a toile of your skirt, so it’s easier to keep the pattern pieces without seam allowance for now because if you need to adjust them, it’ll be easier.
To make your toile, pin the pattern pieces onto your fabric (I used calico), mark the 5/8” seam allowance around the outside, and cut.
Sew your centre back seams together, stopping part-way to leave space where the zip will go on your final piece. Then sew the side seams together.
Now try your toile on, pinning at the back to give you a more accurate idea of how it will fit. If you’re happy with it, then you can go on to sew the real thing!
What to do if it’s too small…
My toile was a wee bit small, perhaps because I was kidding myself with my measurements! In my experience most commercial patterns are quite generous so I usually breathe in a bit, or round down the measurement, but what I forgot was that this time I was making the pattern, so my measurements really did need to be accurate! Here’s what I did, with Debbie’s help:
First of all, I wanted my skirt to sit 1.5” below my waist, so I cut 1.5” off the top part of the pattern pieces.
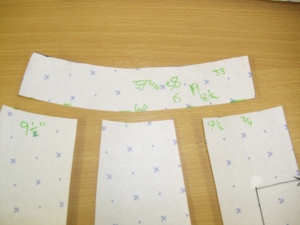
I measured myself at the place where I wanted the waistband to sit (37.75”), and divided by 4, so I knew then that at the top of each pattern piece it would have to measure 9.5”.
I cut each pattern piece into three strips again. I spread them apart so that the top measured 9.5”. I kept the space between each strip roughly the same as I liked the shape of the skirt, but if I had wanted it to be a little more flared, I could have spread the strips further apart at the bottom.
I then added paper into the spaces and taped it all up, ready to make the next toile!
What to do if it’s too big…
My second toile was slightly too big, but it was so easy to resolve the problem. When I tried it on, the side seams sat perfectly, which meant that I didn’t need to adjust the front pattern piece at all. At the back, I took in a little on each side and pinned it, as you can see on the left below. After pinning, I unpinned and drew along the lines so that I could measure how much I had taken the skirt in, as you can see on the right below:
I then cut the pattern piece in two, overlapped by the amount I took in each side, and re-taped it up.
So… making my own pattern for an A-line skirt wasn’t as simple as I thought it might be, but I got it right eventually with a few simple adjustments and Debbie’s help!
I now need to retrace my pattern pieces and add in the seam allowance…
Let me know how you get on if you try this method!
Comments are closed.


Hi, I’ve never seen this method, I like the fact that ti has no horrid darts!
Thanks for your clear instructions……let you know how I get on.
Thanks again :0)
You’re welcome. Good luck!
Hi, thanks for the very clear and nice instructions! I have one question though – what is the difference between the back piece and the front piece? Is it sufficient to make just one pattern piece for both? Thank you very much! Eva
Hi Eva. The pieces, without seam allowance, should be similar enough I think to just use one for front and back, but remember that the front piece would be cut on the fold, and therefore you would only add seam allowance to the side seams. The back piece would be cut as normal and would therefore require seam allowance adding to both side seams and centre back seam. Or, you could cut both front and back on the fold and have a side seam zipper! Up to you!
It is a fab pattern making instruction. This is my first try to make a-line skirt (happy for not having the darts 😊😊). Only question about waistband… how can i attach a waistband? How it should look like an a pattern, please? Thank you