Feeds:
Posts
Comments

Hey everyone,

I’m excited to announce that Earn Your Cheat Day is now called GoHealthyGoFit.com!!! Everything is the same, just an easier to remember name. Make sure to update your RSS feeds and bookmarks. If you haven’t already added us to your RSS feed, now would be a great time to do it! If you have any questions about how to do that, let me know!!!

All the Best,

Andrew

photo provided by flickr user Tyson Cecka

To start it off, there is no one right answer because everyone has different exercise needs. So then how do you know what type of shoe will best fit your needs. Well, I’m gonna break down a few different types of people who work out:

The Walker

Walking shoes, above all else need to be comfortable. On The Walking Site, they describe some key elements for a good walking shoe which include:

  1. A rounded heel
  2. Flexible sole
  3. Lightweight and breathable
  4. A good fit with some room in the toe

Other than the basics, you want to think about how and where you’ll be walking. If you’re walking at night, make sure you get reflective shoes. If you’ll be walking in or around water, ask them to waterproof it.

The Hiker

First and foremost, you should never go hiking in regular tennis shoes. The main reason why occurs on behalf of ankle support. Most tennis shoes are low-rise and don’t provide the ankle support that you need in order to go hiking. The less ankle support, the better chance of getting a sprain. That said, you don’t have to get high top hiking boots for every hike. I personally use a multi-sport pair from Vasque to do everything from casual hikes to hiking Half Dome in Yosemite.

Second, you want to identify what type of hiking you will be doing, whether it’s mountaineering, backpacking, standard hiking, trail running or amphibious hiking. Identify what type of hiker you are and that will really narrow things down for you.

Next, understanding the brands is very important..Hiking and Backpacking has a great article that lists some of the more popular brands of hiking shoes. Everyone knows who the established running shoe manufacturers are, but not many know who are the established hiking manufacturers.

The Weightlifter

I’ll bet you’re saying “Why would you have to have a special shoe for weightlifting?” I’ll tell you why! Running shoes are all about decreasing shock. Weightlifting shoes are all about transmission of power, traction against the floor and control according to Lon Kilgore, Ph.D. and Mark Rippetoe, CSCS in their Weightlifting Shoes 101:

When we lift weights we want two things to happen; (1) all the force our body produces under the bar should contribute to moving the weight and (2) the weight needs to be controlled in a safe manner. If we lift in a running shoe, it’s akin to trying to lift while standing on a giant marshmallow… But in the weight room, shoes should provide for the efficient transmission of power between the bar and the ground…

To be stable and perform optimally, a weightlifting shoe needs to be snug fitting, provide exceptional support, and have a noncompressible wedge sole with neoprene or crepe for traction against the floor.”

So if you are engaging in weightlifting with free weights, don’t make your running shoes be dually designated as your “gym shoes”!

The Runner

Ah yes, the cornucopia of choice! This one can be tough. Questions to ask include: Are you a sprinter (HIIT training)? Are you a long distance runner? Are you a casual jogger? All three of these questions will yield different shoe choices. They’re just like tires on a car. You wouldn’t put Nascar tires on an RV, so give your feet the same type of specialization and attention.

Here’s a two part article on Cool Runnings that can really help you decide what type of running shoe is right for you.

If you’re the typical run-to-exercise person like I am, I would suggest sticking with Nike and New Balance. Why? Well, New Balance provides in depth measuring including the width of your feet and Nike pretty much wrote the book on running shoes. If it ain’t broke, why fix it?

Next time we’ll take a look at different types of footwear for specific sports… so stay tuned!

photos provided by Flickr users h.koppdelaney, suburbanbloke, rich115, ericmcgregor

No one tailgates like ASU!!!

No one tailgates like ASU!!!

Ok, so given the extreme popularity of the last post titled “Tailgating recipes”, I’ve decided to make it a weekly post for the rest of the football season! So here are some more great healthy tailgating recipes:

Tailgating.com Recipes

Well, wouldn’t you know it… there’s a tailgating.com! So I researched the site and picked out the healthiest recipes I could find!

Lobster

Not sure whether or not Lobster is healthy? Check out this article by Articles Alley that quotes the American Heart Association!

“Put in large lobster pot, half gallon of water that has been well salted. Bring water to a boil and place lobster head down, (Mary Tyler Moore will appreciate this!) Cover and boil for 10 to 12 minutes. Shake the lobster, when the antlers come right off, the babies are done!!! Use real butter only for dipping!! This amount of water should cook 15 lobsters, less lobster…..less water!”

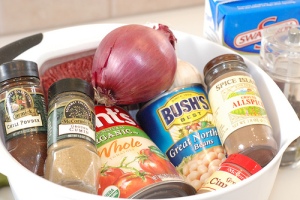
Turkey Chili

Note: Cooking with Olive Oil = awesome!! White beans are a great source of fiber! As for the cheese… we’ll let it slide if you share!!

3 Tbs. Olive Oil
1 each Chopped bell pepper
1 each Chopped Anaheim Pepper
2 each Diced red onions
2 stalks Diced celery
1 Tbs. Chopped garlic
4 cups Cooked white beans
2 cups diced tomatoes with juice
1 lb. Diced cooked turkey meat
1 cup Fresh corn on the cob kernels
1 qt. Chicken stock
2 Tbs. Chili Powder
1 tsp. Cayenne pepper
1 tsp. Black pepper
2 Tbs. Ground cumin
1 cup Sliced green onions
1 cup Grated cheddar cheese

In a thick bottom soup pot add the oil and saute the peppers, onions, celery and garlic for about 3 minutes. Add the beans, tomatoes, turkey, corn kernels and chicken stock. Add the spices and let simmer for about twenty minutes on a medium heat. Remove and top with the green onions and the cheddar cheese.”

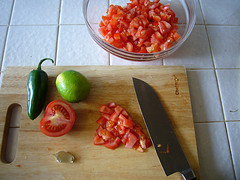
San Diego Fresh Salsa

No tailgate is complete without salsa and chips (try substituting tortilla chips for Pita chips!)

“4 cup chopped, peeled fresh tomatoes
1/2 cup chopped onion
2 to 4 Jalapeno peppers, seeded and finely chopped
1 tbsp. oil
1 tbsp. vinegar
2 garlic cloves minced
1 tsp. cumin
salt to taste

In bowl, combine all ingredients, mix well. Let stand for about 2 hours. Serve at room temperature. Store in refrigerator.

Makes 3-4 cups”

So that should get you started! This weekend is gonna be jam-packed with great college football… enjoy!!

NOTE: SINCE THIS IS AN ONGOING WEEKLY POST, PLEASE FEEL FREE TO SUBMIT YOUR OWN HEALTHY TAILGATING RECIPES FOR NEXT WEEK’S POST!!!

photos by flickr user andrewyang, mjecker, florian

Here’s part two of the top ten tips of avoiding injury at the gym:

6. When you’re exhausted, it’s time to go

This one is actually much more complicated than it seems. There are differing schools of thought. Some say that exhaustion is an “event” while others view it as something that can take place in the middle of the workout, indicative to an endspurt of energy that provides peaks in performance, both of these topics discussed in a great post by The Science of Sport.

The overall point I’m trying to get across is that most people exercise to stay healthy and attain goals. So set those goals ahead of time, recognize if you’ve truly “got nothing left in the tanks” and work towards improving your strength and endurance over the long run, not that day! It’s a journey towards improvement, not something that is defined by a last ditch effort, so to speak.

.

7. Drink lots of water

I don’t need to point to a scholarly journal on this one! It’s simple, dehydration can cause lapses in judgment, lack of focus and an overall decrease in performance. So drink lots of water!

8. Enlist the help of a spotter

If you are weightlifting to increase your strength, you have to increase the weight you’re lifting gradually. Sometimes its hard to gauge just how much should add on to a specific workout. So don’t be shy, people at the gym really don’t mind spotting you on an exercise because it’s an understood part of the gym culture.

9. Maintain a proper diet

The food you put into your body is similar to the oil and gas you put into your car. Since I truly believe that everyone has the makings to be a Ferrari, then you should only fuel your engine with the best. I mean, if you put 89 grade gas into a 575 Maranello, you’re not going to get the best performance. Therefore, if you’ve got a crappy diet, you won’t be able to perform to the ability that you think you should and may try to overcompensate, which can lead to injury.

10. Workout all of your muscles

Although most guys and girls have a set of muscles that they care about aesthetically, it’s important to workout all your muscles. For example, if you don’t workout your lower back, your core won’t be strong enough to do certain exercises. This can lead to unexpected injuries that could be prevented from a balanced workout routine.

photo provided by Flickr user Celeste33

Here’s yet another exercise that is susceptible to bad form and thus opens one to incurring injury. Too often, you’ll see people upping the weight when maintaining good form with a manageable weight is all you need. So here’s a video tutorial on how to do a proper front shoulder raise with dumbbells.

If you tend to hang out at nutritional supplement stores longer than you should like I do, lol, you’ve definitely heard that flaxseed oil is the best source of Omega 3 fatty acids. But is it the best choice? Well, Mark’s Daily Apple posted a great article recently about why flax seed oil can lead to prostate cancer. In the article, Mark mentions that:

My advice would be to use fish oil as your primary omega-3 source and keep the ALA [found in flax seed] on the lower side.

If you’re a man? Particularly an older man? I’d definitely suggest you make fish oil your principal source of omega-3s.”

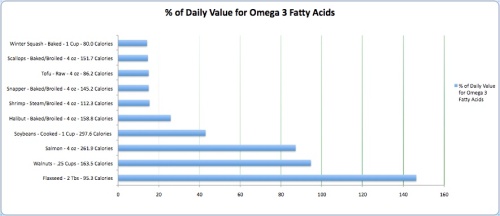
So what are the best, natural food sources that can provide essential Omega 3 fatty acids? Let’s see:

As the above graph shows, a resonable amount of Walnuts and Salmon can provide you with the daily recommended value of Omega 3 fatty acids.

So what about fun recipes that incorporate these foods rich in Omega 3’s.

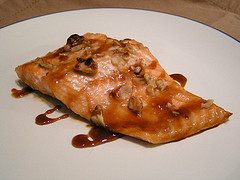
Salmon

  1. Here’s a website called Salmon Recipes, so they’ve obviously got some good stuff in there!
  2. The Food Network has got about 100 salmon recipes, all with a rating system to let you know whether or not it’s easy to make!
  3. Eating Well provides salmon recipes that not only taste great, but are also very healthy!

Walnuts

  1. California Walnuts provides an easy to use system that lets you pick out what meal you would like to cook, with Walnuts, of course!
  2. Ok, so if you don’t usually like the taste of Walnuts, why not try making candied Walnuts as featured in Simply Recipes!
  3. Natural Health found a recipe that’s got Walnuts and Winter Squash, another great source of Omega 3’s!

Don’t forget, if you can’t find the time to make foods rich in Omega 3 fatty acids, you can always supplement. In the Fish Oils section of Healthy Oil Planet, you can read about all of the different benefits you get from taking fish oil supplements.

Those are just a few recipes and ideas that can help you incorporate more Omega 3’s into your diet! Let me know if you have any other recipes!

photo provided by flickr user DawnsRecipes

Hey all,

Here’s a couple of Blog Carnivals that Earn Your Cheat Day has been featured in this week. In case you were wondering, a blog carnival is a blogging event that features multiple blog posts on a specific topic.

Total Mind and Body Fitness Carnival

Another Earn Your Cheat Day article was included in yet another blog carnival. You can find my article as well as a bunch of other great articles at Fit Buff’s Total Mind and Body Fitness Carnival 69. Look under the “Nutrition” section to find a link to my post on Body Fat Percentage.

Weight Management and Fitness Forum

I just wanted to let you guys know about a great blog carnival on Weight Master that Earn Your Cheat Day was included in! Check it out, there are some great articles about weight management and fitness.

Workout Blog Carnival

Here’s a blog carnival by Workoutebooks that focuses on working out tips. They’ve featured Earn Your Cheat Day’s video tutorial on hitting the heavy bag!

Healthbolt Blog Carnival

My article outlining the Lactagen program was just featured in Health Bolt’s new health carnival!

Check these out and let me know what you think!

All the Best,

Andrew

photo provided by flickr user wallyg

I always seem to know when I should have my cheat day, but then I try to fight off the temptation. That’s what I love about this site, it helps remind me that having a cheat day is a good thing.

Meal #1

Protein shake

Meal #2

Smoked Salmon

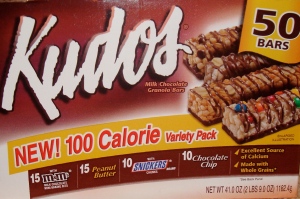
Kudos bar (Yeah, It was wort it)

.

.

.

Meal #3

Garlic and Permesan Pita chips

Guacamole

Meal #4

3 egg whites

Broccoli

1 Kiwi

Meal #5

1 slice of pizza

1 Coca-cola

Dried strawberries

.

The dried strawberries should really be a separate entry because after I got back home from eating the pizza and coke, I really had a craving and probably ate too many strawberries. I think that the dough and cheese in the pizza really threw my metabolism for a loop, seeing as I don’t usually eat either.

This is another great example on why it’s good to have a cheat day. Everyone knows it’s hard to fight those cravings, like the one described above. So by limiting your intake of the foods that stimulate those cravings (you know what those foods are for you) to your cheat day, it keeps you from binge eating everyday. Now, I’m not saying that you should ever binge eat, but at least by eating your 5 to 7 meals a day, 6 days a week, you will take away the temptation and provide yourself with a consistent foundation of health to work on!!

photo provided by flickr user Harris Graber

After one of my last posts when we talked about body fat percentage, I decided to take a look at some of the different, most practical ways to test your body fat percentage to see which was the most accurate.
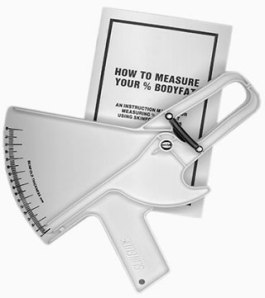
Calipers (A.K.A. Skinfold measurement)

If you buy calipers, this is a body fat percentage test that you can do at home, but I would recommend going to a gym and having a personal trainer do it for you. They will be more accurate most of the time. So that’s what I did. I went to my gym and had a personal trainer measure my body fat using the caliper system

Basically, the caliper measurement system takes readings from various parts of your body (in this case, I was tested on my bicep, tricep, love handles, and on the back [subscapula]) to determine the skinfold thickness when pinched by the calipers. Here’s a great article from ABC Body Building that explains just how to use the caliper system.

Once the measurements are taken, they are plugged into an equation to determine your body fat percentage. This particular measuring technique put my body fat percentage at 13%.

Benefits:  This is a chep, easy to use device for calculating your body fat percentage

Drawbacks:  User error can alter the percentages quite a bit. It’s recommended that you follow the instructions and take multiple readings on each testing site of the body to gain more accuracy.
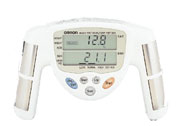
Bioelectrical Impedence Method

This is a more private way to test your body fat percentage that doesn’t require another person to be involved. The device looks almost like a video game controller! Basically, this particular method sends a minute electric current through your body in order to determine your body fat percentage (Don’t worry, it’s completely harmless!!)

Given that the current moves slower through fat as opposed to lean body mass (water, muscle, bone), the device can calculate body fat percentage based on the time it takes for the electric current to travel through the body. In an article by New Fitness:

Impedance is greatest in fat tissue, which contains only 10-20% water, while fat-free mass, which contains 70-75% water, allows the signal to pass much more easily. By using the impedance measurements along with a person’s height and weight, and body type (gender, age, fitness level), it is possible to calculate the percentage of body fat, fat-free mass, hydration level, and other body composition values.

I decided to buy a Bioelectrical Impedence device in order to test my body fat percentage. The device calculated my body fat percentage between 11.2% and 12%, depending on when I tested it. The instructions recommend that you test it when you wake up, 2 hours after breakfast before lunch (I love how they’re basing the schedule on a 3 meal a day plan!!! HA!!!), 2 hours after lunch, and 2 hours after dinner. I tested at all of those times.

Benefits: This is also fairly cheap (GNC sells this device for $39.99, but support your local nutritional supplement stores for everything else please!) and it provides you the privacy of being able to test your body fat percentage in the comfort of your own home without anyone else being present.

Drawbacks: Whether or not you are hydrated has a HUGE outcome on the reading. I decided to make myself dehydrated and when I tested, it told me that I was at 7.4% body fat!!! Wow, if only that were true. My suggestion is to take multiple readings at the times suggested above.
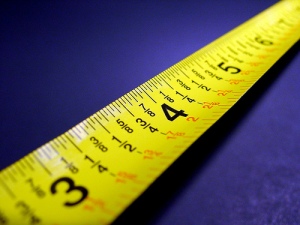
Home body fat percentage test:

Here’s one of the more popular body fat testing techniques. This can be done on a website such as Cholesterol Network and basically utilizes measurements taken from your waist, neck, hips, forearm, and wrist in conjunction with your age, weight and sex. It’s simple, you take the measurements and plug them into the website and based on the information you provide, the website estimates your body fat percentage.

I measured myself and plugged in the information and the website guessed that I had about 12.5% body fat.

Benefits: It’s private, easy to use and you only have to have a tape measure and a scale to do it!

Drawbacks: While it is based off of studies that have been done, it’s still just an estimate. Also, if you are a person that is “skinny, but not fit”, the numbers can be a little off.

Overall, I tested on three different techniques and got a number that was consistent (maybe even accurate?) across the board + or – 1%. That’s pretty good! Of course, the “gold standard” of testing body fat percentage is the underwater weighing method, but other than university labratories, the closest testing center is in San Diego! I’m working on finding a place to test this to validate my findings using the other three methods most commonly used.

photo provided by flickr user Darren Hester