Bell Inequalities

0
  1. Uncertainty relation

We start from Heisenberg uncertainty relation

\Delta x \Delta p_x \geq \frac{\hbar}{2}

This equation mean the following: let we have a statistical ensemble of particles having wavefunction \psi(\overset{\rightarrow}{\bold{r}}). We divide this ensemble into 2 approximately equal parts, A аnd B. In the part A we measure coordinate x, in the part B we measure corresponding impulse projection p_x. The measurements do not give constant values, we obtain some probability distributions. Then we compute standard deviations (square root of variances) \Delta x and \Delta p_x of the distributions. These standard deviations are called uncertainties in Quantum Mechanics (QM). The uncertainty relation states that whatever wavefunction \psi(\overset{\rightarrow}{\bold{r}}) is, the inequality is satisfied.

We can understand the uncertainty relation by two different ways:

  1. Particle has definite coordinate x and impulse projection p_x. The measurement simply shows us these values. We can’t measure x and p_x of a particle at the same time due to the limitations imposed by nature, still the values x and p_x exist independent of measurement.
  2. Particle has no definite coordinate x and impulse projection p_x, only probability distributions. The definite values are created by measurement.

The first point of view belongs to Einstein, the second to Bohr. For a long time people thought that the dispute of Bohr and Einstein is philosophical and one can take any point of view and do QM. If we take Einstein’s point of view, QM is incomplete theory. Bell was the first who understood that that the dispute is not philosophical but physical, and can solved experimentally.

2. Einstein’s argument

Let we have a pair of particles with operators of coordinate and corresponding impulse projection (\hat{x}_1,\hat{p}_{x1}) and (\hat{x}_2,\hat{p}_{x2}). It is easy to show that operators of full impulse projection \widehat{P}_x=\hat{p}_{x1}+\hat{p}_{x2} and coordinate of distance between particles \widehat{X}= \hat{x}_1-\hat{x}_2 commute. It follows from here that there exist a state with definite coordinate of distance between particles X and full impulse projection P_x.

Now, if we measure the coordinate of the first particle x_1, then we know the coordinate of the second particle x_2=x_1-X. Alternatively, if we measure the impulse projection of the first particle p_{x1}, then we know impulse projection of the second particle p_{x2} = P_x - p_{x1}. Since we can set the experiment so that measurement of the first particle has no physical effect on the second particle, it follows from here that the second particle has definite coordinate and impulse projection, irrespective of measurement.

Before we go further let’s think what is the weakness of Einstein’s argument. If we measure the coordinate of the first particle we can’t measure its impulse projection, because these measurements are incompatible. By saying “Alternatively we could measure impulse projection” Einstein is making counterfactual statement. Counterfactual statements are quite innocent in classical physics, and Einstein used them in thought experiments in relativity theory. But in QM one can’t apply counterfactual statements to non-commuting observables such as coordinate and corresponding impulse projection.

3. Singlet Spin State

We will derive Bell inequalities for singlet spin state of spin-1/2 particles. This is two-particle state having the following properties:

  1. The measurement result of spin projection of a particle on any axis is random, the result can be “up”(+) or “down”(-), equally likely.
  2. The total spin of two-particle system is equal to zero, so the measurements of spin projections of individual particles are always opposite, that is if the first particle is measured “up”, the second is measured “down”, and vice versa.

Let’s apply Einstein’s argument to singlet state. Let’s choose some direction of an axis (I’ll call it z axis) and measure spin projection on this axis of the first particle; then we know spin projection of the second particle on z axis which is opposite. But we could choose another direction of z axis; then we would know spin projection of the second particle on another axis, without acting on the second particle. Following Einstein, it follows from here that the second particle has defined values of spin projection on any axis. Since the choice which particle is first and which is second is arbitrary, the result is true for any particle.

4. Bell Inequalities

Now we are ready to derive Bell inequalities. Suppose we have an ensemble of N pairs of particles in singlet state. Let’s choose 3 possible directions of z axis, which we call a,b and c. If each particle have defined values of spin projection on all 3 axes, then our ensemble consists of 8 parts:

# of pairs1-st particle2-nd particle
N_1a+ b+ c+a- b- c-
N_2a+ b+ c-a- b- c+
N_3a+ b- c+a- b+ c-
N_4a+ b- c-a- b+ c+
N_5a- b+ c+a+ b- c-
N_6a- b+ c-a+ b- c+
N_7a- b- c+a+ b+ c-
N_8a- b- c-a+ b+ c+

So the first part consists of N_1 pairs such that measurement of spin projection of the first particle on all 3 axes gives “up” (+), and so on.

Now let us ask, what is the probability that in an arbitrary chosen pair the spin projection of the first particle on a axis is measured “up”(+), and spin projection of the second particle on b axis is measured “up”(+). From the table, these are pairs from the 3rd and 4th groups, so

P(a+,b+)=\frac{N_3+N_4}{N}

Similarly, we could find P(a+,c+)

P(a+,c+)=\frac{N_2+N_4}{N}

and P(c+,b+)

P(c+,b+)=\frac{N_3+N_6}{N}

Now

P(a+,b+)=\frac{N_3+N_4}{N}\leq \frac{N_2+N_4+N_3+N_6}{N}=P(a+,c+)+P(c+,b+)

We derived one of the Bell inequalities

P(a+,b+)\leq P(a+,c+)+P(c+,b+)

which should always be satisfied if Einstein was right.

5. Violation of Bell inequalities

It is easy to show that Bell inequalities can be violated in QM. Let a,b and c axes are lying in the same plane and c axis is lying between a and b axes, in the middle. From QM, the probability that projection of spin of the first particle on axis \overset{\rightarrow}{n_1} is “up” (+) and projection of spin of the second particle on axis \overset{\rightarrow}{n_2} is “up” (+) in singlet state is

P(\overset{\rightarrow}{n_1}, \overset{\rightarrow}{n_2})=\frac{1}{2}\sin^2{\frac{\Theta_{12}}{2}}

where \Theta_{12} is the angle between \overset{\rightarrow}{n_1} and \overset{\rightarrow}{n_2} axes. The Bell inequality then takes the form

\sin^2{\frac{\Theta_{ab}}{2}}\leq 2 \sin^2{\frac{\Theta_{ab}}{4}}

The above inequality is wrong if \Theta_{ab}=\frac{\pi}{2}, for example.


Disclaimer: The derivation of Bell inequalities is taken from Barton Zwiebach’s course of QM MIT 8.05.

Dual boot UEFI Windows 10/Linux Mint 19.3 system

1

After 2 years without Windows, I decided to assemble a desktop with dual Windows 10 / Linux Mint 19.3 boot. I remember making Windows/Ubuntu dual boot system was a pain in the ass since UEFI replaced good old BIOS; but times changed, and I was surprised how smooth and easy is making UEFI dual boot system now.

I used ASUS PRIME 365M-K motherboard for my desktop; I think all modern ASUS motherboards have the same UEFI support.

You install Windows 10 first. I used brand new HDD, and I allocated half of HDD for Windows and left the rest of HDD unpartitioned. Windows created several partitions in the allocated area, the most important for dual boot is EFI partition which Windows labelled “System” or like that; it will be relabelled as “EFI” subsequently by Linux Mint installation program.

Now you install Linux Mint 19.3. When asked how to install Linux Mint, I have chosen default “Install alongside Windows” option. This is a preferable option unless you want a third system on your HDD.

If you google “Dual boot Windows Ubuntu UEFI” now, you probably find recommendations to disable Secure boot and do other strange things. I believe this staff is outdated for modern hardware and latest Ubuntu or Mint versions, and all you need is just run installation programs.

Monica Cellio drama

2

Disclaimer: I don’t care about StackOverflow or StackExchange sites. I can use them for asking or answering questions, but I have no respect for the sites; if some day they disappear, I would not regret.

I quite understand now how this crowdsourcing business works. They created an attractive platform for users to ask questions and to answer questions, without paying a cent to both askers and answerers. Ok, no offence, this is just business. But at least people expect some respect for what they are doing for SO and SE money makers. Question askers expect some respect for their questions; question answerers expect some respect for solving problems of question askers, and moderators expect some respect for what they do to support the platform. No money, just respect; but nobody who works for SO/SE business for free is granted respect.

The Monica Cellio drama has shown that even diamond moderators have no respect from whose who work for money; SO and SE business use it’s users like a toilet paper; and if they think it is profitable to blame a user for what he/she did not do, they will blame. No personal, just business.

Quantum Information and Quantum Noise

0

The term quantum information is really a synonym of the term quantum state, only viewed at a different angle. If a qubit has state

|\psi\rangle =\alpha|0\rangle + \beta|1\rangle

then the complex numbers \alpha and \beta are (up to a global phase) the quantum information stored in the qubit; instead of saying “qubit has state |\psi\rangle“, we can say “qubit store information |\psi\rangle

If we have a single qubit, we can’t pull down quantum information from the qubit into our classical world. We need many qubits storing identical information to measure \alpha and \beta with some precision; the more precision we want, the more qubits we need. We can’t also obtain \alpha and \beta by measuring in a single basis only, we need to measure in two different bases at least.


Pure states

|\psi\rangle =\alpha|0\rangle + \beta|1\rangle

are not the most general qubit’s states. The most general states are called mixed states and are described by density matrices. Density matrix \rho of a pure state |\psi\rangle is

\rho =|\psi\rangle\langle\psi|=\begin{pmatrix}\alpha \\ \beta\end{pmatrix}(\alpha^* \beta^*)=\begin{pmatrix} |\alpha|^2 & \alpha\beta^* \\ \alpha^*\beta &|\beta|^2 \end{pmatrix}

A valid density matrix must be Hermitian, positive semidefinite and have trace 1; vice versa, any Hermitian and positive semidefinite matrix with trace 1 is a valid density matrix.

An example of a density matrix of a non-pure state:

\rho =p_0|0\rangle\langle 0|+p_1|1\rangle\langle 1|=\begin{pmatrix} p_0 & 0 \\ 0 &p_1 \end{pmatrix}

where p_0 and p_1 are real, p_0\geqslant 0, p_1\geqslant 0, and p_0 + p_1 = 1

Non-pure states are also called noisy states. In the classical data processing noise is always bad and we should always get rid of the noise to obtain clean data. As we will see soon, the quantum noise is more interesting.


What does it mean that a qubit has mixed state

\rho =\begin{pmatrix} p_0 & 0 \\ 0 &p_1 \end{pmatrix}

Does it mean that a qubit really has a pure state |0\rangle or |1\rangle, it just happened that we don’t know it exactly and model our incomplete knowledge by probabilities p_0 and p_1 ?

Well, this is subtle. It is possible that a qubit has a pure state that we don’t know exactly, but it is also possible that a qubit has no pure state.

What is important to understand, the above said is not some philosophy. The difference between the two cases has mathematical consequences in quantum mechanics, and in the end of the day the difference can be (statistically) measured.

Let us consider two-qubit EPR state

|\psi_{1}\rangle =\frac{1}{\sqrt{2}}(|00\rangle + |11\rangle)

The density matrix of the state is

\rho_{1} =\frac{1}{2}(|00\rangle + |11\rangle)(\langle 00| + \langle 11|)=\frac{1}{2}\begin{pmatrix} 1 & 0 & 0 & 1 \\  0 & 0 & 0 & 0 \\  0 & 0 & 0 & 0 \\  1 & 0 & 0 & 1 \end{pmatrix}

Each qubit in the pair the has probability 1/2 of being in state |0\rangle or state |1\rangle.

We can construct mixed state with the same property:

\rho_{2} =\frac{1}{2}(|00\rangle\langle 00| + |11\rangle\langle 11|)=\frac{1}{2}\begin{pmatrix} 1 & 0 & 0 & 0 \\  0 & 0 & 0 & 0 \\  0 & 0 & 0 & 0 \\  0 & 0 & 0 & 1 \end{pmatrix}

In both cases the individual qubits have identical noisy states (only the two-qubit states are different). It looks like the EPR state and the second state are statistically identical, but John Bell using clever argument has shown that they are not: EPR state violates so-called Bell’s inequalities while the second state does not.

It is funny that the Bell’s discovery happened about 30 years after the related questions were raised in the famous EPR paper by Einstein himself, and all prominent physicists of the time were aware of the EPR paper; the discovery has waited 30 years for John Bell.

It is common knowledge today that the density matrix formalism mathematically captures physical difference of the states: two states with the same density matrix are physically indistinguishable, and two states with different density matrices are physically distinguishable; it seems like nobody understood this before the Bell’s discovery.


Another term to discuss quantum noise is coherence (the term coherence may have different meanings in physics, be aware). If an initially pure qubit’s state evolves into a noisy state, we say that the qubit has lost coherence. But there are different ways to loose coherence. The coherence of an individual qubit in a multiqubit system may leak into other qubits of the system so that the whole multiqubit system preserves coherence. This is controllable and reversible loss of coherence. If the multiqubit system is quantum computer, this process is an important part of quantum computation. In the quantum algorithms the individual qubits loose coherence at intermediate step and restore coherence (with high probability at least) in the end, before the final measurement.

The main problem with building quantum computers is that coherence uncontrollably leaks into environment, and the whole multiqubit system looses coherence; since we can’t control environment on the quantum level, the loss of coherence is irreversible. This process introduces really bad kind of quantum noise which destroys quantum computation.

On the Delphi *.dcp files

2

A *.dcp file is created when Delphi builds a package. It always bothered me that the default *.dcp file location does not take into account the build configuration. For example, the default location for Win32 platform is $(BDSCOMMONDIR)\DCP; if you build a package in DEBUG configuration and then in RELEASE configuration, the release *.dcp overwrites the debug *.dcp.

But the point is: *.dcp files are needed to develop dependent packages. If you develop a single package, say PackageA, you can forget about the PackageA.dcp file and where it is located; it is simply not needed.

If you develop 2 packages, say PackageA and PackageB, and the PackageB depends on the PackageA (requires PackageA), then you can’t even fully create PackageB without specifying the location of PackageA.dcp file. In this case the solution is: rely on the default *.dcp file location and don’t change it. The build workflow should be as follows:

  • Build PackageA in DEBUG configuration
  • Build PackageB in DEBUG configuration
  • Build PackageA in RELEASE configuration
  • Build PackageB in RELEASE configuration

The release versions of *.dcp files has overwritten the debug versions, but the *.dcp files served their purpose: the compiled debug version of PackageB depends on compiled debug version of PackageA, the compiled release version of PackageB depends on compiled release version of PackageA; the *.dcp files are not needed anymore.

Introduction to Python for Delphi programmers

3

Why Delphi programmer needs Python at all? The main reason is: Python ecosystem is much bigger and much more active than Delphi ecosystem; there are many useful and actively developing projects in Python, much more than you can find in Delphi. Currently I am dabbling in a nice MkDocs documentation generator and planning to use it for documenting my project.

The first thing you need to understand about Python is project isolation. In Delphi you can add units, packages, etc to a project and it does not affect other projects; the Delphi projects are well isolated. If you simply install Python and start developing projects, you quickly discover that there is no project isolation at all; if you add python package for one project, the package becomes available for all projects. It is quite stunning when you encounter it for the first time, but there is a solution: you need a separate Python installation for each project. These separate installations are called environments. The idea is: you have one global Python installation with the sole purpose of creating environments; you never use the global installation for developing projects. When you start a new project you create a new environment, and when later on you add packages to the environment it does not affect global installation or other environments.

There are several ways to create environments, the way I use is Conda package manager.

I am using Python on Linux Mint, and Linux Mint already has Python installed (on Windows you probably need to install Python first). But this Python belongs to the system; the system installed it for its own purposes, and trying to modify the system Python is bad idea. Good news are: Python is Conda installation requirement, and you have it.

Go to Miniconda download page and download Miniconda for your system. There are two installer versions, based on Python 2 and Python 3 – use the one based on Python 3; it does not matter much; by default Python 3 version creates Python 3 environments. Don’t install Anaconda – if you want to play with Anaconda install it later into environment.

Open Terminal window, go to the download folder and run the downloaded installer; accept the default settings and answer “yes” to the installer questions. After the installation is completed close the Terminal window and open it again. Now you have Python installed in your home folder; to check it run which python command:

  serg@TravelMate ~ $ which python
  /home/serg/miniconda3/bin/python

This is global Python installation that will be used to create environments.

To play with MkDocs I’ve created environment named mkdocs:

  conda create -n mkdocs pip

pip is Python package manager that will be included in the new environment. Conda documentation may say that you need not pip because you can install everything using Conda itself; I believe this is too good to be true, and prefer to have pip in any environment, and it is better to install pip right in the environment create command.

Now we need to activate the newly created environment; after the activation check that we have different python installed in the environment:

  serg@TravelMate ~ $ source activate mkdocs
  (mkdocs) serg@TravelMate ~ $ which python
  /home/serg/miniconda3/envs/mkdocs/bin/python

The next step is to upgrade pip in the environment:

  pip install --upgrade pip

and finally install MkDocs package into the environment:

  pip install mkdocs

Check that mkdocs is installed:

  (mkdocs) serg@TravelMate ~ $ mkdocs --version
  mkdocs, version 1.0.2 from /home/serg/miniconda3/envs/mkdocs/lib/python3.7/site-packages/mkdocs (Python 3.7)

If you are not going to do more for now, deactivate the environment

  (mkdocs) serg@TravelMate ~ $ source deactivate
  serg@TravelMate ~ $ 

or just close the Terminal window.

Bitbucket in Russia

0

Bitbucket in Russia fell innocent victim of random wars the russian government is waging in Internet. The connection to Bitbucket was worsening for months and is nearly broken now. I’ve found the currently working solution here (in Russian). It boils down to editing /etc/hosts file, for example

sudo -i nano /etc/hosts

adding the line

104.192.143.1 bitbucket.org

and rebooting.

It worked for me, but I am thinking now of making backup repository on Github.

FastMM4 FullDebugMode Setup Guide

3
  1. Download the latest FastMM4 release; currently it is version 4.992
  2. Copy the precompiled FullDebugMode dll’s from the downloaded archive to the folders where Windows can find them. I recommend to do the following:
    • Manually create ‘c:\Software’ folder (or name the folder as you like);
    • Create ‘c:\Software\DLL’ subfolder (for 32-bit dll’s) and ‘c:\Software\DLL64’ subfolder (for 64-bit dll’s);
    • Add the paths ‘c:\Software\DLL’ and ‘c:\Software\DLL64’ to the system PATH variable (open Start menu, begin typing ‘environment …’ and choose ‘Edit the system environment variables’)
    • Copy ‘FastMM_FullDebugMode.dll’ to ‘c:\Software\DLL’
    • Copy ‘FastMM_FullDebugMode64.dll’ to ‘c:\Software\DLL64’
  3. Create FastMM4 folder; let it be ‘c:\Software\FastMM4’
  4. Copy ‘*.pas’ files and ‘FastMM4Options.inc’ from the main folder of the downloaded archive to ‘c:\Software\FastMM4’; do not copy the subfolders of the archive, they are just not needed here
  5. Enable FullDebugMode (open ‘FastMM4Options.inc’, find {.$define FullDebugMode} entry and remove the dot, {.$define FullDebugMode} –> {$define FullDebugMode})

Now the system-wide setup is completed, and we can test apps.

Delphi 10.2 Tokyo:

  • Create new console project and open ‘Project Options’ dialog;
  • Select ‘All configurations’ target;
  • Add ‘c:\Software\FastMM4’ to the search path and click ‘OK’.
  • Add ‘FastMM4’ as the first item in the ‘uses’ clause and add a simple memory leak
program Project1;
{$APPTYPE CONSOLE}

{$R *.res}

uses
  FastMM4,
  System.SysUtils;

procedure MemLeak;
var P: PByte;

begin
  GetMem(P, 10);
end;

begin
  try
    MemLeak;
  except
    on E: Exception do
      Writeln(E.ClassName, ': ', E.Message);
  end;
//  Readln;
end.

If you run the app you get FastMM4 error message

Lazarus 1.8.4:

  • Unfortunately FastMM4 does not support FPC on Windows and even a simplest code example does not compile.

Linux Mint 18 and UEFI boot manager

1

Recently I was installing Linux Mint on a new Acer laptop with UEFI boot manager. The laptop came with preinstalled “Endless OS” which turned out to be useless because of absence of a package manager. I’ve created Linux Mint 18.3 bootable USB using Rufus, and chosen “GPT partition scheme for UEFI”. I did not make any BIOS changes before installation, and the installation procedure worked fine; I’ve chosen “Erase the entire disk” option during installation. After the installation, when I tried to launch the newly installed OS, I’ve got “No Bootable Device” screen. After several “try and error” iterations I came with the following solution:

  • During installation, do not check “Install 3rd party drivers …” option – the drivers will not be installed anyway; they can be installed later using Driver Manager.
  • After the installation is over, boot into BIOS settings (on Acer laptops by pressing F2 key after switching power on) and set the EFI file created during installation as trusted. The procedure is written in much detail here, only in my case the file turned out to be grubx64.efi
  • The system should boot now, but without some drivers. The worst thing in my case appeared after installing Oracle’s Virtual Box – Virtual Box installs it’s own kernel driver, and Virtual Box did not work because the driver did not work. So you need to enable driver installation now, and it is done by disabling “Secure Boot” option in BIOS.

Crosscompiling with Lazarus 1.8 on Linux Mint 18.3

0

Suppose you installed Lazarus 1.8 on Linux Mint 18.3 as described before and want to build Windows binaries (well we don’t like Windows, but the users do 🙂 ). I’ve found the useful piece of information about crosscompiling here and started to adopt it to my 32-bit Linux system.

The first step is to build and install the crosscompiler. For the demonstration purposes I decided to build Win32 crosscompiler (the Win64 case should not be much different).

Lazarus 1.8 uses FPC version 3.0.4, so to perform the first step open up Terminal and execute following commands:

# Navigate to the fpc source folder.
cd /usr/share/fpcsrc/3.0.4

# Compile the cross-compiler.
sudo make clean all OS_TARGET=win32 CPU_TARGET=i386

# Install the cross-compiler.
sudo make crossinstall OS_TARGET=win32 CPU_TARGET=i386 INSTALL_PREFIX=/usr

# Link the cross-compiler and place the link where Lazarus can see it.
sudo ln -sf /usr/lib/fpc/3.0.4/ppcross386 /usr/bin/ppcross386

Now let us open Lazarus and create a simple GUI project. I dropped a button on the form and written OnClick handler:

procedure TForm1.Button1Click(Sender: TObject);
begin
  ShowMessage('Hello World!');
end;

I created subfolder /Projects/Lazarus/HelloWorldGUI in my home folder and saved the project under the name HelloW. You can build and run the project and see it works.

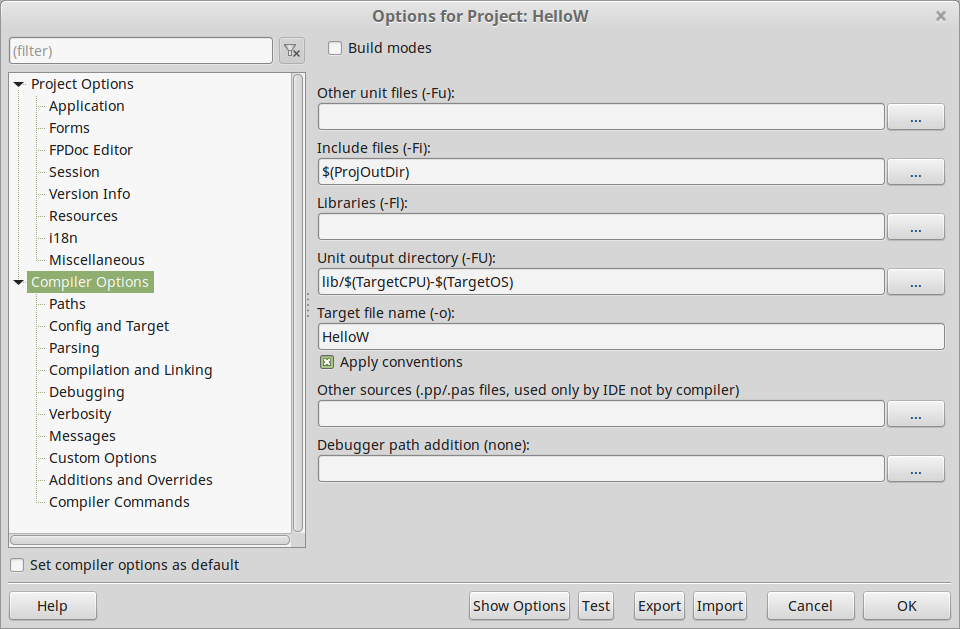
Now time to configure the project for Win32 crosscompiling. Open Project Options dialog (Ctrl-Shift-F11). You should see this:

Options0

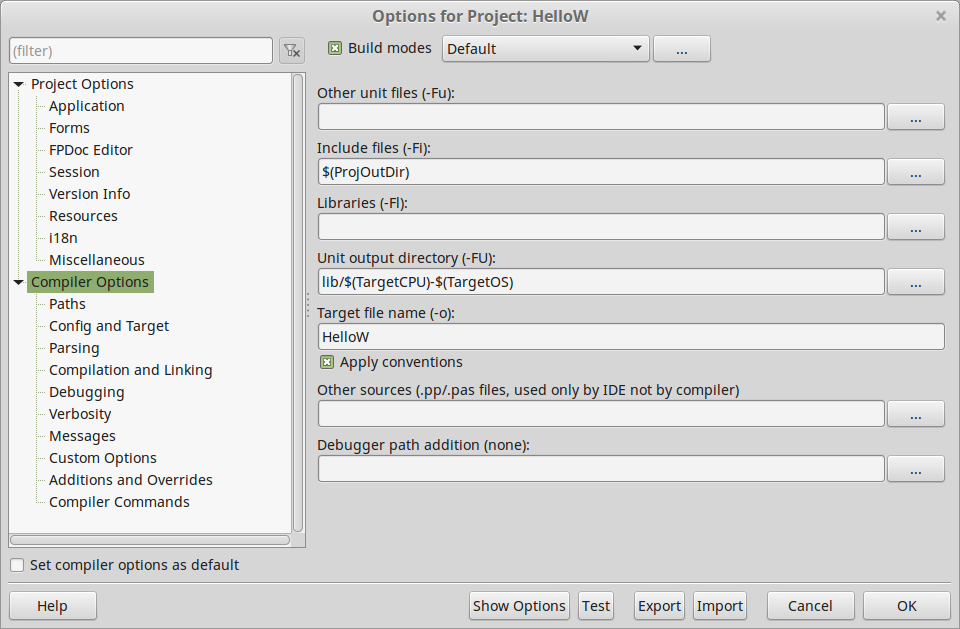
Check Build Modes checkbox:

Options1

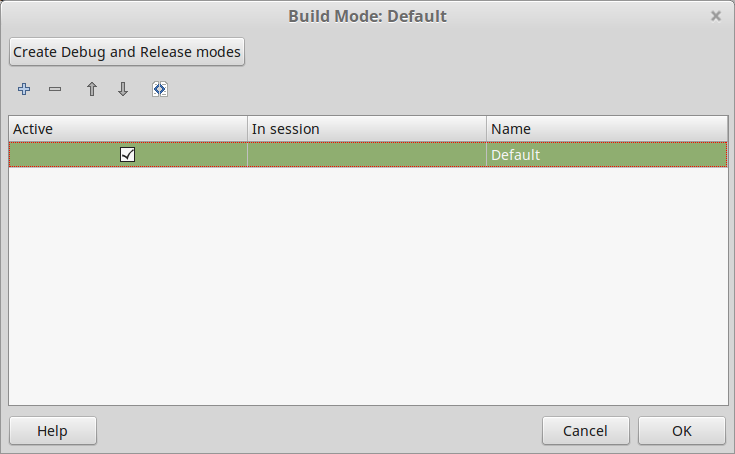
and click the ellipsis button; a new dialog appears:

BuildMode0

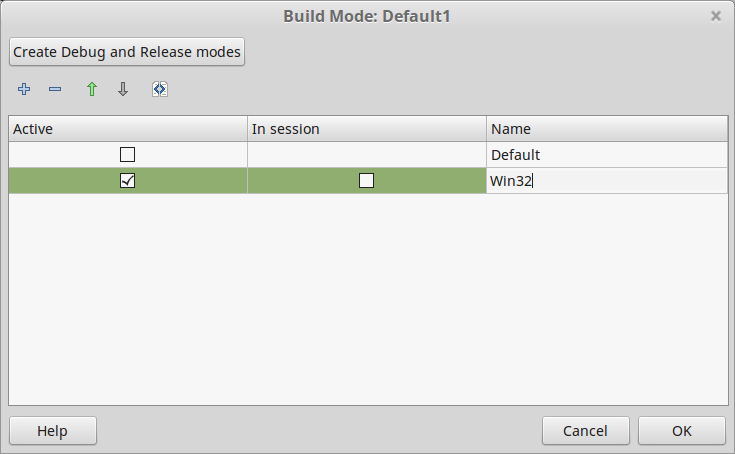
Click plus button to create a new build mode, and name it Win32:

BuildMode1

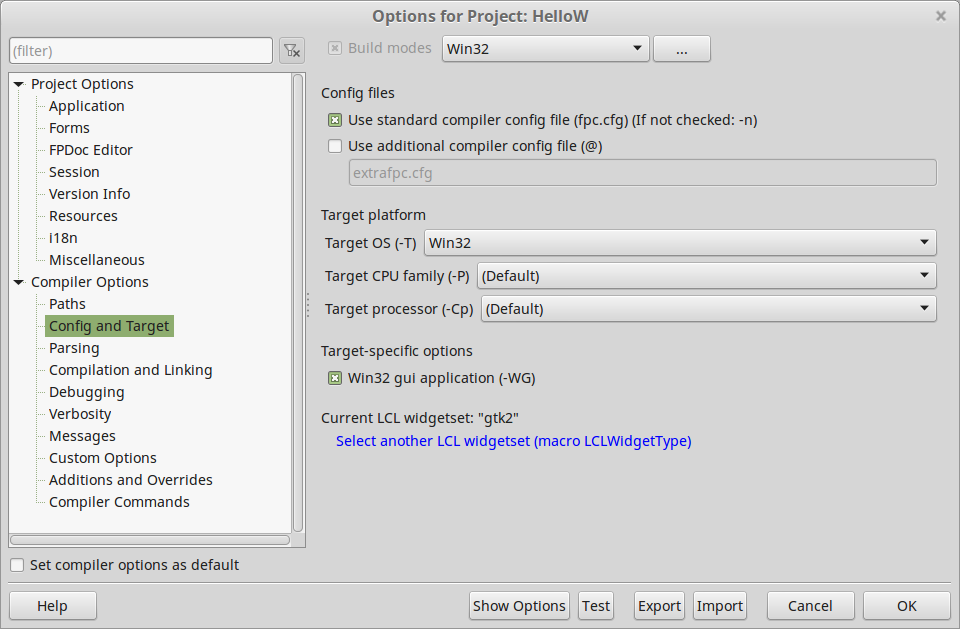
Now we should tell Lazarus to compile Win32 code for this build mode. Select Config and Target on the left panel and select Win32 as target OS:

ConfigWin32

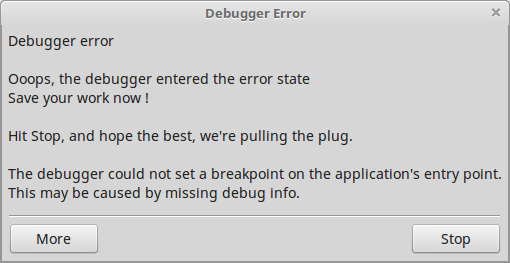
Now you can build the project. I simply clicked green Run button and obtained the warning window:

DebugErr

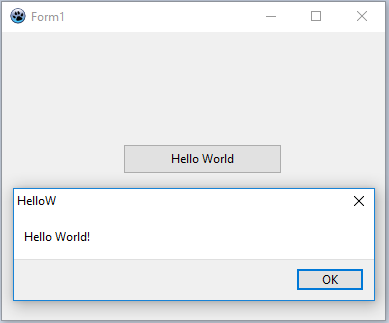
Well I guess one can’t expect to debug Win32 binary on Linux. Still the work was done, and I’ve found HelloW.exe file in the project folder. To be sure I’ve copied the file on 64-bit Windows 10 system, and It Works!

CrossWin32