Linux – Repair Bootloader / Change Boot device path
If a Linux sever is not booting anymore (e.g. HP Proliant server) and on screen the following message appears:
“boot from hard drive c: no operating system”
there is usually a problem with boot disk device path, for example after changing configuration on Raid Controller or moving disks from one disk controller to another etc.
Solution
Boot into Rescue Mode
Just boot from a Linux Live CD/DVD (f.e. RHEL 6 installation DVD) an choose “Rescue Mode”, which gives you a root terminal after boot.
Mount disk devices
Mount all devices (including /dev device, otherwise you run into trouble later !)
Rescue# fdisk -l

Rescue# mount /dev/vg00/lv_root /mnt

Rescue# mount /dev/cciss/c0d0p1 /mnt/boot

Rescue# mount  -o bind /dev /mnt/dev
Chroot into mounted Root environment
Rescue# chroot /mnt
Hint: If you get an error like “/bin/sh: exec format error” you use the wrong LiveCD (e.g. x86 instead of x86_64)
Run Grub CLI
Rescue# grub
grub> root (hd0, 0) -> hd0,0 is actually the first partition on first disk (e.g. /dev/cciss/c0d0p1, basically /boot partition)
grub> setup (hd0)
grub> quit
Change entries in /boot/grub/menu.lst
Last step is to set correct entries in bootloader config file.
vim /boot/grub/menu.lst
splashimage=(hd0,0)/grub/splash.xpm.gz
title Red Hat Enterprise Linux (2.6.32-220.el6.x86_64)
root (hd0,0)
Reboot Server
After the steps above you should be able to boot server again.
Rescue# reboot
Join RedHat Linux to Microsoft Active Directory
Overview
To login as a Microsoft Active Directory (AD) user on a RedHat Linux system the Linux server has to be joined on the AD. There are several ways to do that, one solution is to use Likewise Open as described here.
Likewise is an open-source community project that enables core AD authentication for Linux.
Environment:
– RedHat Linux Enterprise (RHEL) 5.4
– Microsoft Active Directory 2003
– Likewise Open 6.0
Installation
The software is available and downloadable after registration on Likewise website http://www.likewise.com/download/.
# chmod +x LikewiseOpen-6.0.0.8234-linux-x86_64-rpm-installer

# ./LikewiseOpen-6.0.0.8234-linux-x86_64-rpm-installer
Join Linux system to AD Domain
# domainjoin-cli join mydomain.local Administrator
Joining to AD Domain: mydomain.local
With Computer DNS Name: myserver.mydomain.local
Administrator@MYDOMAIN.LOCAL’s password:
Enter Administrator@MYDOMAIN.LOCAL’s password:
SUCCESS
Login as Domain User
With PuTTY (single backslash)
login as: mydomain\domain_user
Using keyboard-interactive authentication.
Password:
/usr/bin/xauth: creating new authority file /home/local/MYDOMAIN/domain_user/.Xauthority
-sh-3.2$
On a Unix command line (double backslash)
$ ssh -l mydomain\\domain_user myserver.mydomain.local
-sh-3.2$ whoami
MYDOMAIN\domain_user
# domainjoin-cli query
Name = myserver
Domain = MYDOMAIN.LOCAL
Distinguished Name = CN=MYSERVER,CN=Computers,DC=mydomain,DC=local
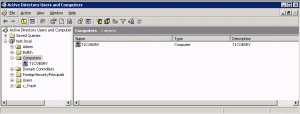
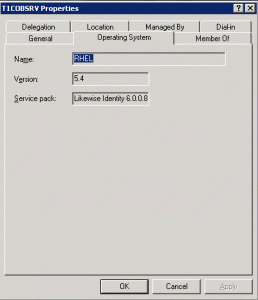
Check Linux server on AD console
Useful information
HP-UX Increase Veritas cluster filesystem (CFS) online
Overview
The following steps are needed to online increase a Veritas CFS (cluster file system) on a HP-UX MC/Serviceguard cluster.
Environment
OS: HP-UX B.11.31 (Cluster: Serviceguard 11.18)
Server: BL860c
Storage: EVA8000
Disk Devices: c1t6d3, c1t6d4
Disk Group: unix5dg
Volume: u05vol
Installed Software
# swlist | grep -i veritas
Base-VxFS-50 B.05.00.01 Veritas File System Bundle 5.0 for HP-UX
Base-VxTools-50 B.05.00.01 VERITAS Infrastructure Bundle 5.0 for HP-UX
Base-VxVM-50 B.05.00.01 Base VERITAS Volume Manager Bundle 5.0 for HP-UX
# swlist | grep -i serviceguard
B5140BA A.11.31.02 Serviceguard NFS Toolkit
T1905CA A.11.18.00 Serviceguard
T8687CB A.02.00 HP Serviceguard Cluster File System for RAC with HAOE
Installed Licenses
# vxdctl license
All features are available:
Mirroring
Root Mirroring
Concatenation
Disk-spanning
Striping
RAID-5
VxSmartSync
Array Snapshot Integration Feature
Clustering-full
FastResync
DGSJ
Site Awareness
DMP (multipath enabled)
CDS
Hardware assisted copy
CFS Cluster Overview
# cfscluster status
Node : node1
Cluster Manager : up
CVM state : up (MASTER)
MOUNT POINT TYPE SHARED VOLUME DISK GROUP STATUS
/u05 regular u05vol unix5dg MOUNTED
Node : node2
Cluster Manager : up
CVM state : up
MOUNT POINT TYPE SHARED VOLUME DISK GROUP STATUS
/u05 regular u05vol unix5dg MOUNTED
# vxdisk list
DEVICE TYPE DISK GROUP STATUS
c1t6d3 auto:cdsdisk unix5disk01 unix5dg online shared
c1t6d4 auto:cdsdisk unix5disk02 unix5dg online shared
Steps to increase filesystem
1. Old disk size
# bdf
/dev/vx/dsk/unix5dg/u05vol 18874368 173433 17532255 1% /u05 (-> size: 18GB, used: 173 MB)
2. Increase LUN size on EVA
c1t6d3: from 10GB to 50GB
c1t6d3: from 10GB to 50GB
3. Rescan devices
# ioscan –fnC disk
4. Find CVM master node
# vxdctl –c mode
master: node1
5. Increase VX-Disks (on CVM master node)
# vxdisk resize c1t6d3

# vxdisk resize c1t6d4
6. Show max size to increase volume
# vxassist –g unix5dg maxgrow u05vol
7. Increase volume (to 90 GB)
# vxassist –g unix5dg growto u05vol 90g
8. Find CFS master node
# fsclustadm –v showprimary /u05
node1
9. Increase filesystem (on CFS master node)
# fsadm –F vxfs –b 90g /u05
10. Show new filesystem size
# bdf
/dev/vx/dsk/unix5dg/u05vol 94371840 173433 94198407 0% /u05 (-> size: 90GB, used: 173 MB)
Useful information
MC/Serviceguard Cluster – Replace Quorum Server
Overview
It is not possible to replace the Quorum Server of a MC/Serviceguard Cluster while the cluster is running.
Get the current cluster configuration
Get the current cluster configuration and save it to an ascii file.
# cmgetconf -v -c cluster1 mycluster.ascii
Edit the config
Edit the config dump.
# vi mycluster.ascii
QS_HOST myquorum-server
QS_POLLING_INTERVAL 1200000000
Stop the Cluster
Stop all packages on the cluster.
# cmhaltpkg -v [pkg_1] [pkg_2]
Stop the whole cluster.
# cmhaltcl -v
Apply the new config
Check and apply the new configuration.
# cmcheckconf -v -C mycluster.ascii

# cmapplyconf -v -C mycluster.ascii
Start the Cluster
# cmruncl -v
Check Cluster
Check if the cluster uses the new Quorum server.
# cmviewcl –v

.

.

Quorum_Server_Status:

    NAME	           STATUS       STATE

    myquorum-server       up           running

.

.
HP-UX Integrity Virtual Machines (Integrity VM)
Overview
HP Integrity Virtual Machines (Integrity VM) is a soft partitioning and virtualization technology, within the
HP Virtual Server Environment, which enables you to create multiple virtual servers or machines with shared resourcing
within a single HP Integrity server or nPartition.
This type of virtualization technology enables you to:
- Maximize server utilization and resource flexibility
- Consolidate enterprise-class servers
- Rapidly deploy new environments
- Improve cost of ownership
- Isolate operating environments
HP Integrity VM provides:
- Software fault and security isolation
- Shared processor and I/O
- Automatic dynamic resource allocation based on demand and entitlement
- Dynamic memory migration
Each virtual machine hosts its own “guest” operating system instance, applications, and users.
HP Integrity Virtual Machines runs on any HP Integrity server (including blades),
and supports the following guests (at this time):
- HP-UX 11i v2 and v3
- Windows Server 2003 (SP1 and SP2
- RHEL AP 4.4, 4.5
- SLES 10 SP1
Installation
1. Install HP Integrity VM
# swinstall -s /mnt/cdrom/hpvm_v350_tapedepot.sd
2. Install HP VM Manager (Plugin to System Mgmt Homepage SMH)
# swinstall -s /mnt/cdrom/vmmgr_a_03_50_07_33_hp_.depot
3. Show installed VM bundles
# swlist | grep -I 'integrity vm'
T2767AC A.03.50 Integrity VM
VMGuestLib A.03.50 Integrity VM Guest Support Libraries
VMKernelSW A.03.50 Integrity VM Kernel Software
VMMGR A.03.50.07.33 HP Integrity VM Manager
VMProvider A.03.50 WBEM Provider for Integrity VM
Create Virtual Machines
# hpvmcreate
- -P name of the VM
- -c number of virtual CPUs
- -O operating system that will be installed on the guest
- -r amount of memory for the VM
- -a adds a device that can be accessed from the guest
- -s sanity-check, just check VM creation, not yet create the VM
Sanity-checks the virtual machine configuration and returns warnings or errors, but does not create the virtual machine (-s)
# hpvmcreate -P vmguest01 -O hpux -c 2 -r 4096 -s
Actually create VM
# hpvmcreate -P vmberlin01 -O hpux -c 2 -r 4096
Status of the VM
# hpvmstatus
Status of VM (details)
# hpvmstatus -v -P vmguest01
Manage Virtual Machines
Start VM
# hpvmstart -P vmguest01
Connect to VM (console)
# hpvmconsole -P vmguest01
Stop VM
# hpvmstop -P vmguest01
Create virtual network switch (connected to host lan0)
# hpvmnet -c -S vsw01 -n 0
Start vSwitch
# hpvmnet -S vsw01 -b
Status of VM Network
# hpvmnet -v
Add a virtual network interface to the VM
# hpvmmodify -P vmberlin01 -a network:lan:0,0,0x020102030405:vswitch:vsw01
Add a virtual disk to the VM (use rlv_vm01 not lv_vm01)
# hpvmmodify -P vmberlin01 -a disk:scsi::lv:/dev/vg_vm/rlv_vm01
Add a virtual DVD drive to the VM (first insert CD/DVD)
# hpvmmodify -P vmberlin01 -a dvd:scsi::disk:/dev/rdsk/c0t0d0
Remove the virtual DVD drive to the VM
hpvmmodify -P vmberlin01 -d dvd:scsi::disk:/dev/rdsk/c0t0d0
Automatically start VM on system boot
# hpvmmodify -P vmberlin01 -B auto
–> VM HP-UX Installation over Ignite Server LAN Boot
Managing VM via System Management Homepage (SMH)
http://server.domain:2301 -> Tools -> Virtual Machine Manager
More Information:
MC/Serviceguard Cluster on HP-UX 11.31
HP Serviceguard is specialized software for protecting mission-critical applications from a wide variety of hardware and software failures. With Serviceguard, multiple servers (nodes) and/or server partitions are organized into an enterprise cluster that delivers highly available application services to LAN-attached clients. HP Serviceguard monitors the health of each node and rapidly responds to failures in a way that minimizes or eliminates application downtime.
This article describes the installation steps for a MC/Serviceguard Cluster Installation on two HP-UX Servers.
Environment:
Server 1:
Hardware: HP Integrity rx4640
OS: HP-UX B.11.31
Servername: boston.vogtnet.com
Stationary IP: 172.16.18.30 (lan0)
Heartbeat IP: 10.10.1.30 (lan1)
Standby: (lan2)
Lock Disk: VG: /dev/vglock
PV: /dev/disk/disk12
Server 2:
Hardware: HP Integrity rx4640
OS: HP-UX B.11.31
Servername: denver.vogtnet.com
Stationary IP: 172.16.18.31 (lan0)
Heartbeat IP: 10.10.1.31 (lan1)
Standby: (lan2)
Lock Disk: VG: /dev/vglock
PV: /dev/disk/disk12
Storage:
HP Enterprise Virtual Array EVA8000 SAN
Cluster Installation Steps
1. Configure /etc/hosts
-> on boston.vogtnet.com:
# vi /etc/hosts
—————————————-
# boston
172.16.18.30 boston.vogtnet.com boston
10.10.1.30 boston.vogtnet.com boston
127.0.0.1 localhost loopback
# denver
172.16.18.31 denver.vogtnet.com denver
10.10.1.31 denver.vogtnet.com denver
—————————————-
-> on denver.vogtnet.com
# vi /etc/hosts
—————————————-
# denver
172.16.18.31 denver.vogtnet.com denver
10.10.1.31 denver.vogtnet.com denver
127.0.0.1 localhost loopback
# boston
172.16.18.30 boston.vogtnet.com boston
10.10.1.30 boston.vogtnet.com boston
—————————————-
2. Set $SGCONF (on both nodes)
# vi ~/.profile
—————————————-
SGCONF=/etc/cmcluster
export SGCONF
—————————————-
# echo $SGCONF
/etc/cmcluster
3. Configure ~/.rhosts (for rcp, don’t use in secure envs)
-> on boston.vogtnet.com
# cat ~/.rhosts
denver root
-> on denver.vogtnet.com
# cat ~/.rhosts
boston root
4. Create the $SGCONF/cmclnodelist
(every node in the cluster must be listed in this file)
# vi $SGCONF/cmclnodelist
—————————————-
boston root
denver root
—————————————-
#rcp cmclnodelist denver:/etc/cmcluster/
5. Configure Heartbeat IP (lan1)
-> on boston.vogtnet.com
# vi /etc/rc.config.d/netconf
—————————————-
INTERFACE_NAME[1]=”lan1″
IP_ADDRESS[1]=”10.10.1.30″
SUBNET_MASK[1]=”255.255.255.0″
BROADCAST_ADDRESS[1]=””
INTERFACE_STATE[1]=””
DHCP_ENABLE[1]=0
INTERFACE_MODULES[1]=””
—————————————-
-> on denver.vogtnet.com
# vi /etc/rc.config.d/netconf
—————————————-
INTERFACE_NAME[1]=”lan1″
IP_ADDRESS[1]=”10.10.1.31″
SUBNET_MASK[1]=”255.255.255.0″
BROADCAST_ADDRESS[1]=””
INTERFACE_STATE[1]=””
DHCP_ENABLE[1]=0
INTERFACE_MODULES[1]=””
—————————————-
Restart Network:
# /sbin/init.d/net stop
# /sbin/init.d/net stop
# ifconfig lan1
lan1: flags=1843<UP,BROADCAST,RUNNING,MULTICAST,CKO>
inet 10.10.1.30 netmask ffffff00 broadcast 10.10.1.255
6. Disable the Auto Activation of LVM Volume Groups (on bot nodes)
# vi /etc/lvmrc
—————————————-
AUTO_VG_ACTIVATE=0
—————————————-
7. Lock Disk
( The lock disk is not dedicated for use as the cluster lock; the disk can be
employed as part of a normal volume group with user data on it. The
cluster lock volume group and physical volume names are identified in
the cluster configuration file. )
However, in this cluster we use a dedicated Lock Volume Group so we are sure this VG will never be deleted.
As soon as this VG is registered as lock disk in the cluster configuration, it will be automatically marked as cluster aware.
Create a LUN on the EVA and present it to boston and denver.
boston.vogtnet.com:
# ioscan -N -fnC disk
disk 12 64000/0xfa00/0x7 esdisk CLAIMED DEVICE HP HSV210
/dev/disk/disk12 /dev/rdisk/disk12
# mkdir /dev/vglock
# mknod /dev/vglock/group c 64 0x010000
# ll /dev/vglock
crw-r–r– 1 root sys 64 0x010000 Jul 31 14:42 group
# pvcreate -f /dev/rdisk/disk12
Physical volume “/dev/rdisk/disk12” has been successfully created.
// Create the VG with the HP-UX 11.31 agile Multipathing instead of LVM Alternate Paths.
# vgcreate /dev/vglock /dev/disk/disk12
Volume group “/dev/vglock” has been successfully created.
Volume Group configuration for /dev/vglock has been saved in /etc/lvmconf/vglock.conf
# strings /etc/lvmtab
/dev/vglock
/dev/disk/disk12
# vgexport -v -p -s -m vglock.map /dev/vglock
# rcp vglock.map denver:/
denver.vogtnet.com:
# mkdir /dev/vglock
# mknod /dev/vglock/group c 64 0x010000
# vgimport -v -s -m vglock.map vglock
–> Agile Multipathing of HP-UX 11.31 is not used by default after import (HP-UX 11.31 Bug ?!). The volume group uses alternate LVM Paths.
Solution:
# vgchange -a y vglock
// Remove Alternate Paths
# vgreduce vglock /dev/dsk/c16t0d1 /dev/dsk/c14t0d1 /dev/dsk/c18t0d1 /dev/dsk/c12t0d1 /dev/dsk/c8t0d1 /dev/dsk/c10t0d1 /dev/dsk/c6t0d1
// Add agile Path
# vgextend /dev/vglock /dev/disk/disk12
// Remove Primary Path
# vgreduce vglock /dev/dsk/c4t0d1
Device file path “/dev/dsk/c4t0d1” is an primary link.
Removing primary link and switching to an alternate link.
Volume group “vglock” has been successfully reduced.
Volume Group configuration for /dev/vglock has been saved in /etc/lvmconf/vglock.conf
# strings /etc/lvmtab
/dev/vglock
/dev/disk/disk12
# vgchange -a n vglock
// Backup VG
# vgchange -a r vglock
# vgcfgbackup /dev/vglock
Volume Group configuration for /dev/vglock has been saved in /etc/lvmconf/vglock.conf
# vgchange -a n vglock
8. Create Cluster Config (on boston.vogtnet.com)
# cmquerycl -v -C /etc/cmcluster/cmclconfig.ascii -n boston -n denver
# cd $SGCONF
# cat cmclconfig.ascii | grep -v "^#"
——————————————————————-
CLUSTER_NAME cluster1
FIRST_CLUSTER_LOCK_VG /dev/vglock
NODE_NAME denver
NETWORK_INTERFACE lan0
HEARTBEAT_IP 172.16.18.31
NETWORK_INTERFACE lan2
NETWORK_INTERFACE lan1
STATIONARY_IP 10.10.1.31
FIRST_CLUSTER_LOCK_PV /dev/dsk/c16t0d1
NODE_NAME boston
NETWORK_INTERFACE lan0
HEARTBEAT_IP 172.16.18.30
NETWORK_INTERFACE lan2
NETWORK_INTERFACE lan1
STATIONARY_IP 10.10.1.30
FIRST_CLUSTER_LOCK_PV /dev/disk/disk12
HEARTBEAT_INTERVAL 1000000
NODE_TIMEOUT 2000000
AUTO_START_TIMEOUT 600000000
NETWORK_POLLING_INTERVAL 2000000
NETWORK_FAILURE_DETECTION INOUT
MAX_CONFIGURED_PACKAGES 150
VOLUME_GROUP /dev/vglock
———————————————————————————–
-> Change this file to:
———————————————————————————–
CLUSTER_NAME MCSG_SAP_Cluster
FIRST_CLUSTER_LOCK_VG /dev/vglock
NODE_NAME denver
NETWORK_INTERFACE lan0
STATIONARY_IP 172.16.18.31
NETWORK_INTERFACE lan2
NETWORK_INTERFACE lan1
HEARTBEAT_IP 10.10.1.31
FIRST_CLUSTER_LOCK_PV /dev/disk/disk12
NODE_NAME boston
NETWORK_INTERFACE lan0
STATIONARY_IP 172.16.18.30
NETWORK_INTERFACE lan2
NETWORK_INTERFACE lan1
HEARTBEAT_IP 10.10.1.30
FIRST_CLUSTER_LOCK_PV /dev/disk/disk12
HEARTBEAT_INTERVAL 1000000
NODE_TIMEOUT 5000000
AUTO_START_TIMEOUT 600000000
NETWORK_POLLING_INTERVAL 2000000
NETWORK_FAILURE_DETECTION INOUT
MAX_CONFIGURED_PACKAGES 15
VOLUME_GROUP /dev/vglock
———————————————————————————–
# cmcheckconf -v -C cmclconfig.ascii
Checking cluster file: cmclconfig.ascii
Checking nodes … Done
Checking existing configuration … Done
Gathering storage information
Found 2 devices on node denver
Found 2 devices on node boston
Analysis of 4 devices should take approximately 1 seconds
0%—-10%—-20%—-30%—-40%—-50%—-60%—-70%—-80%—-90%—-100%
Found 2 volume groups on node denver
Found 2 volume groups on node boston
Analysis of 4 volume groups should take approximately 1 seconds
0%—-10%—-20%—-30%—-40%—-50%—-60%—-70%—-80%—-90%—-100%
Gathering network information
Beginning network probing (this may take a while)
Completed network probing
Checking for inconsistencies
Adding node denver to cluster MCSG_SAP_Cluster
Adding node boston to cluster MCSG_SAP_Cluster
cmcheckconf: Verification completed with no errors found.
Use the cmapplyconf command to apply the configuration.
# cmapplyconf -v -C cmclconfig.ascii
Checking cluster file: cmclconfig.ascii
Checking nodes … Done
Checking existing configuration … Done
Gathering storage information
Found 2 devices on node denver
Found 2 devices on node boston
Analysis of 4 devices should take approximately 1 seconds
0%—-10%—-20%—-30%—-40%—-50%—-60%—-70%—-80%—-90%—-100%
Found 2 volume groups on node denver
Found 2 volume groups on node boston
Analysis of 4 volume groups should take approximately 1 seconds
0%—-10%—-20%—-30%—-40%—-50%—-60%—-70%—-80%—-90%—-100%
Gathering network information
Beginning network probing (this may take a while)
Completed network probing
Checking for inconsistencies
Adding node denver to cluster MCSG_SAP_Cluster
Adding node boston to cluster MCSG_SAP_Cluster
Marking/unmarking volume groups for use in the cluster
Completed the cluster creation
// Deactivate the VG (vglock will be activated from cluster daemon)
# vgchange -a n /dev/vglock
9. Start the Cluster (on boston.vogtnet.com)
# cmruncl -v
cmruncl: Validating network configuration…
cmruncl: Network validation complete
Waiting for cluster to form ….. done
Cluster successfully formed.
Check the syslog files on all nodes in the cluster to verify that no warnings occurred during startup.
# cmviecl -v
MCSG_SAP_Cluster up
NODE STATUS STATE
denver up running
Cluster_Lock_LVM:
VOLUME_GROUP PHYSICAL_VOLUME STATUS
/dev/vglock /dev/disk/disk12 up
Network_Parameters:
INTERFACE STATUS PATH NAME
PRIMARY up 0/2/1/0 lan0
PRIMARY up 0/2/1/1 lan1
STANDBY up 0/3/2/0 lan2
NODE STATUS STATE
boston up running
Cluster_Lock_LVM:
VOLUME_GROUP PHYSICAL_VOLUME STATUS
/dev/vglock /dev/disk/disk12 up
Network_Parameters:
INTERFACE STATUS PATH NAME
PRIMARY up 0/2/1/0 lan0
PRIMARY up 0/2/1/1 lan1
STANDBY up 0/3/2/0 lan2
10. Cluster Startup Shutdown
// Automatic Startup:
/etc/rc.config.d/cmcluster
AUTOSTART_CMCLD=1
// Manuel Startup
# cmruncl -v
// Overview
# cmviewcl -v
// Stop Cluster
# cmhaltcl -v
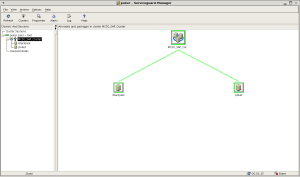
Serviceguard Manager (sgmgr)
Serviceguard Manager is a graphical user interface that provides configuration, monitoring, and administration of Serviceguard. Serviceguard Manager can be installed on HP‑UX, Red Hat Linux, Novell SUSE Linux, Novell Linux Desktop or Microsoft Windows.
More Information:
http://h71028.www7.hp.com/enterprise/cache/4174-0-0-0-121.html?jumpid=reg_R1002_USEN
HP-UX 11i comfortable shell environment
By default the HP-UX 11i (11.23, 11.31) has an inconvenient shell environment. But it is very easy to make the environment usable.
1. Configure shell history and set an assistant command prompt:
# vi ~/.profile
HISTSIZE=1024
HISTFILE=$HOME/.sh_history
PS1=”[`logname`@`hostname` “‘${PWD}]#’
export HISTSIZE HISTFILE PS1
Now the previous commands can be listed with the history command or directly called on the command line with Esc”-“ and Esc”+”.
2. Set the Erase character to Backspace instead of Esc-H (default):
# vi ~/.profile
OLD: stty erase “^H” kill “^U” intr “^C” eof “^D”
NEW: stty erase “^?” kill “^U” intr “^C” eof “^D”
With that environment HP-UX is almost an easy-to-use Unix system ;-))
Xen Guest (DomU) Installation
OS: RedHat Enterprise Linux 5 (RHEL5), should also work on CentOS and Fedora.
There are a few methodes to install a Xen Guest (DomU). In my experience the easiest and smoothest way for such an installation is to use the virt-install script, which is installed by default on RedHat Linux systems.
Xen Packages
First of all, we have to install the Xen Virtualization packages (kernel-xen-devel is optional, but for example needed by HP ProLiant Supprt Pack (PSP)).
# yum install rhn-virtualization-common rhn-virtualization-host kernel-xen-devel virt-manager
On CentOS and Fedora:
# yum groupinstall Virtualization
After that a reboot for loading the Xen kernel is needed.
Guest Installation with virt-install
In the following example the Xen Guest installation is made with a kickstart config file. The kickstart file and the OS binaries are on a provisioning server (cobbler) and reachable over the http protocol.
# virt-install -x ks=http://lungo.pool/cblr/kickstarts/rhel51-x86_64_smbxen/ks.cfg

Would you like a fully virtualized guest (yes or no)?  This will allow you to run unmodified operating systems. no

 What is the name of your virtual machine? smbxen

 How much RAM should be allocated (in megabytes)? 1024

 What would you like to use as the disk (path)? /dev/vg_xen/lv_smbxen

 Would you like to enable graphics support? (yes or no) yes

 What is the install location? http://lungo.pool/cblr/links/rhel51-x86_64/

Starting install...

Retrieving Server...                                            651 kB 00:00

Retrieving vmlinuz...     100% |=========================| 1.8 MB    00:00

Retrieving initrd.img...  100% |=========================| 5.2 MB    00:00

Creating domain...                                                 0 B 00:00

VNC Viewer Free Edition 4.1.2 for X - built Jan 15 2007 10:33:11
At this point a regular RedHat OS installation (graphical installer) starts.
To automatically run the guest after a system (Dom0) reboot, we have to create the following link:
# ln -s /etc/xen/[guest_name] /etc/xen/auto/
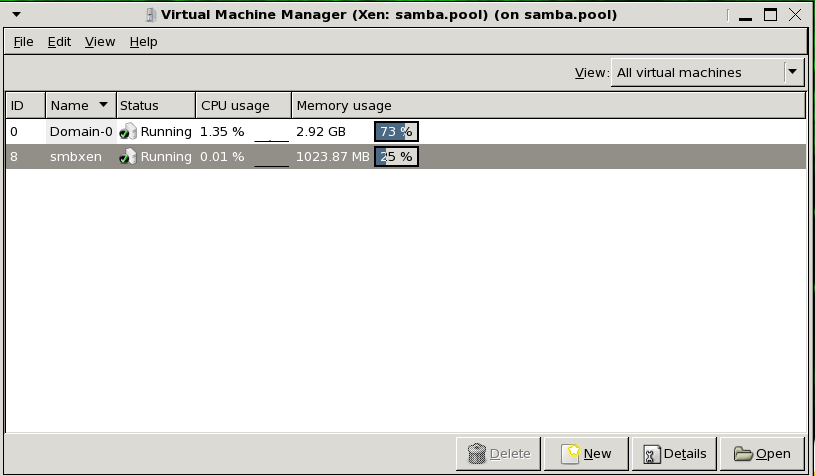
We can manage the Xen Guest with xm commands, virsh commands or virt-manager.
Virt-Manager
# virt-manager
xm commands
List Domains (Xen Guests)
# xm list
Start a Guest
# xm create [guest-config]
Connect to a guest console ( Back: ESC-] (US-keyboard), Ctrl-5 (German keyboard))
# xm console [guest_name]
Shutdown a guest
# xm shutdown [guest_name]
Destroy (Power off) a guest
# xm destroy [guest_name]
Monitor guests
# xm top
virsh commands
# virsh
virsh # help

Commands:

    autostart       autostart a domain
    capabilities    capabilities
    connect         (re)connect to hypervisor
    console         connect to the guest console
    create          create a domain from an XML file
    start           start a (previously defined) inactive domain
    destroy         destroy a domain
    define          define (but don't start) a domain from an XML file
    domid           convert a domain name or UUID to domain id
    domuuid         convert a domain name or id to domain UUID
    dominfo         domain information
    domname         convert a domain id or UUID to domain name
    domstate        domain state
    dumpxml         domain information in XML
    help            print help
    list            list domains
    net-autostart   autostart a network
    net-create      create a network from an XML file
    net-define      define (but don't start) a network from an XML file
    net-destroy     destroy a network
    net-dumpxml     network information in XML
    net-list        list networks
    net-name        convert a network UUID to network name
    net-start       start a (previously defined) inactive network
    net-undefine    undefine an inactive network
    net-uuid        convert a network name to network UUID
    nodeinfo        node information
    quit            quit this interactive terminal
    reboot          reboot a domain
    restore         restore a domain from a saved state in a file
    resume          resume a domain
    save            save a domain state to a file
    schedinfo       show/set scheduler parameters
    dump            dump the core of a domain to a file for analysis
    shutdown        gracefully shutdown a domain
    setmem          change memory allocation
    setmaxmem       change maximum memory limit
    setvcpus        change number of virtual CPUs
    suspend         suspend a domain
    undefine        undefine an inactive domain
    vcpuinfo        domain vcpu information
    vcpupin         control domain vcpu affinity
    version         show version
    vncdisplay      vnc display
    attach-device   attach device from an XML file
    detach-device   detach device from an XML file
    attach-interface attach network interface
    detach-interface detach network interface
    attach-disk     attach disk device
    detach-disk     detach disk device
Exp.: Start a guest with virsh
# virsh start [guest_name]
Linux SAN Multipathing (HP Storage)
Instead of installing the original device-mapper-multipath package there is a simillar package from HP called HPDMmultipath-[version].tar.gz that has already a configuration for HP EVA and XP storage devices. The HPDMmultipath-[version].tar.gz can be downloaded from http://www.hp.com -> Software and Drivers -> Enter Linux as Search String.
 # tar -zxvf HPDMmultipath-3.0.0.tar.gz
 # cd HPDMmultipath-3.0.0/RPMS
 # rpm -ivh HPDMmultipath-tools[version]-[Linux-Version]-[ARCH].rpm

 # vim /etc/multipath.conf

defaults {
        udev_dir                /dev
        polling_interval        10
        selector                "round-robin 0"
        path_grouping_policy    failover
        getuid_callout          "/sbin/scsi_id -g -u -s /block/%n"
        prio_callout            "/bin/true"
        path_checker            tur
        rr_min_io               100
        rr_weight               uniform
        failback                immediate
        no_path_retry           12
        user_friendly_names     yes
}

devnode_blacklist {
        devnode         "^(ram|raw|loop|fd|md|dm-|sr|scd|st)[0-9]*"
        devnode         "^hd[a-z]"
        devnode         "^cciss!c[0-9]d[0-9]*"
}

devices {

device {
        vendor                  "HP|COMPAQ"
        product                 "HSV1[01]1 \(C\)COMPAQ|HSV2[01]0"
        path_grouping_policy    group_by_prio
        getuid_callout          "/sbin/scsi_id -g -u -s /block/%n"
        path_checker            tur
        path_selector           "round-robin 0"
        prio_callout            "/sbin/mpath_prio_alua /dev/%n"
        rr_weight               uniform
        failback                immediate
        hardware_handler        "0"
        no_path_retry           12
}

device {
        vendor                  "HP"
        product                 "OPEN-.*"
        path_grouping_policy    multibus
        getuid_callout          "/sbin/scsi_id -g -u -s /block/%n"
        path_selector           "round-robin 0"
        rr_weight               uniform
        prio_callout            "/bin/true"
        path_checker            tur
        hardware_handler        "0"
        failback                immediate
        no_path_retry           12
}

}
Show paths to an EVA8000 storage array.
# multipath -ll
mpath0 (3600508b4001054a20001100001c70000)
[size=4.0G][features="1 queue_if_no_path"][hwhandler="0"]
\_ round-robin 0 [prio=200][active]
 \_ 0:0:1:1 sdd 8:48   [active][ready]
 \_ 0:0:3:1 sdj 8:144  [active][ready]
 \_ 1:0:2:1 sds 65:32  [active][ready]
 \_ 1:0:3:1 sdv 65:80  [active][ready]
\_ round-robin 0 [prio=40][enabled]
 \_ 0:0:0:1 sda 8:0    [active][ready]
 \_ 0:0:2:1 sdg 8:96   [active][ready]
 \_ 1:0:0:1 sdm 8:192  [active][ready]
 \_ 1:0:1:1 sdp 8:240  [active][ready]
ProLiant Support Pack (PSP)
While installing PSP from HP, unckeck the HBA failover driver in the installation screen, otherwise a new kernel will be installed and the above installed multipathing driver isn’t working correctly anomymore.
Linux Network Bonding
Every system and network administrator is responsible to provide a fast and non interrupted network connection for his users. One step in that direction is the easy to configure and reliable network bonding (also called network trunking) solution for linux systems.
The following configuration example is on a RedHat Enterprise Linux (RHEL) 5 System.
Network Scripts Configuration
mode = 0, load balancing round-robin (default);
miimon=500 (monitor bond all 500ms)
# vim /etc/sysconfig/network-scripts/ifcfg-bond0

DEVICE=bond0

BONDING_OPTS="mode=0 miimon=500"

BOOTPROTO=none

ONBOOT=yes

NETWORK=172.16.15.0

NETMASK=255.255.255.0

IPADDR=172.16.15.12

USERCTL=no
# vim /etc/sysconfig/network-scripts/ifcfg-eth0

DEVICE=eth0

BOOTPROTO=none

ONBOOT=yes

MASTER=bond0

SLAVE=yes

USERCTL=no
# vim /etc/sysconfig/network-scripts/ifcfg-eth1

DEVICE=eth1

BOOTPROTO=none

ONBOOT=yes

MASTER=bond0

SLAVE=yes

USERCTL=no
Load Channel Bonding modul on system boot
# vim /etc/modprobe.conf
alias bond0 bonding
Show Network Configuration
The bond MAC address will be the taken from its first slave device.
# ifconfig
bond0     Link encap:Ethernet  HWaddr 00:0B:CD:E1:7C:B0

inet addr:172.16.15.12  Bcast:172.16.15.255  Mask:255.255.255.0

inet6 addr: fe80::20b:cdff:fee1:7cb0/64 Scope:Link

UP BROADCAST RUNNING MASTER MULTICAST  MTU:1500  Metric:1

RX packets:1150 errors:0 dropped:0 overruns:0 frame:0

TX packets:127 errors:0 dropped:0 overruns:0 carrier:0

collisions:0 txqueuelen:0

RX bytes:168235 (164.2 KiB)  TX bytes:22330 (21.8 KiB)
eth0      Link encap:Ethernet  HWaddr 00:0B:CD:E1:7C:B0

inet6 addr: fe80::20b:cdff:fee1:7cb0/64 Scope:Link

UP BROADCAST RUNNING SLAVE MULTICAST  MTU:1500  Metric:1

RX packets:567 errors:0 dropped:0 overruns:0 frame:0

TX packets:24 errors:0 dropped:0 overruns:0 carrier:0

collisions:0 txqueuelen:1000

RX bytes:84522 (82.5 KiB)  TX bytes:4639 (4.5 KiB)

Interrupt:201
eth1      Link encap:Ethernet  HWaddr 00:0B:CD:E1:7C:B0

inet6 addr: fe80::20b:cdff:fee1:7cb0/64 Scope:Link

UP BROADCAST RUNNING SLAVE MULTICAST  MTU:1500  Metric:1

RX packets:592 errors:0 dropped:0 overruns:0 frame:0

TX packets:113 errors:0 dropped:0 overruns:0 carrier:0

collisions:0 txqueuelen:1000

RX bytes:84307 (82.3 KiB)  TX bytes:19567 (19.1 KiB)

Interrupt:177 Base address:0x4000
Test the Bond
Plug out a network connection.
# tail -f /var/log/messages
kernel: bonding: bond0: link status definitely down for interface eth1, disabling it
Plug in the network connection again.
# tail -f /var/log/messages
kernel: bonding: bond0: link status definitely up for interface eth1.
The bonding module detects a failure in one of the two physical network interfaces configured in the bonding interface and disables the affected interface. After the failed network interface is online again the bonding module automatically re-integrates the interface into the bond. During this network interface failure, the logical network connection was always online and usable for all applications without any interrupts.
-
Recent
- Linux – Repair Bootloader / Change Boot device path
- Join RedHat Linux to Microsoft Active Directory
- HP-UX Increase Veritas cluster filesystem (CFS) online
- MC/Serviceguard Cluster – Replace Quorum Server
- HP-UX Integrity Virtual Machines (Integrity VM)
- MC/Serviceguard Cluster on HP-UX 11.31
- HP-UX 11i comfortable shell environment
- Xen Guest (DomU) Installation
- Linux SAN Multipathing (HP Storage)
- Linux Network Bonding
- Linux SAN Multipathing
- ASM Disk not shown in Oracle Universal Installer (OUI) or DBCA
-
Links
-
Archives
- December 2011 (1)
- July 2010 (1)
- April 2010 (1)
- August 2009 (1)
- October 2008 (1)
- August 2008 (1)
- May 2008 (1)
- March 2008 (1)
- February 2008 (1)
- December 2007 (1)
- November 2007 (5)
-
Categories
-
RSS
Entries RSS
Comments RSS
