Saturday 1 June 2024

With 3 Things: Blues Book {by Mags Woodcock}

Hello, Mags here with you today for another post in the three things challenge. 

You'll have  seen the previous two projects by Autumn and Floss, weren't they fabulous ! I love seeing how different artists use similar supplies to create a project in their own style. As many of you may know, I favour a vintage vibe with my art. This project is no exception. The book and journal Topic is a firm favourite and adding in a hidden element was great fun.


So lets have a look at the supplies I received from PaperArtsy HQ. There is a fabulous stamp set by Lynne Perrella (LPC006), a small stencil (PM015) and a bottle of Shark Mattint (MT04). If you haven't already discovered the Mattints, think coloured Matte Medium, just so incredibly versatile. As soon as I opened the parcel I was a very happy girl, a lovely surprise and right up my street.


My mind started to bubble over with ideas, so many choices and decisions. I've recently started revisiting my love of board books, you know the sort of thing that very small children start with, chunky and sturdy cardboard pages for little hands to hold. I love to repurpose those into art projects. I also adore miniature things, so a mini board book was the planned starting point for this project.

Firstly I wanted to get a feel for the stamps, the size, amount of open space etc. I was hoping to stamp onto vintage book pages, but I needed to find out which ink and papers were the best to combine. Some vintage book pages are fairly rough textured and the ink bleeds. I like Versafine Claire ink pads, as they give great detail to stamped images. You'll see that most of my papers took the ink well without any or too much bleeding. Playing with the stamps beforehand also gave me a stash to work with, and to try things on.


I sorted through my collection of saved board books, but couldn't find one small enough to work with my ideas. So I decided to create my own, in fact I created a prototype using music papers and then another using the end papers from some old books. Both were created using grey board as the base. I have a video on my YouTube channel showing the method I came up with, but you could just use a ready made board book. I decided to leave the binding until the pages were completed.


Once my board book pages were ready, I started creating the grungy papers for the backgrounds. Recently whilst playing with the Mattints, I discovered that they are fabulous for lifting multiple dried on layers of paint from a gel plate. So with this in mind I chose some vintage piano roll paper as my base, I love all the punched holes and random printed dots. I started by using just the Shark Mattint (MT04). I then needed more colours to build up the layers on the plate, so Fresco Finish Chalk Acrylic Blue Bayou (FF206) Glacier Ice (FF132) and Midnight (FF123) came out to play. I didn't over think the process and added very small amounts of paint to the plate before using my brayer to spread it thinly. Picking up a random grungy layer is easy this way. 

Once I had some layers built up on the plate, I added a layer of the Shark Mattint and pressed my vintage paper onto the plate. It's important at this stage to let the Mattint dry fairly well. Test a corner to see if it's picked up the paint, and them peel away. Any remaining prints that were too bright were given a coat of Mattint with my brayer. Even the most striking colours can be given a vintage look by adding a coat of Shark Mattint over the top.


When I had a collection of grungy vintage looking gel prints I picked out my favourites and started to add details. The first print I used the stencil (PM015) and a Micron pen to add the archway, following up with a light inking using a Ranger archival Ink pad (Jet Black) applied with a sponge.The centre of the arch was easy to cut away using a craft knife, leaving an aperture to act as a frame for a stamped image.


For the first hidden part of the project I decided to have the main character from the stamp set hiding in the building. This was fairly easy to achieve. I had stamped her onto vintage book pages, and cut her out. I folded her up and concealed her behind the bottom panel of the stamp. That way when the viewer opens the book at that page she is hidden, but moving the panel downwards reveals her. Again I used a grungy gel print as a background on the page.
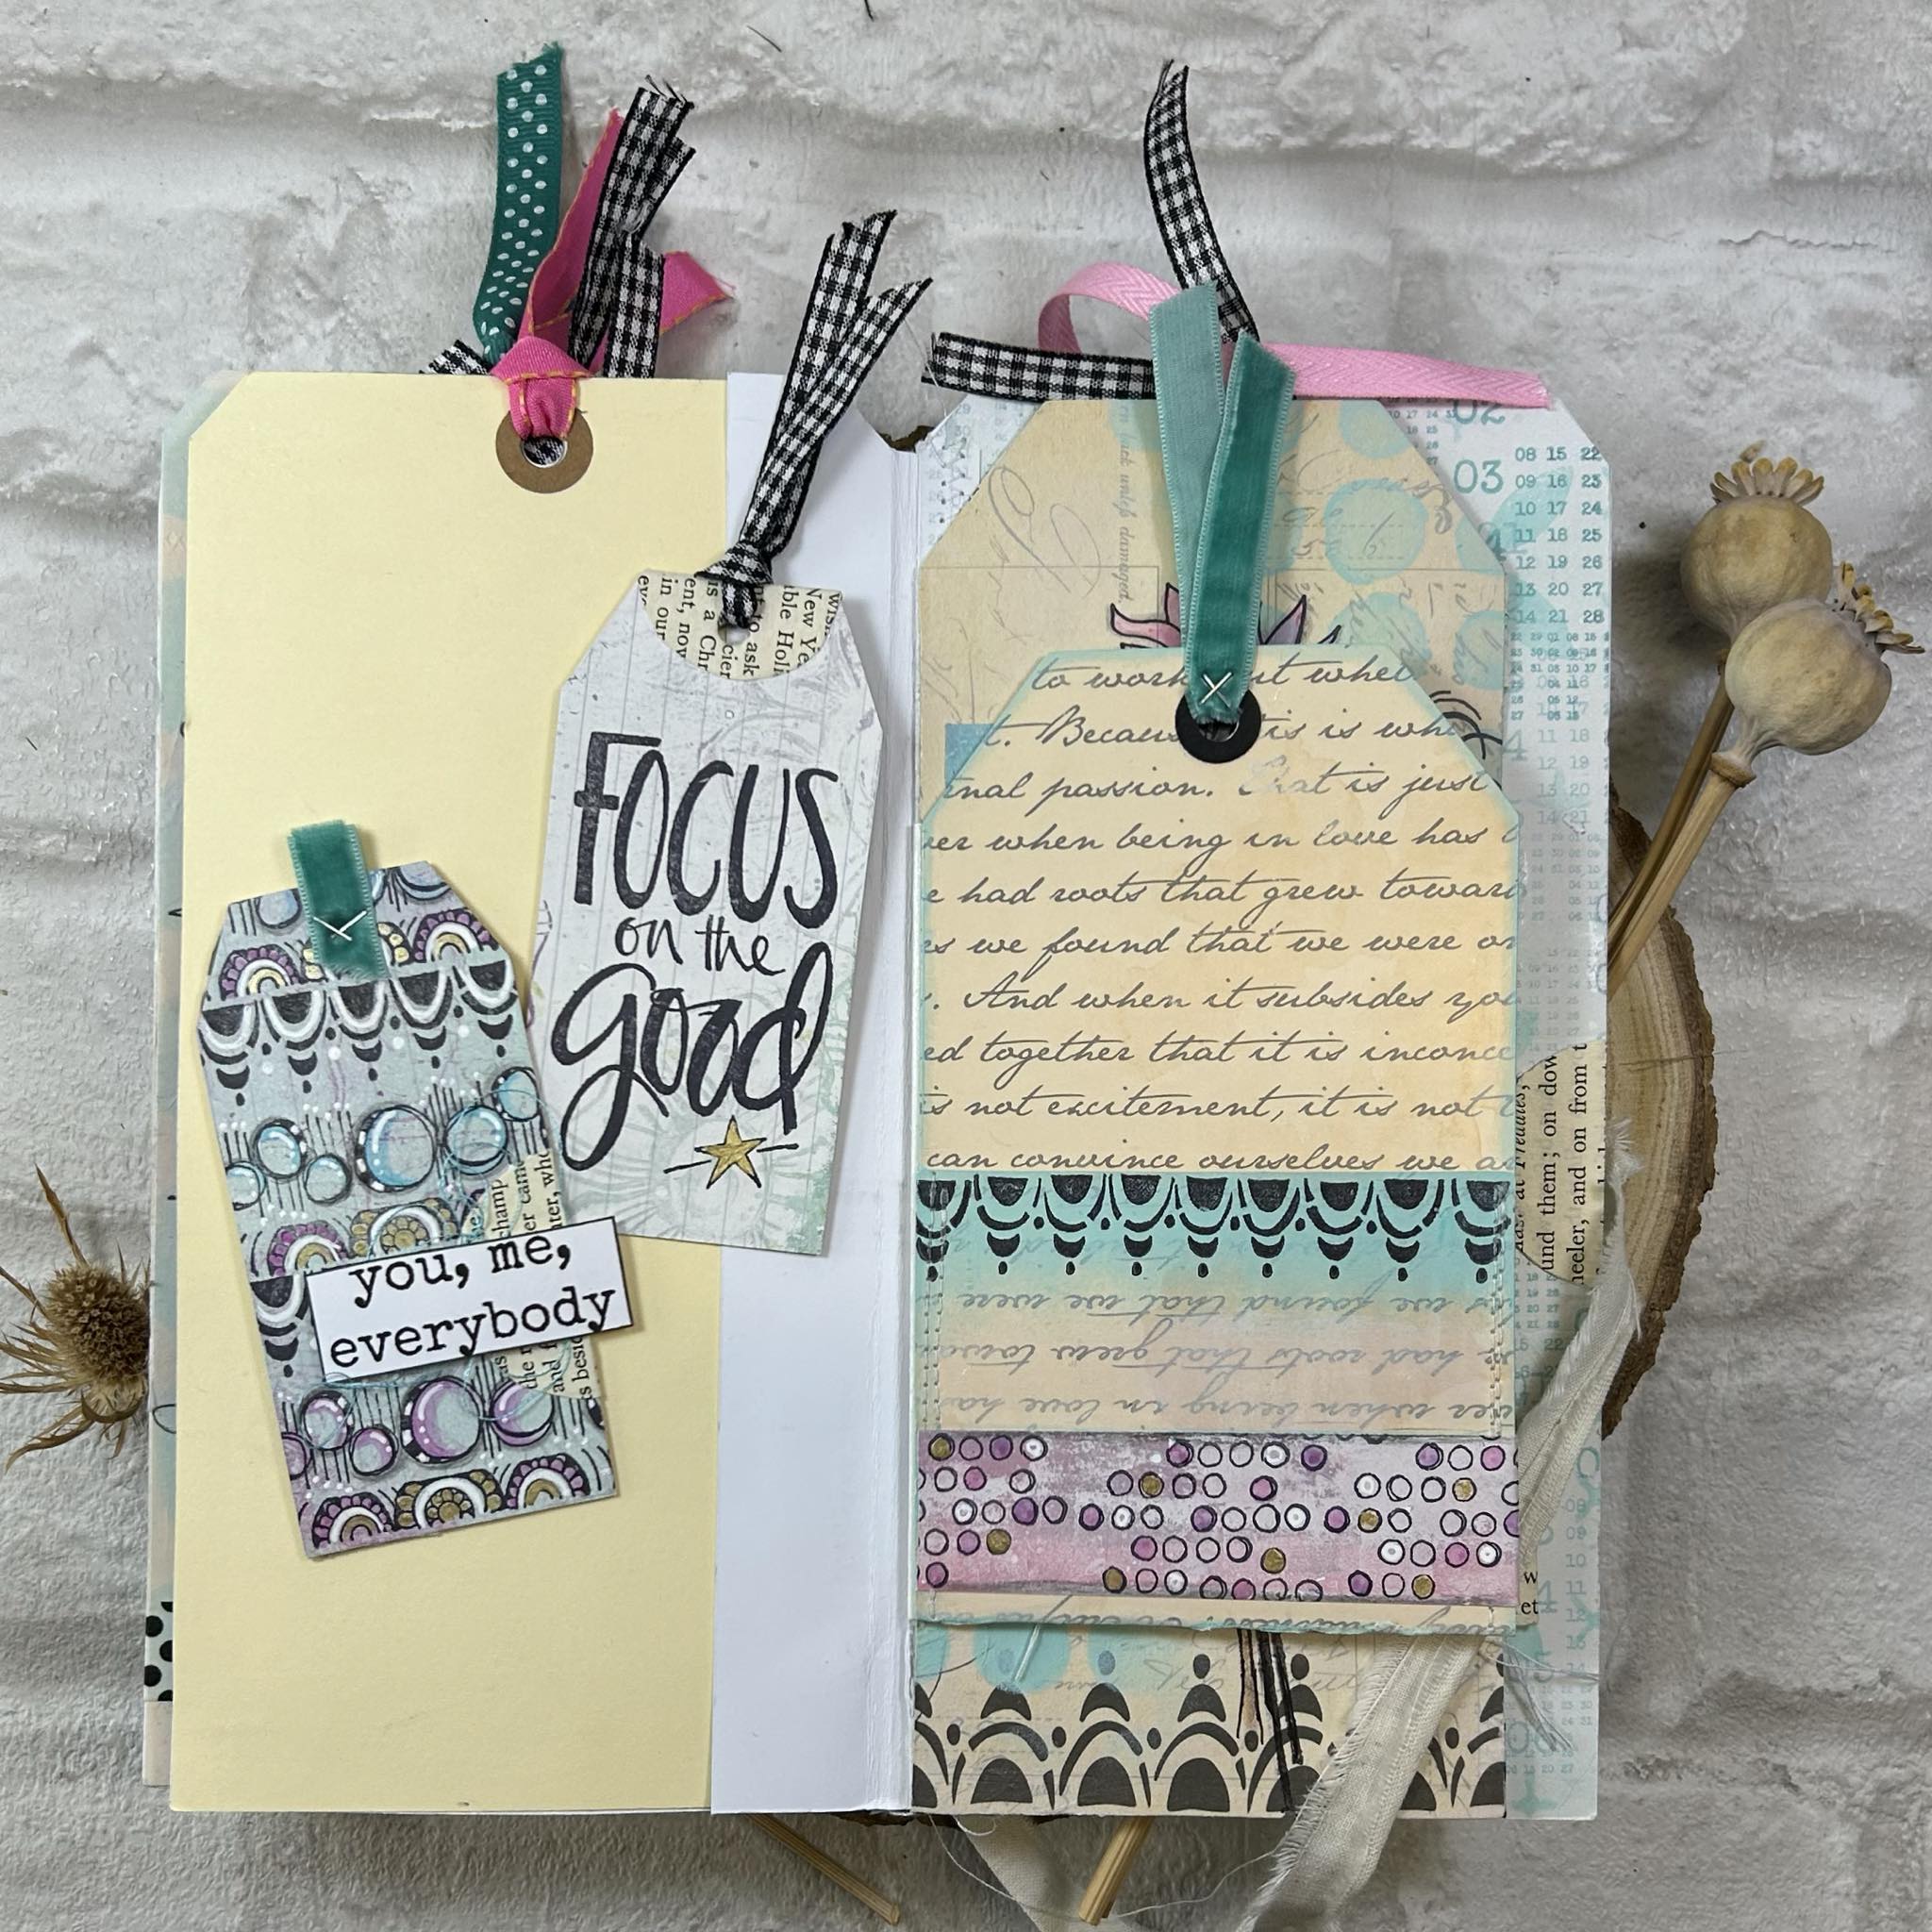
I also decided to add folded index cards to the left hand pages, making for a second hidden element for secret journaling. These cards were given a coat of Shark Mattint with a brayer and then dipped into a weak solution of Just Walnut Infusions (CS25)


I continued to work with the gel prints and stamped images, cutting and combining some of the images made interesting pages.


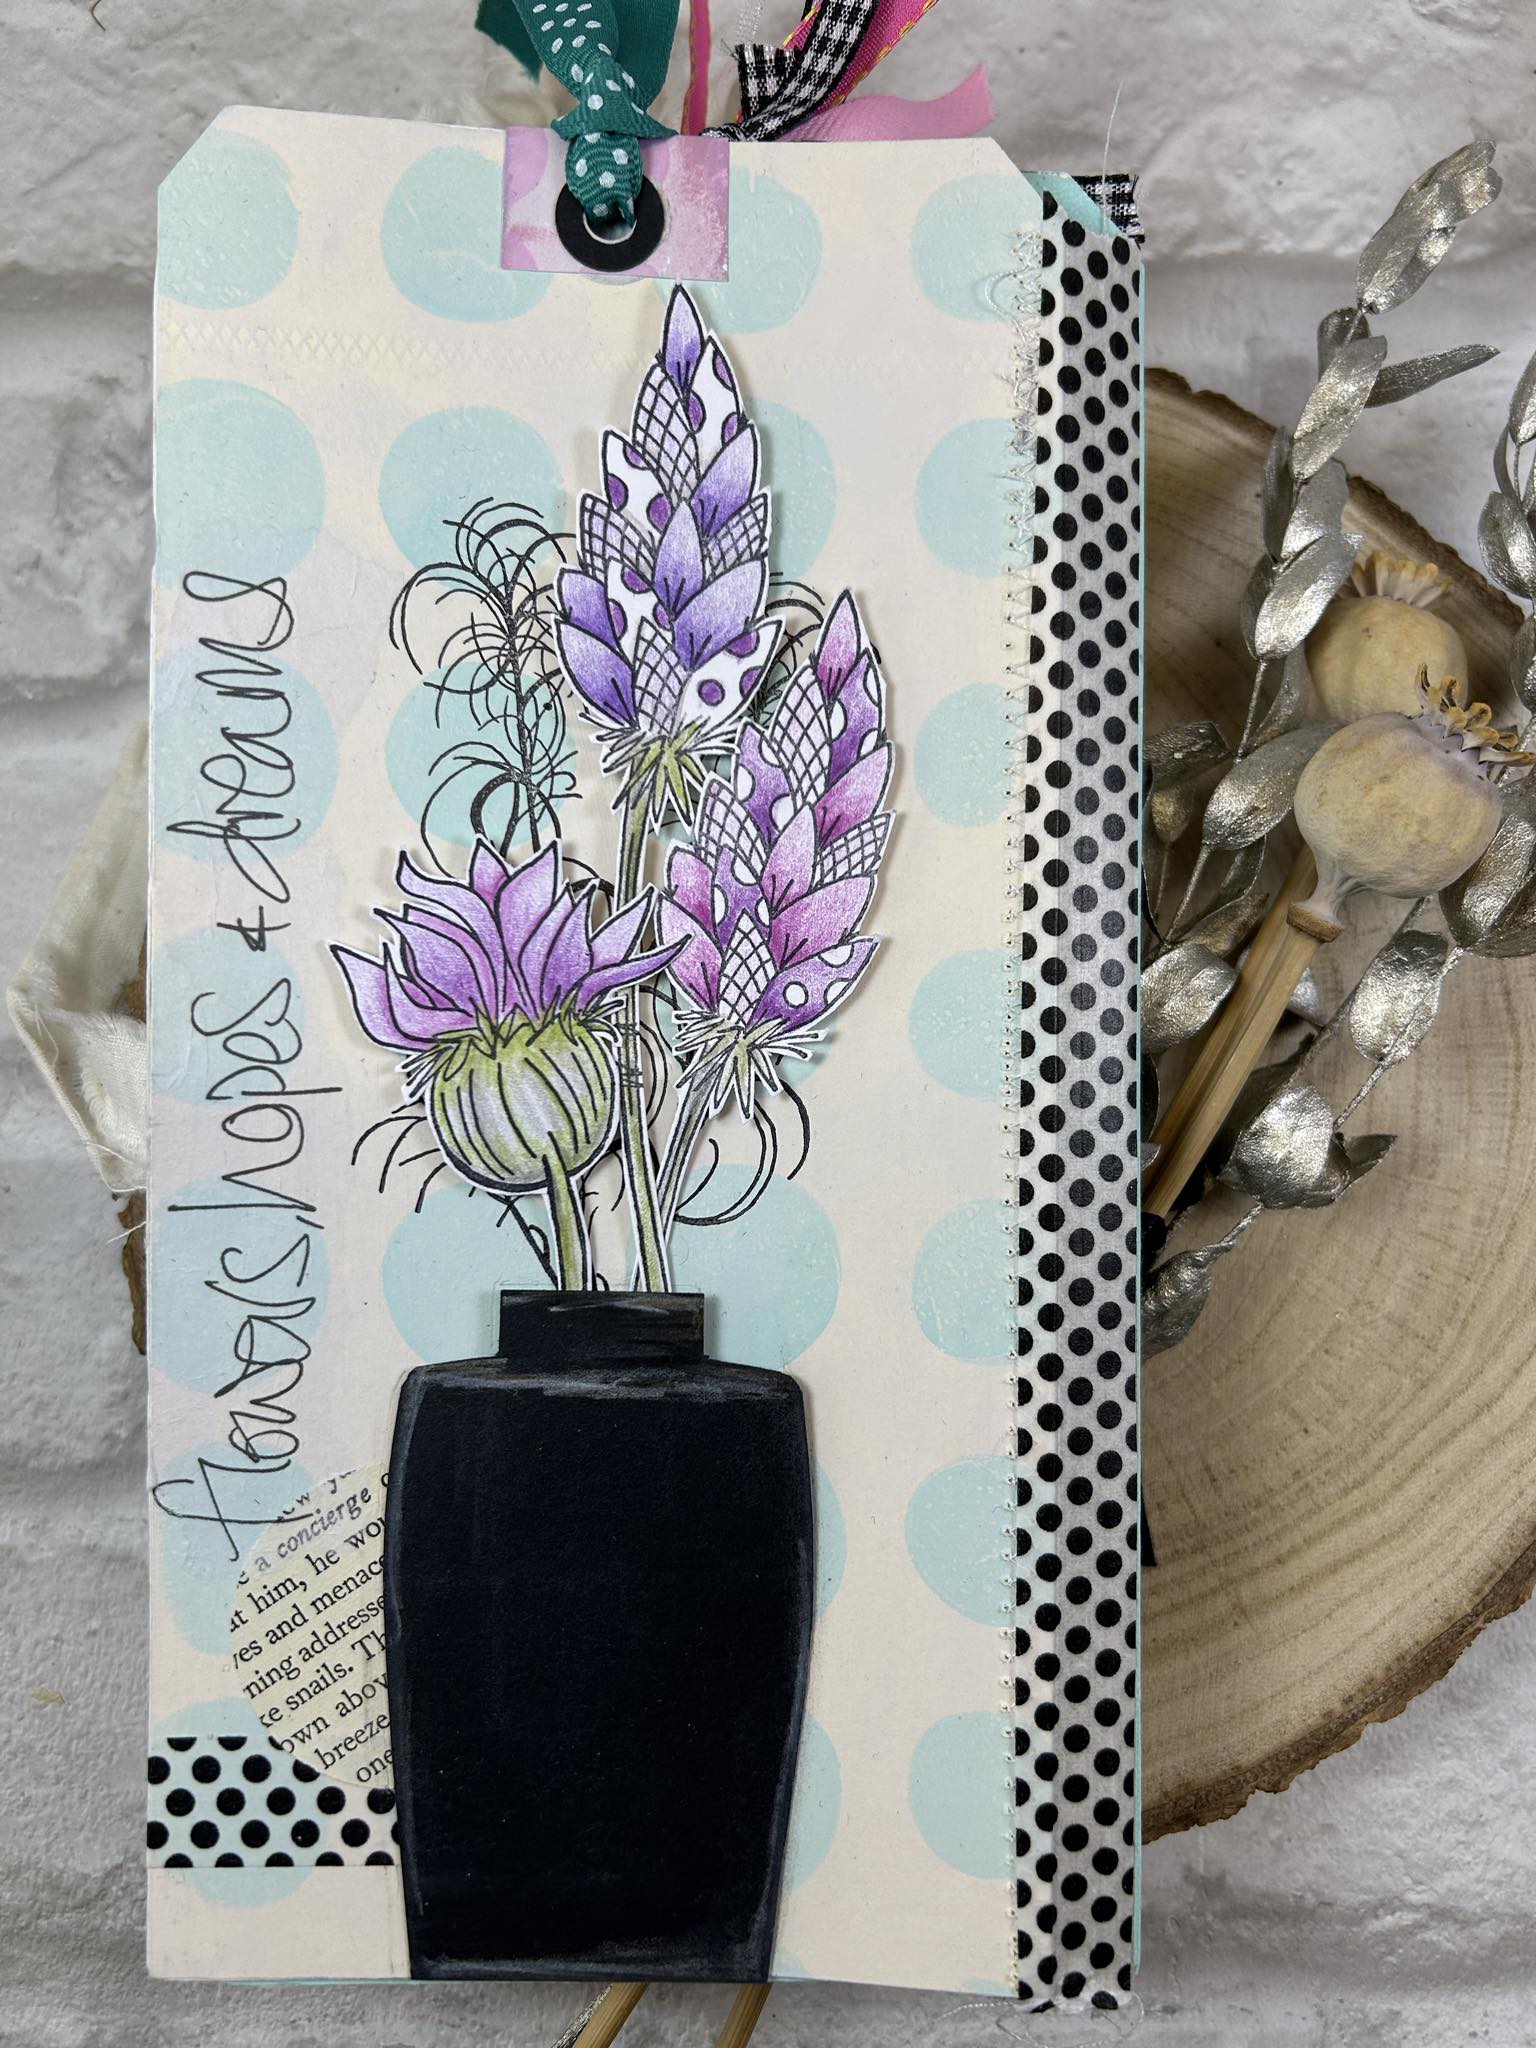
Adding torn strips of gel prints and book papers along with small details from the stamps added interest to the rest of the pages. You'll notice I also coloured parts of the images with the Shark Mattint for a cohesive look.


When all the pages and the cover were completed I used a strip of heavy cotton rag paper to create the binding, adding Shark Matting with my fingers until I got the depth of colour I wanted. I glued the binding in place with PVA glue and clamped everything together until it was dry. With hindsight I think I should have used a lighter weight paper which would have been more pliable and adhered to the signatures better. As they say, we learn something new everyday.


I had great fun creating this little book and may add some wording to the journaling panels. Possibly something along the lines of Where did we go? Who did we meet? What did we do? . I'll let you make up your own mind about the story behind the adventures these ladies had. 
I'll leave you with a couple more photos of the project and say goodbye for now. 


Happy crafting
Mags x

https://www.youtube.com/channel/UCuhrZcsU0x6GlDK2M8Rf5HQ
https://www.facebook.com/mags.woodcock
https://www.instagram.com/mags.woodcock/


Friday 31 May 2024

With 3 Things: Storage Book of Pockets {by Floss Nicholls}


Hello lovely creatives...It's Floss here with you today with the 3 things challenge. 

I was excited when I opened the box with the three surprise supplies in and found; stamp set Lynne Perella LPC006, The Hot Picks stencil PM018 and Shark Mattint (available from stockists). 

I knew in that moment that I wanted to do something with fussy cutting.  I'd incorporate my free motion stitching as a feature based on the Panacea Pizpireta image I'd seen a few weeks before that I found inspirational by Lisa Kokins and that I would hide stamped images in folds to incorporate the hidden element for this quarters PaperArtsy theme.

I was itching to get started and so went to find a fairly thin hard back book. 

I folded eleven pages roughly in the centre of the book using the deep margin as my measurement...and glued those folds down.  I then folded the remaining pages in half lengthways but did not need to glue these.  The idea behind this was to use the book as storage for my fussy cuts.  The front half of the folds to store the rough cuts, the back half for those that had been fussy cut and the middle pockets for anything in between.

With a thicker book, if I'd have folded all the pages in half it would have given me an open rolodex book holder, but I wanted to be able to close this one and potentially be able to flip through the pockets and tuck spots so I took a few pages out too...Being able to close the book would hold all the fussy cuts securely in place and this was important so I could have it with me wherever I went. My reel shows me shaking it about and nothing falls out :)


Using my gel plate, PaperArtsy stencil PM018, and their slimed and desert bush fresco paints I created some papers which I would use for the concertina edging which would hold the centre pockets together and bring some colour to the project. 

I measured the depth of the page for the length of each segment and made each segment wide enough to allow the pages to open enough to access the pocket area and also enough space to stamp the hidden feature within the folds.  I chose to stamp some images using Ranger Archival Plum Ink as I thought it suited the greens beautifully. 


I used my stamping platform to create a whole stash of prints to fussy cut...again I used Ranger Archival Inks in black and plum for this.  I used the Shark Mattint to bring a little interest to some of the prints using a small brush.


I really liked the idea of the hidden images in the folds...with two segments between each page it gave me an opportunity to mix the images up by stamping directly on to some of the concertina folded sections and fussy cut and glue black and white stamps on to others making this hidden detail more visually stimulating.


I wanted to explore using the shark Mattint further and wondered what it would look like on mulberry paper...It looked/reacted as I hoped it might and was definitely a YESSSS moment!

I squirted the Mattint straight onto the mulberry paper and spread it to cover the surface using and old store card. It absorbed deeper into the areas where the mattint was squirted than where it was spread and so it left some 'streaks' which was, for me, a bonus.  But it was the way the mattint worked with the little fibres inside the paper that was what I wanted to test...The fibres remained white giving me another visible texture. You really must try this technique if you like mulberry paper.


I glued tissue paper, fabric and paper 'Lynne Perrella' flowers made with stamp set LPC006 for a further variety of texture and surfaces onto the mulberry paper. I enjoyed using different parts of the stamps to give me colour density variation too. My free motion stitching around the flower using plum and cream coloured threads gave me a little more attention to detail and interest with another on the reverse. I then glued this onto the book creating the cover.


I used a lace ribbon to secure the tuck folder book together keeping all the fussy cuts safely stored away ready to be used on other projects.


I now have somewhere safe to keep my fussy cuts; it's organised sections means I can take my tuck folder book anywhere with me and I can trim to my hearts content at any given moment!

I really enjoyed making this project and I shall be putting a class together for this soon so do give me a shout if you are interested in doing this in person or online.

I must say one of the things I really like about doing the 'with 3 things' blog posts for PaperArtsy is that I have absolutely no idea what same (or very similar) three products/supplies the three blog artists will receive and then how we all make something so very different. You'll already have seen one fabulous post by Autumn yesterday and so make sure you look out for the third with 3 things using the same supplies by Mags tomorrow.

Until next time 
Sending lots of creative love
Floss x x x


Thursday 30 May 2024

With 3 Things: Altered Book {by Autumn Clark}


Hi friends, it's Autumn Clark from SewPaperPaint with you for another With 3 Things post. I was so happy the current Topic, Books & Journals, was announced in conjunction with these particular 3 things.

I had previously started a shabby Lynne Perrella altered book and was thrilled to incorporate these 3 things into its pages.  Find more details on the altered book HERE.

Our allotment of treasures included the new PaperArtsy Mattint in Shark, along with a beautiful stamp set by Lynne Perrella (LPC006) and a favorite Hot Picks Mini Mask (PM017).

I had previously torn the pages between a spread to make room for the added artwork and decided it would be a fun place to start these journal pages.  I used the glue properties of the Mattints to adhere the layers of torn pages together.  The finished result was a sturdy, tinted page on which I could journal, with loads of texture as a bonus!

I mixed up a bit of Sleight Blue Infusions with water to make some "ink" for journaling.  I used a brush to scribe some thoughts in large script onto the tinted pages, adding some splatter for extra detail.  I tried to do some stencil monoprinting with PaperArtsy Fresco Chalk Acrylics over the backgrounds, but it didn't show up very much, so I tried to come up with an alternate idea for using the Mini Mask.  


I grabbed some tea dyed paper and did a stencil monoprint with Infusions  on the paper.  I wet the stencil thoroughly so it bled through to the backside of the thin paper.  I decided I would use this two-sided paper to make flaps for some "hidden" journaling to tie in with our quarterly theme.  


I sewed some random lace and blank pages along with some wrinkled strips of paper I had dyed with the leftover on my kraft mat from the monoprinting.  I liked how this wrinkled paper tied into the torn paper book page base.


I used the remainder of my Infusions "ink" mix with a glass dip pen to do some journaling on the blank pages.  I had never tried using a glass dip pen and was surprised at the way my faux ink flowed so evenly!  I used two of the stamps from the Lynne Perrella set as my focal images on either side of the spread.  The book closes very well because the thin papers don't add much bulk, but looks incredibly textural nonetheless.  I hope this project has inspired you today!  Perhaps you can use your Mattints to adhere some book pages together in your own altered book.  

Have fun!  xx, Autumn


YouTube: SewPaperPaint
Facebook: Autumn Clark
Instagram: @sewpaperpaint
Pinterest: SewPaperPaint

Tuesday 28 May 2024

NEW PaperArtsy Products: JoFY {May 2024}


A note from Leandra:
This release continues on beautifully from Jo's last one in February, allowing for gorgeous continuity and cross over. We encourage designers to think about how their new stamps can enhance those that have come before, and I'm sure you will agree, Jo's designs do that perfectly, whether it is a vase of flowers with some new foliage, or accents and border strips that have endless uses. We know you love a mini, and this series offers everything from washi strips to words and fantastic background options, but those large stamps and stencils ... oh my! I'm swooning.
 
Jo will be along to share with you LIVE her new products and ideas over in our Facebook Group, 'PaperArtsy People' shortly after this post publishes, 20:30 Paris time or catch the replay at a time that suits you.
 
These stamps are available EXCLUSIVELY from our approved stockists. Please check the list at the foot of this post to find a retailer online or geographically near you, it makes sense to order within your country where possible. Our retailers also endeavour to join the designer's live to share their direct shopping links - this makes it super easy for you to find a store with product in stock immediately.


Hello everyone. Jo here with you today. This release seems to have come around quickly  - and I'm glad as I can't wait to show you!

As Leandra mentioned in her introduction these new designs feel like a continuation of my last release... more carved designs, backgrounds and clusters... and as always, lots of little bits and pieces to add detail to your projects.

I made 2 tag books for this product release - its my way of keeping all ideas together. One small book and a taller, more complex one - I think of them as 'sampler' books for the release of the new stamps.  In them I created pages to showcase how the stamps will work with new and previous releases of stamps and stencils, working with gel prints and or course the JOFY tissue paper. You'll see pages of the bigger book throughout this blog post.

These turned into really useful books to have on the desk when creating - I encourage you to make something similar yourself - it's like having a visual notebook.

Let get started.


Red Rubber Stamps (A5 set)
Price: RRP €23.00 +VAT    
Size:5" x 6" (13 x16.5cm)
All stamps are individually trimmed onto cling foam, with a laminated storage/index sheet.

Before I dive into the stamps/stencils individually I'm going to begin with the project mentioned above that uses several of the sets - a small book of tags. 

I'd started playing with the new stamps on gel printed 6x4 index cards and I ended up with quite a few. I die cut them into tags and bound them together to make a simple tag book. I stamped and stencilled more details onto the various pages and created a little book of ideas and inspiration.


These are the back (left) and front (right) covers of the book. It's interesting to see how the linear flower cluster from JOFY134 looks on different substrates... the right hand page (front has a base of Gold fresco which is a big contrast to the kraft base of the back cover).


On these pages the flowers have been stamped in a red Archival ink, and layered with sentiments and small flower motifs - the additional pink colour (flower) is 'The Pink' Mattint.
On the left hand page the outline stones have been clear embossed - they are almost invisible until they reflect the light - a nice subtle effect.


On the left page - lots of random stamping of the number block (JOFY134), also the spotty motif and bigger opaque spots (stencil PS329).  The seedheads (JOFY135) look great with the gold detailing and book text paper-piecing.


Stamping of the single stems - shading around the stamped image gives dimension and makes it pop. The spotty border is great for adding pops of colour (and stickles for a touch of sparkle!).  Several of the leaves have been mounted on 3d foam to add dimension. The background of these pages have been created with a subtractive technique on the gel plate.


Jo Firth-Young - A5 stamp set 134 {JoFY134}

There's no such thing as too many flowers!!
 
Its nice to have separate flowers but sometimes its good to stamp lots of flowers all at once, and that's why I created this linear cluster.  It can be stamped to cover a page and create a background, or stamped across a panel to create a one-layer card design.  The flowers can also be cut and layered up with ease. I added a couple of little flower motifs perfect to fill in any spaces or to layer on top of the cluster.

A gorgeous card can be created by stamping the image across a panel and colouring with the fabulous Mattints.
 

The flowers also look great stamped around the outer edges of a card - on the sample below I've coloured the edges with Distress Oxide. You could achieve a similar look with brayered Fresco Finish paint or Mattints applied in a circular action from a round foam pad.


The photo below is a spread from the tag sampler book. The left hand page shows how the flowers can be separated from the group and used with smaller motifs to make a different grouping (here layered up with carved designs from JOFY132). The right hand page show the linear cluster stamped vertically several times to run the length of the tag.


I love a tag - especially little ones! They are great way of using up scraps of images and adding detail to pages. Here I used the number stamp and a scrap of mini JM78.


The leaves on JOFY134 will look great behind the flower group or layered up on their own. (the phrase on the tag is from a new Kate Crane stamp set KC002)


Jo Firth-Young - A5 stamp set 135 {JoFY135}

In my last release I featured hand carved stamp designs and I'm continuing those designs in this release too - this time I have designed background motifs that I think of as 'stones'. 
The flower stems are inspired by flowers in my garden and the dried stems I've kept when their flowering season is finished.

The 'stones' are a great base for the flowers (walls, paving) and the open designs are great for colouring in and/or spaces for doodles. Stamping background layers in soft shades of grey allows the focal images to still be the stars of the show in these tall cards.


In the card below the 'stones' have been coloured using Distress watercolour pencils - love the pops of colour on these - imagine this as a border around a page!! (and/or painted in metallic paints - Fresco paints with Metallic or Pearl Glaze! yes please!)


This another page from the tag sampler book. A vase of flowers set against my stencil PS309 with words taken from a section of my tissue paper sheet.


When this seedhead is painted in purple tones it resembles a Lavender head, but if painted in natural colours it would look like a wheat or seed stem (lovely for autumnal cards or journal pages).


The 'poppy' head looks great teamed up with the wispy stem. The poppy head has been painted with the fabulous Mattints in Jam & The Pink.


Another page from the tag sampler book - the zig-zag block makes a great border for a page - especially when embossed in gold!


This is one of the first projects I made with this stamp set - I love how the seed head looks with the addition of the paper-pieced book page 'seeds'. The same could be done with pattered papers.


JOFY Red Rubber Mini Stamps
Price: RRP €4.90 +VAT 
Size: generally credit card (ish) size images
All stamps are individually trimmed onto cling foam

This release's mini stamps feature borders, motifs, backgrounds and a phrase. Perfect for the journalers out there!

JM77 {JoFY Mini 77}

A fun repeatable background - I love how this looks when embossed in gold!


JM78 {JoFY Mini 78}

This mini was developed from a doodle in one of my 'mini doodle journals'.

Doodling is a great way to wake up your mojo - I encourage you to give it a go!


JM79 {JoFY Mini 79}

This mini is made up of 3 very useful strips - use them singularly as borders or repeated to create a longer striped border/stripes for bigger projects.


JM80 {JoFY Mini 80}

A simple mantra - worth remembering if the going gets a little tough - great for journals. 
 

The background is a gel print with additional stamping of mini motifs on JOFY134.


PaperArtsy Stencils {Large}
Price: RRP €6.58 +VAT
Large Size: 6.25" x 9.5" (16 x 24cm) 
Robust mylar designed to offer longevity, deep texture and easy clean up

PaperArtsy Stencil by JoFY 434 {PS434}

Oh my goodness I'm so happy with this stencil!!

This first photo shows the stencil coloured with Distress Oxides.... 


The tags below have been printed using a gel plate and Fresco Finish paints - I love how the Gold Fresco looks when used with a gel plate.  The ghost prints are particularly nice (and very hard to photograph, lol)


PaperArtsy Stencil by JoFY 435 {PS435}
 
This is a lovely dainty stencil... perfect when you want to add 'something' to a page but not too much.


The top tag is the stencil (positive) print using a gel plate, the bottom tag is the 'negative'/clean up print - just as nice especially when a white gel pen is used to outline the design.


I hope you enjoy creating with these new stamps as much as I do - and I look forward to seeing what you create and how you mix them in with your other {JOFY} stamps.

Take care

Jo


You can see more and visit me at... 
YouTube: Jo Firth-Young
Pinterest: @jofyjo
Facebook: JoFY Jamboree!
Twitter: @jofyjo
Instagram: @jofyjo


  PaperArtsy Stockist List

Our stockists are your go-to  source for all PaperArtsy products, and we suggest that you also use the PaperArtsy People Facebook group to source a retailer in your country. Many are members of our FB group and will happily share links to their online stores.

Australia
A Place to Create, Brisbane a place to create
Bev's Cross Crafts, Spreyton, Tasmania bevscrosscrafts
Crafters Cupboard, Berwick, Victoria crafters cupboard
Hillbilly Scrappin, Nikenbah, QLD hillbilly scrapping
Memories on the Murray, Murray Bridge, SA  memories on the murray
Natalie May Scrapbooking, Dover Gardens, SA natalie may
Scrapbook Superstore & More, South Penrith, NSW scrapbook superstore
The Scrapbooker's Confetti Box, Swansea, NSW the scrapbookers confetti box
The Scrapbook Store, North Perth,WA the scrapbook store 

Belgium
Cart N Scrap Art, Antwerp, cart n scrap art
Créatelier Caracolle, Liège, createlier caracolle

Canada
Clipper Street Scrapbook Company, Langley BC, Clipper Street Scrapbook Co
Glitter & Ink, Belleville ON Glitter & Ink
Paper Art Creations Inc, Leduc, Alberta, paper art creations
Scrapbook Centrale, Dollard Des Ormeaux, Quebec scrapbook centrale
Scrap Addicts, Edmonton, Alberta scrap addicts
Scrap and Bean, Edmonton, Alberta scrap and bean 
Scrapbooking Fairies, Drayton Valley, Alberta scrapbooking fairies
The Paper & ink Boutique, Calgary, Alberta paper and ink boutique
The Scrap Yard, Calgary, Alberta, the scrap yard 

Denmark
Hobbyboden Scrapworld Samso hobbyboden

Finland
Korttipaja, Istunmaki Heidin Korttipaja 
Klemmarikellari, Turku Klemmarikellari

France
Eirl Bancon Cartoscrap, Midi Pyrenees, www.cartoscrap.com
Emispheres Eurl Ruy Montceau,38300   
Fée Du Scrap, Saint Sébastien-Sur-Loire, fee du scrap
Horizon Créatif, Ste Jalle horizon creatif
Instant Créatif, La Possession, La Réunion, i creatif
Katzelkraft, Ingwiller katzelkraft
Kerudoc Creation, St Yvi kerudoc creation
Le Grenier des filles, Pierre Benite
Page de scrap, Saint Pavace, page de scrap
Passion Scrap, Vieux-Conde, Passion Scrap
Scrap by Jo, Saint-Orens-de-Gameville, 31650 Scrap by Jo
Scrap Déco Home, Goutrens, www.scrap deco home
Toutencolle, Dun sur Auron toutencolle

Germany
Stempeloase Munich, Munich stempeloase
Stempelfee Shop, Hilden stempelfee shop
Stempellaedle, Stuttgart, stempellaedle
Tue Was Di Liebst, Bayern, Tue Was du Liebst

Italy
Immagine SAS di Rapaccini, Rome, immagine lab
Il Negozio Della Mamma Di Cle, Torino, il negozio della mamma di cle
Marte Savona, Savona, marte savona
Pezze E Colori, Lissone, pezze e colori 
Piccole Passioni, Siena, piccole passioni

Japan
La Wadao, Odawara, Kanagawa, la wadao
Tiny Dots, Funabashi-shi, Chiba tiny dots

Netherlands
De Hobbystudio, Genemuiden, de hobby studio
Doe@ding,Spijkenisse doe @ ding
Hobbycompleet de Duif, Leeuwarden hobby compleet
Stampingcorner, Capelle Aan Den Ijssel stamping corner

Puerto Rico
Paper Boutique, Fajardi Paper Boutique

South Africa
Kcraft imports Ltd, Centurion 0014  kcraft

Spain
Cien por Cien Manualidades, Barcelona,  100 x 100 manualidades
Ideas 10 Manualidades Y Scrapbook, Bilbao ideas 10 manualidades/
Marakiscrap, Tarragona, maraki scrap
Scrap & Papers Experiences, Barcelona, scrap papers experiences
The Paradise Corner, Barcelona, the paradise corner

United Kingdom
Amelia's Creative Crafts, Studley, Warwickshire  amelias creative crafts
Art from the Heart, Harrogate, Yorkshire art from the heart
Crafts at The Malthouse, Herstmonceux,  East Sussex, crafts at the malthouse
Countryview Crafts, Potton, Bedfordshire countryview crafts
Loobi Crafts, Leighton Buzzard, Bedfordshire, loobi crafts
Procraftynation Ltd, King's Lynn, Norfolk Procraftynation
Sir Stampalot, Peterborough, Cambridgeshire sir stampalot
Stampers Grove, Springbank, Lilliesleaf, Melrose,Scotland stampers grove
The Artistic Stamper Craft Store, Faversham, Kent the artistic stamper
The Forget me not Kraft KabinRochford, Essex, The Forget Me Not Kraft Kabin

USA
Artistic Artifacts, Alexandria, VA artistic artifacts
Artistic Studio Creations, Fayetteville, Georgia Artistic Studio Creations
Craftiness, Chatsworth, CA, craftiness
Everything Scrapbook & Stamps, Lake Worth, Florida Everything Scrapbook & Stamps
Frantic Stamper, Oregon frantic stamper
Free Heart LLC, Denver, Colarado, free heart llc
Joggles, Coventry, Rhode Island, joggles
Messy Papercrafts, Temecula CA Messy Papercrafts
PaperCraft Clubhouse, Westbrook, Connecticut, papercraft clubhouse
Roadtique Boutique, Hilton NY 
Runaway, Art & Craft Studio, NE Salem, Oregon runaway
Scrap-A-Latte, West Babylon NY scrap a latte
Scrapbook-N-Memories, Harrisonville Missouri Scrapbook N Memories
Simon Says Stamp, Columbus, Ohio simon says stamp
Topflight Stamps, Irmo, South Carolina topflight stamps

If you are interested in becoming a PaperArtsy stockist contact Dounia@paperartsy.com for more information

PaperArtsy Links
Facebook Group PaperArtsy People
Facebook Page PaperArtsy